
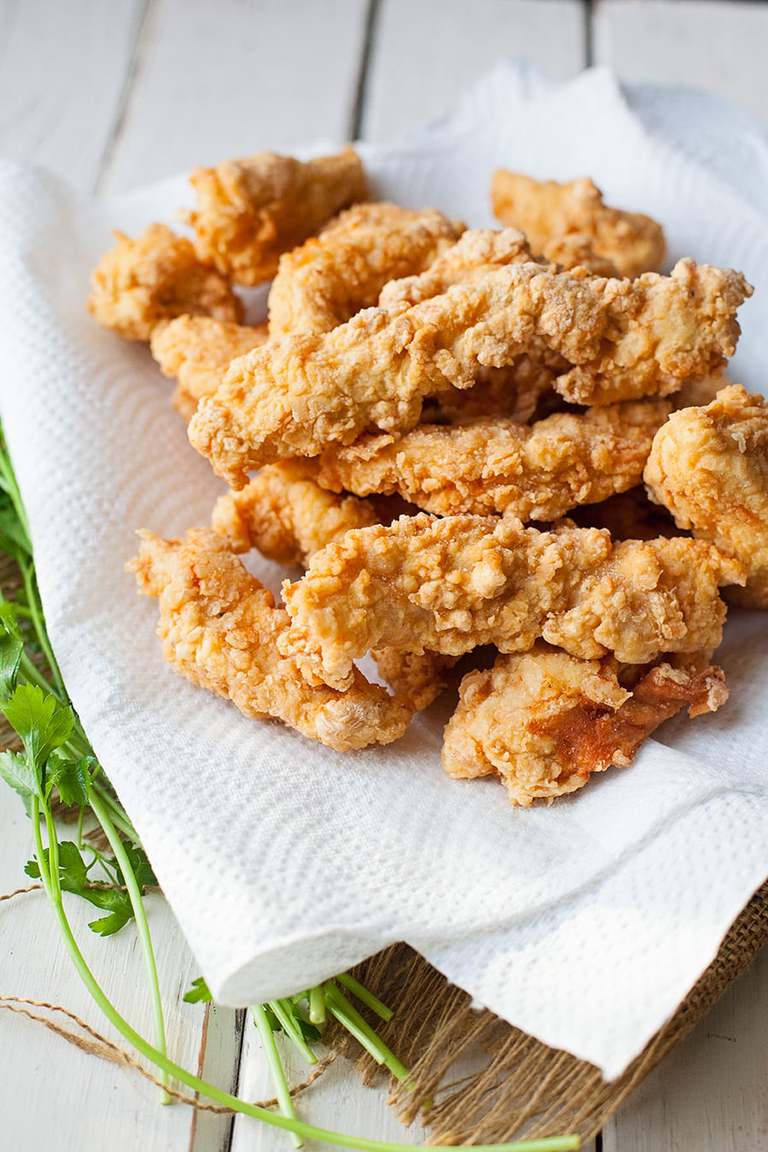
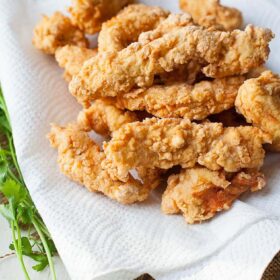
Crispy Fried Chicken Tenders
Truly crispy fried chicken tenders are a dinnertime staple you’re whole family will love. Get all my tips for making that crispy crust you crave, seasoning like a pro (and shortcuts if you don’t know how), and fry them up like “cast iron skillet” is your middle name.
I’m not going to lie or sugar coat this. If you haven’t ever fried anything, you’ll more than likely mess this up.
Because there’s some sort of rule that says that if you don’t get your first cast iron skillet by the age of 5, you won’t be able to hack it as an adult. No–frying takes practice. Lots of it.
Sometimes you’ll burn things, sometimes you’ll cook it too low and all the breading will fall off. Sometimes it will be golden on the outside and raw in the middle.
You just can’t give up. If you need to, use an electric skillet where you can set the heat or a fryer for safety. Please don’t burn your house down.
Don’t walk away from it. Don’t do laundry. Don’t take a nap. (I know a friend who has!)
My crispy fried chicken tenders don’t have any buttermilk listed, but if you want to wet yours in some before you drop them in the first round of flour, you can do that. I just didn’t here because I get the best crust with egg and flour.
No matter what–once you get the hang of this, you can FRY ANYTHING.
You can make your family the most unhealthy ones on the block. I mean–think about it: donuts, pickles, Twinkies, funnel cakes. Oh man. Funnel cakes. I’m just looking out for your best interests here.
I am your enabler.
Tips for the best crispy fried chicken tenders
-Make sure your flour is well seasoned. If you aren’t confident in that area, I’ve given you measurements for salt and pepper in the recipe.
-Use a good skillet that controls heat well. Of course I’m going to recommend cast iron.
-Press the breading on your chicken tenders really firmly, then let them sit for a couple of minutes before you fry them. This makes the breading soft of gooey and it crisps up even better.
Watch me make the full recipe on YouTube
Add a skillet of cornbread and you’ll be all set! You can learn how to make cornbread here if you don’t know how or get brave and learn how to fry bone-in buttermilk fried chicken.
Crispy Fried Chicken Tenders
Ingredients
- 1-2 pounds chicken tenders or 2 large boneless skinless chicken breasts sliced into 1-inch thick strips
- 1 1/2 cups all purpose flour
- 3/4 teaspoon salt
- 1/2 teaspoon black pepper
- 1 egg beaten with 2 tablespoons water
- vegetable oil for frying
Instructions
- Fill a 9-inch cast iron or standard skillet with about 2 inches of oil. Start heating it over medium-high heat while you bread the chicken. (Keep an eye on it!)
- In a large bowl, mix the flour, salt and pepper.
- In another large bowl, beat the egg and water
- Dredge the chicken in the flour, coating well. Shake off excess flour and dip in the egg, the back in the flour.
- Set the chicken to the side to rest for about 5 minutes. (This helps the coating stick better)
- Check your oil temperature with a candy thermometer if necessary (you should be around 365-375 degrees) or drop in a little bit of flour–if it sizzles immediately, you can add one piece of chicken.
- If the chicken sizzles, add about 5 pieces at a time and cook until golden brown on that side–about 8 to 10 minutes or so.
- Turn, and repeat until all brown.
- Cook the rest of the chicken in batches.
- Transfer to a paper towel lined plate and sprinkle with a little more salt if needed.


Excellent! I was so afraid to try this. And yes, all day in the kitchen, but they came out great. I had made them twice before using milk so I didn’t understand why there was water in the egg instead, but followed the recipe. Wouldn’t change it. I’m still not good at keeping the coating on completely. But maybe I’ll make it prettier next time. Thanks for a great simple recipe.
I’m so glad for you Elizabeth! All day in the kitchen, huh? I’m sure it feels that way but you’ll get faster at it. I usually fry a batch in about 35 minutes or so. If the coating won’t stay on, your oil is too cool. You may try turning it up just a tad. Way to go! –Rachel
These turned out great!
I used all purpose flour.
I did add an extra 1TBS of salt (I had about 1/2 inch thick tenders) and cooked them in generic Vegetable Oil at medium/high heat
(Between 5 and 6 on a standard electric oven/flat top)
They took between 5 and 6 minutes to cook and the bredding stayed on so well! And my oil is clean enough I can probably strain it and re-use it
So I will definately be making this recipe again!!
Great job Nikki!
Hi Rachel! My name is Cory Ballard, my wifes name is Rachelle, funny how close it is. Who knows, we could be related. Thanks for the recipe! It makes great chicken strips. I also made potato wedges with the same mixture and they were great too.
Haha! Maybe! My husband is from Southern Indiana. I’m glad you enjoyed your dinner and the potato wedges. Great idea! I love myself some potatoes 😉 –Rachel
Great recipe! Thank you! Why has it taken me so long to get the courage to make fried chicken?! I’m a pro now.
Everyone gets nervous about it but you just needed the right teacher I guess! Great job Danny. –Rachel
So I tried this recipe yesterday, the chicken tenders came out great!
Only problem I had is that the coating kept sticking to the basket of my deep fryer… any tips on how to solve this issue?
I don’t use a deep fryer Ellen, but I’ve learned a few tricks. What I would do is lower the fryer basket empty then hand lower in each tender, holding it suspended 3/4 of the way in the oil (don’t burn yourself) for about 5 seconds then let it drop down into the basket. This gives a few seconds for the batter to solidify and stick less. Try that. –Rachel
The one thing I hate about frying chicken in oil after the batter is on, is the oil turn black from the coating. I use medium heat. What do I do wrong.
Your oil turns blackJudy? You have your heat up too high and you may be frying in a pan that’s too thin to regulate the heat. I never have black oil. I’ll get some dark brown bits in the bottom but nothing else. Just because you put your oven dial on “medium” doesn’t mean the heat is medium. Practice with a pot of boiling water and turn it up and down and until you find true medium for your stove. Always go by what the food is doing and not the appliance. –Rachel
Excellent recipe, I continue to make these still—it’s been a couple of years now if I’m not mistaken.
Here’s the thing though; I really do NOT care for cast iron pans. I own one, and I have a seriously weak right wrist that has required surgery in the past, so it’s almost impossible for me to use/care for a heavy CA skillet (such as the one I have). I use a deep fryer for this now. And I wouldn’t change a thing. I know my appliance, and I can tell exactly how much the basket will hold, and that each batch will take exactly 6 minutes to fry to perfection!! I don’t do these fry-outs very often at all, but I really don’t like that fried food smell in the house—So this is a big treat for us, but in moderation.
I double-dredge my chicken, and my fryer has a lid, so I can easily take it out to my back porch table and we have weekend “chicken frys” (today is actually planned for this). I will bread and fry everything outside, there’s no grease smell left in my house, and I can justify disposing of the used oil when I clean my fryer after it cools, because I do an entire family pack of chicken, plus an entire family pack of bone-in chicken wings that are sauced and finished in the oven. It’s going to be a great Saturday, with the family munching on chicken for the next whole day or so (:
Thanks for a great recipe, for those new to frying. It can be intimidating!
There are a lot of people Jenne who can’t hold cast iron and thankfully there are some great lighter versions coming out now. That said, my biggest recommendation is that people use something that distributes heat evenly. That terrible Pioneer Woman cookware (sorry Ree) and things like it are so thin and cheap they can’t hold the heat evenly and people will end up with a disaster at the least–at the worst perhaps a grease fire. Glad you found a method that works for you! –Rachel
Oh my, how on earth do you make gravy without the scraps in the skillet! That’s a must have with our mashed potatoes! LOL! My mother is 89 and going strong. She has fried anything and everything her entire life. It’s genetics!
These are the best chicken tenders I’ve ever had. So crispy! Yes! I used cast iron. Tonight I’m making them after soaking the tenders in buttermilk. I’ve always followed the recipe exactly. I’ll let you know how it turns out! And I do use Kentucky Kernal seasoned flour.
It’s not as good marinating the chicken in buttermilk. Stick with the original recipe. It was good, just not as crispy. I don’t freeze them! But eat them cold out of the fridge! Or on a biscuit. I love this site!!!
Thanks for the update Lindsey. I actually really like my chicken marinated in buttermilk–I’m surprised you weren’t happy with it.
I love marinating chicken in buttermilk. I do my bone on chicken this way. Just not Rachel’s crispy chicken tenders. I like her original recipe
Can I freeze them
Hey Sharon, I don’t recommend it. I do chill them in the fridge and eat them cold for a couple of days but I wouldn’t freeze. –Rachel
It turned out really despite me not having cast iron. With an electric stove top and cheap pots, I had use a much lower heat but the recipe was perfect. I used more seasoning and it was the perfect whataburger copycat for a homesick Texan. I’ve followed other fried chicken recipes and this was for the most successful. Thank you!
Great job Isa!!