
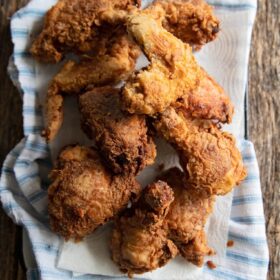
Buttermilk Fried Chicken
Real deal southern buttermilk fried chicken is marinated for tenderness and flavor, dredged in the simplest of ingredients and fried golden brown and perfectly crispy. Master it for yourself!
Jump to Recipe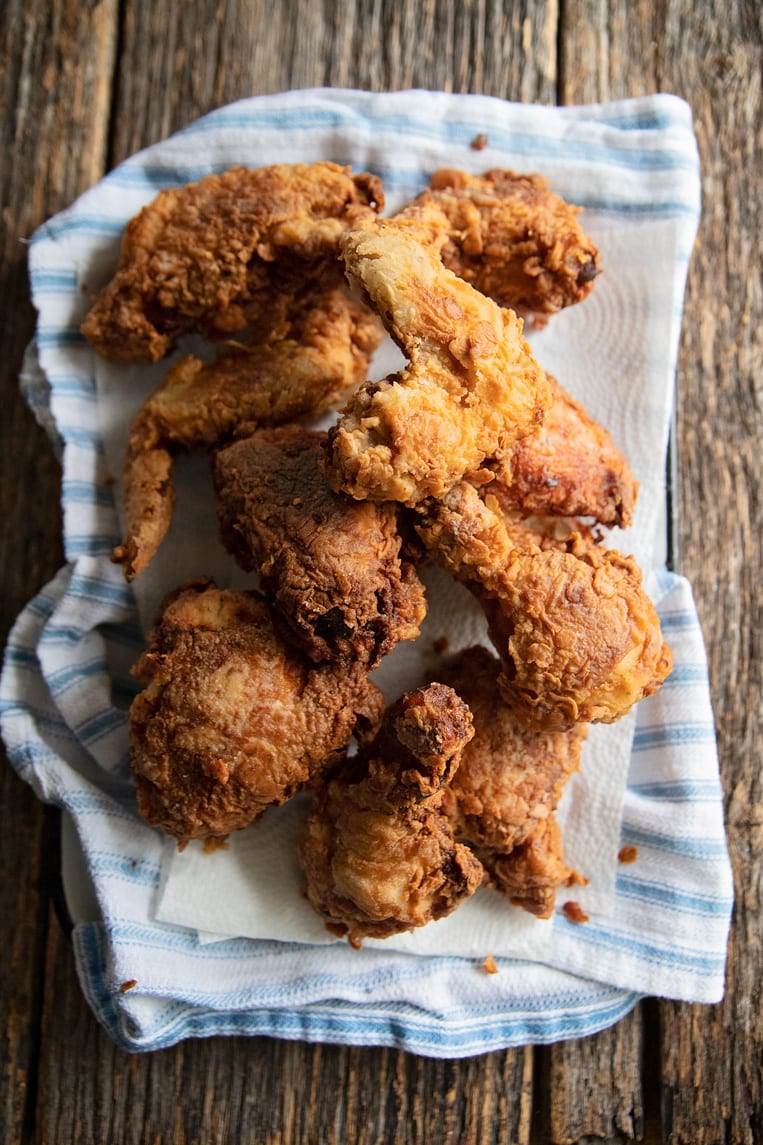
Is fried chicken really unhealthy? You might be surprised.
It depends on what you define as healthy and that means bucking a lot of what you think is “good” or “bad” for you. Whole foods are never wrong in my book and using all of a chicken instead of just buying boneless breasts is a great way to make use of every part.
But what about the frying? “We’ll die if we fry! It’s so much fat!” But the truth is what you fry in matters much more than the fact that you are frying.
I’ll talk to you more about what oils are best for your body in a bit and what oils I use but I think when done correctly, buttermilk fried chicken (that you make at home) doesn’t have to be a source of guilt.
Choose the healthiest chicken
Good chicken is worth its weight and I find that conventional whole chickens are really hit or miss on quality. I can get locally pastured chickens for about $14 where I live and I consider that a total bargain–the meat is more tender and flavorful and the chickens were raised on fresh air and bugs.
At the very least try to buy a chicken that’s antibiotic free, doesn’t contain “retained water” and vegetarian fed. The flavor is just better. You can check out the differences in chicken labels and choose the right one for you here.
Use a whole chicken
You need bone-in, skin-on chicken for this technique. You can buy a whole cut up chicken at the grocery store (though they are tricky to find) or cut up your own. You can also use any bone-in legs, thighs or wings and split breasts you can find in separate packaging.
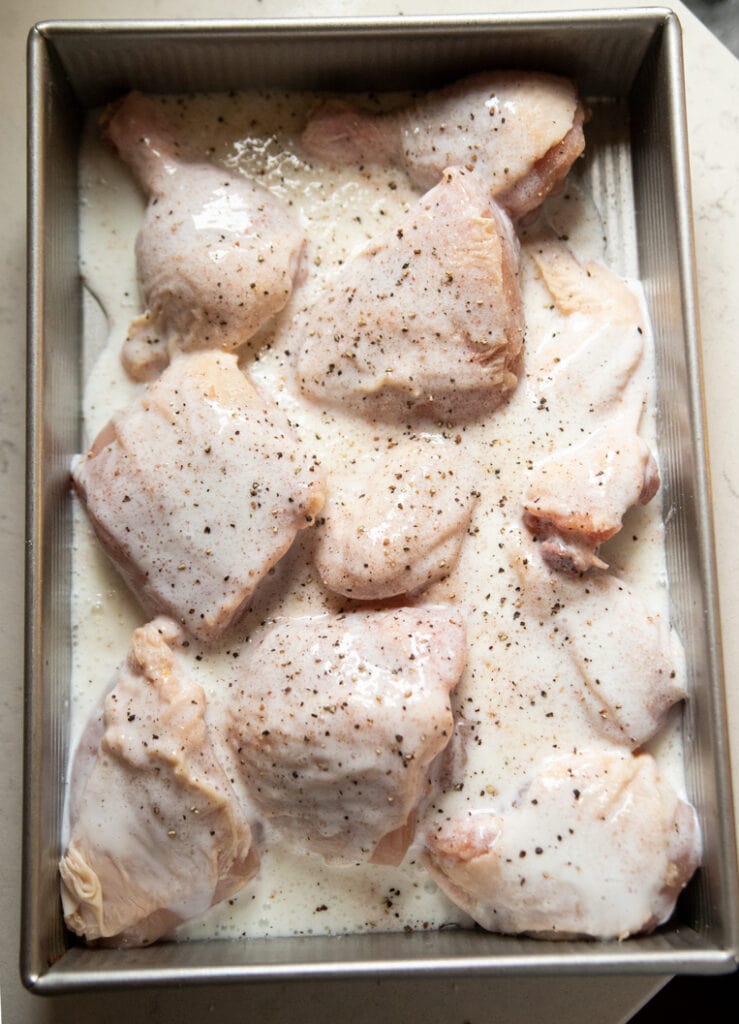
How to make the buttermilk brine
The start of great buttermilk fried chicken begins with the buttermilk brine. Buttermilk is a mild acid and when chicken is soaked in it, it helps the chicken tenderize, retain moisture and take on additional flavor. I add plenty of salt and pepper to my brine and lots of people like a dash of hot sauce in theirs. That’s totally up to you.
The longer you can let it marinade the better. A minimum of two hours but max of 24 is just fine.
I don’t want to buy buttermilk. Can I skip it?
No. I’m firm on that. And I don’t love the milk/vinegar or milk/lemon juice combo some people use as a swap. It’s like buying Dollar Store toilet paper only to discover it fails you when you need it most. It’s a poor swap for the original.
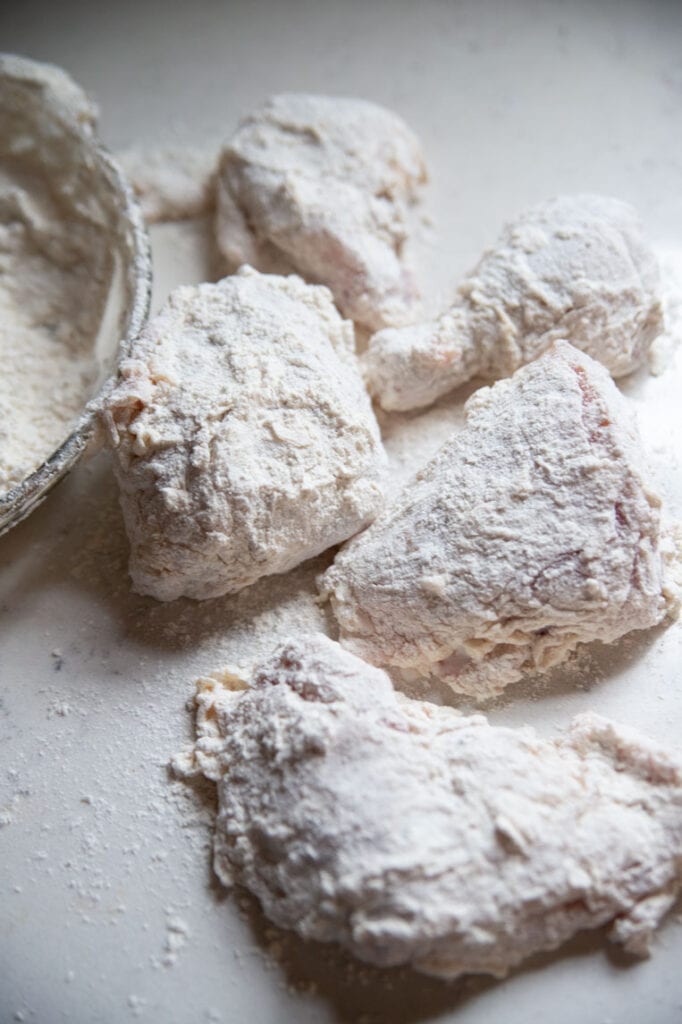
How to make a crispy batter
This part is very simple. Use the buttermilk your chicken is soaking in and just dip the pieces in to seasoned flour then press it on like you mean it. Press it really hard and don’t shake it off.
Once breaded, set the pieces to the side to allow the batter to “set”. The moisture from the buttermilk turns the dry flour in to a bit of a sticky coating that gets crispy in the fryer.
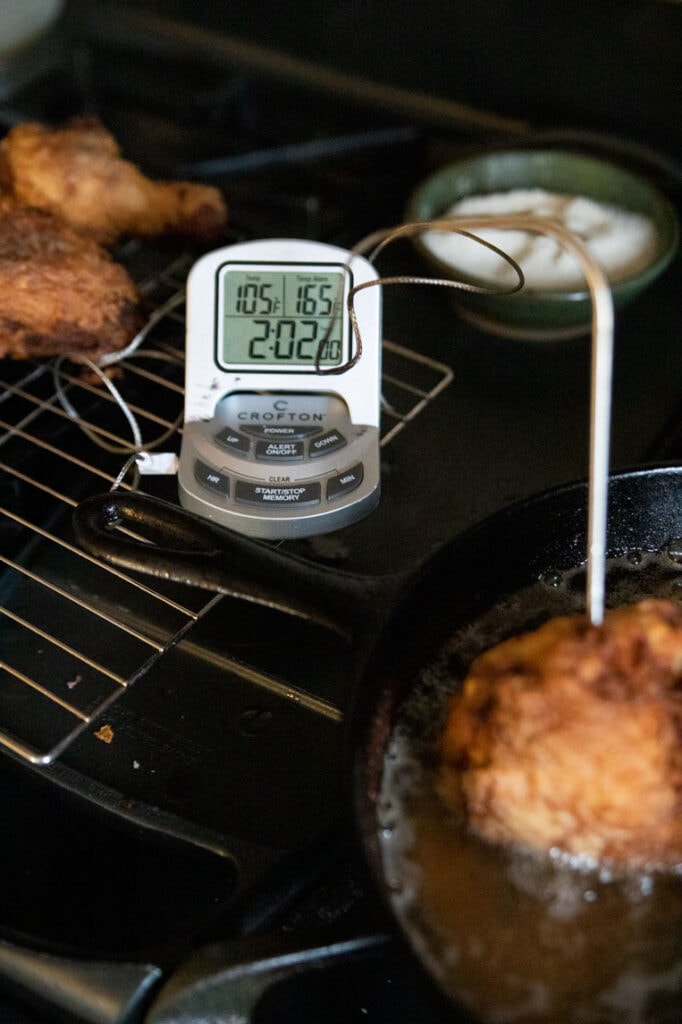
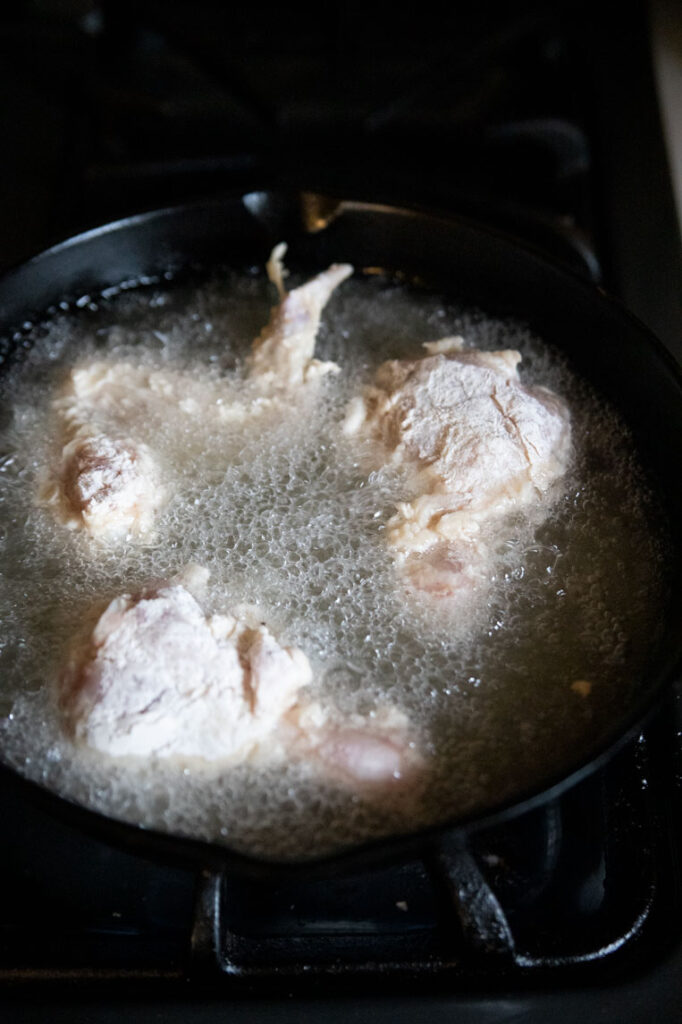
How long to fry chicken and be sure it’s done
Even this part has stumped me a time or two. I’d be sure it was done only to cut in to it and find it raw inside. To prevent this:
Keep your oil temperature moderate
Most of the time we fry in oil between 375 and 400 degrees. You’ll need to fry your chicken pieces at a lower temperature: about 325. It can’t be too low or your breading will fall off but too high and it will burn before it cooks.
Check your timing
This depends a lot on your oil’s heat level but I find that my chicken takes about 15-18 minutes to cook. When frying in batches, be prepared to take close to an hour to get all the pieces finished. Some people say dark meat legs and thighs take longer to cook than breast meat but I found that with the bones in, breast required a similar cook time.
Use a meat thermometer
Yes I got my meat thermometer out and checked my progress. Insert your thermometer near but not against any bones and wait until the temperature is 155 degrees. Remove to a cooling rack where the temperature will continue to climb to 160/165 degrees.
The best oils for frying chicken in a skillet
I always choose refined coconut oil for frying these days (which doesn’t take like coconuts). We no longer use vegetable oil because of its inflammatory properties and highly chemical-refined nature. If you want to inflame your body, raise your cholesterol and fuel chronic illness, keep using it.
Other options for frying are lard from pastured pigs (not that stuff they sell at the grocery that’s loaded with preservatives) or olive oil though it’s smoke point is almost too low and it will add additional flavor in to your chicken that you may not like.
A few more tips for frying
- Test your oil for readiness by dipping just a corner of a piece of chicken in. I use a wing piece for this. As soon as it touches the oil it should bubble vigorously. If it doesn’t or it takes a second or two to start, it’s not ready. Take the chicken out and wait 5 minutes.
- I cannot stress enough that you need a heavy bottomed, sturdy skillet for this job. Your flimsy Wal-Mart Farberware will not heat evenly nor retain heat well making frying super difficult and frustrating. Cast iron or heavy stainless steel is all I would use.
- Remember to watch your food and not your burner dial. When I say to heat on medium, you have to know what medium is on your burner. My stove goes from 10 to 1 and my medium is at 3. If you don’t know where medium is, use a pot of water. Bring it to a boil and turn the burner up and down until you find medium and mark that point.
- You will need to adjust the heat up and down slightly while frying. When adding cold chicken to the pan, you may need to turn it up a bit for a couple of minutes then back down again. Keep the temperature around 325 and not higher to avoid burning the outside of the chicken.
- Do the majority of the frying bone-side down so that the heat can penetrate up and cook the chicken through without burning the skin.

How to reheat your chicken pieces
Once your buttermilk chicken is fried, allow it to cool to room temperature then cover and refrigerate for up to 2 days. To reheat place pieces on a baking sheet and bake uncovered at 350 for 15 to 20 minutes until the chicken is heated through.
Need a simpler chicken tender recipe?
If you don’t feel ready to take on bone in chicken head to head yet, start with my crispy fried chicken tenders first. You may also like Nashville hot fried chicken tenders if heat is your game as well.
Buttermilk Fried Chicken
Equipment
- 10-inch cast iron skillet
Ingredients
For the buttermilk marinade
- 1 3 pound whole chicken cut up or pre-cut, bone in and skin on
- 2 cups buttermilk
- 2 teaspoons sea salt
- 1 teaspoon black pepper
For dredging the chicken
- 2 cups all purpose flour
- 1 tablespoon sea salt *See Note 1
- 1 teaspoon black pepper
- 4 cups refined coconut oil for frying *See Note 2
Instructions
- Place the cut up chicken pieces in a 9×13 baking dish.
- Pour over the buttermilk, 2 teaspoons of salt and pepper. Turn the chicken over in the buttermilk so the meat and skin are down in the buttermilk.
- Cover and refrigerate at least 2 hours but overnight is even better.
- When you're ready to fry, heat a 10" cast iron skillet with the coconut oil over medium high heat while you bread the chicken. (Don't forget it's heating!) Add the flour, remaining salt and pepper to a bowl, zip lock bag or paper bag.
- Make sure the chicken pieces are thoroughly coated in the buttermilk and then place them 2 or 3 at a time in the flour, pressing very firmly to make the flour stick. Transfer the chicken to you work surface for 3 to 5 minutes so the breading can really stick to the chicken.
- Make sure your oil is between 325 and 350 degrees. You can test this by dropping the corner of a piece of chicken in to the oil. It should sizzle immediately but not smoke. If it just sits there or barely bubbles your oil is not hot enough. Just wait about 5 minutes and try again.
- When the chicken pieces bubble vigorously, add no more than 4 pieces of chicken to the skillet skin side down first. Adjust your heat as needed to keep the chicken gently cooking on about medium/medium low heat, turning each piece every 2 minutes. Turn the pieces up on their ends as needed so the chicken browns all around.
- Cook each piece until they reach 160 degrees (about 15 to 18 minutes total). Use a meat thermometer to check the temperature if you are unsure.
- Transfer the cooked chicken to a cooling rack and cook the remainder in batches. Serve warm or cold.

About the Author
Rachel Ballard, RN, BSN brings more than 20 years of professional nursing expertise to Feast and Farm. With a love for nutrient dense foods that support wellness, she works to distill complex health information and current trends into recipes that fuel the best version of yourself. Read more about Rachel here.