
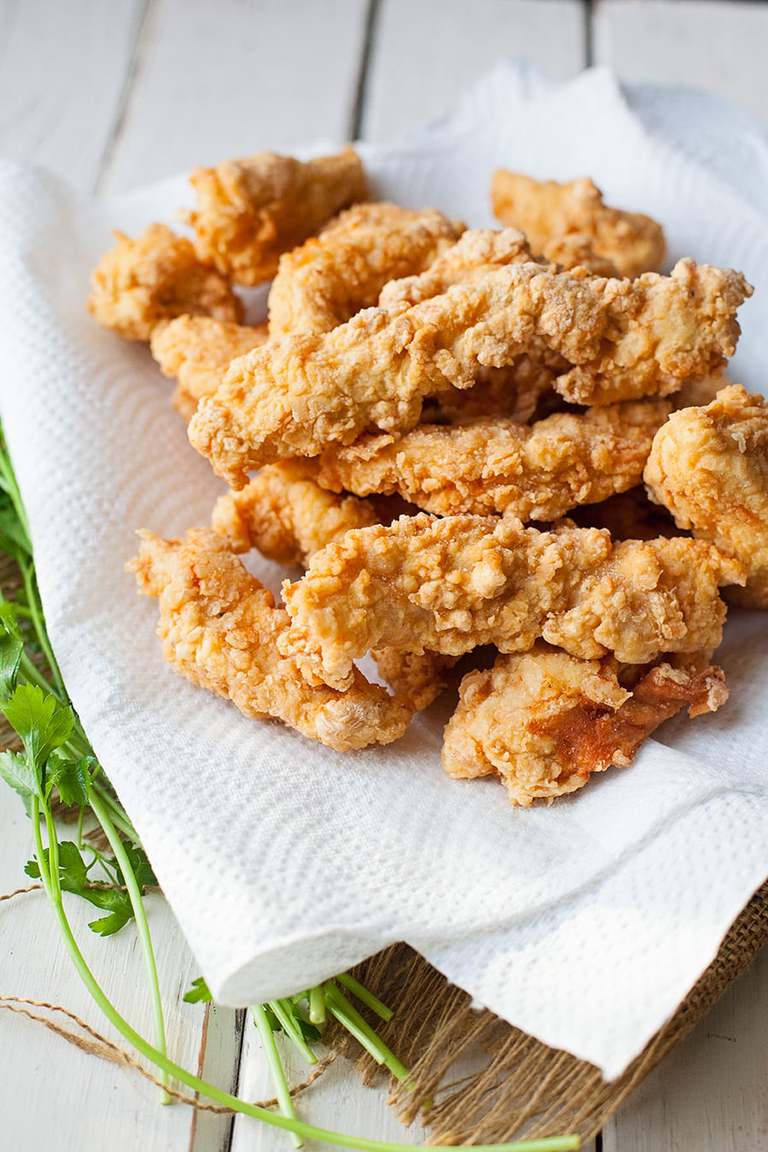
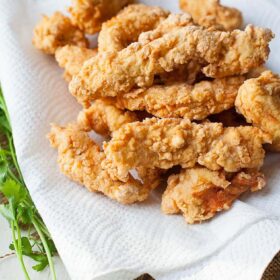
Crispy Fried Chicken Tenders
Truly crispy fried chicken tenders are a dinnertime staple you’re whole family will love. Get all my tips for making that crispy crust you crave, seasoning like a pro (and shortcuts if you don’t know how), and fry them up like “cast iron skillet” is your middle name.
I’m not going to lie or sugar coat this. If you haven’t ever fried anything, you’ll more than likely mess this up.
Because there’s some sort of rule that says that if you don’t get your first cast iron skillet by the age of 5, you won’t be able to hack it as an adult. No–frying takes practice. Lots of it.
Sometimes you’ll burn things, sometimes you’ll cook it too low and all the breading will fall off. Sometimes it will be golden on the outside and raw in the middle.
You just can’t give up. If you need to, use an electric skillet where you can set the heat or a fryer for safety. Please don’t burn your house down.
Don’t walk away from it. Don’t do laundry. Don’t take a nap. (I know a friend who has!)
My crispy fried chicken tenders don’t have any buttermilk listed, but if you want to wet yours in some before you drop them in the first round of flour, you can do that. I just didn’t here because I get the best crust with egg and flour.
No matter what–once you get the hang of this, you can FRY ANYTHING.
You can make your family the most unhealthy ones on the block. I mean–think about it: donuts, pickles, Twinkies, funnel cakes. Oh man. Funnel cakes. I’m just looking out for your best interests here.
I am your enabler.
Tips for the best crispy fried chicken tenders
-Make sure your flour is well seasoned. If you aren’t confident in that area, I’ve given you measurements for salt and pepper in the recipe.
-Use a good skillet that controls heat well. Of course I’m going to recommend cast iron.
-Press the breading on your chicken tenders really firmly, then let them sit for a couple of minutes before you fry them. This makes the breading soft of gooey and it crisps up even better.
Watch me make the full recipe on YouTube
Add a skillet of cornbread and you’ll be all set! You can learn how to make cornbread here if you don’t know how or get brave and learn how to fry bone-in buttermilk fried chicken.
Crispy Fried Chicken Tenders
Ingredients
- 1-2 pounds chicken tenders or 2 large boneless skinless chicken breasts sliced into 1-inch thick strips
- 1 1/2 cups all purpose flour
- 3/4 teaspoon salt
- 1/2 teaspoon black pepper
- 1 egg beaten with 2 tablespoons water
- vegetable oil for frying
Instructions
- Fill a 9-inch cast iron or standard skillet with about 2 inches of oil. Start heating it over medium-high heat while you bread the chicken. (Keep an eye on it!)
- In a large bowl, mix the flour, salt and pepper.
- In another large bowl, beat the egg and water
- Dredge the chicken in the flour, coating well. Shake off excess flour and dip in the egg, the back in the flour.
- Set the chicken to the side to rest for about 5 minutes. (This helps the coating stick better)
- Check your oil temperature with a candy thermometer if necessary (you should be around 365-375 degrees) or drop in a little bit of flour–if it sizzles immediately, you can add one piece of chicken.
- If the chicken sizzles, add about 5 pieces at a time and cook until golden brown on that side–about 8 to 10 minutes or so.
- Turn, and repeat until all brown.
- Cook the rest of the chicken in batches.
- Transfer to a paper towel lined plate and sprinkle with a little more salt if needed.


I didn’t get started till around 8 pm. Took my time to do it right. Put on some Zeppelin, fired up the cast iron, substituted coconut oil for the vegetable oil, and Lawry’s seasoning salt for the regular salt, and went at it.
It was delicious! Even my dogs were impressed. Unfortunately I never got around to cooking the broccoli that was supposed to be the healthy part of the meal.
Haha! I’m glad you enjoyed it!
This recipe turned out so well! I tried making breaded tenders before and the breading just came off. I think the resting period for this recipe made a big difference.
I’m glad you enjoyed them Carrie.
Very yummy and easy to make. I used 2 eggs instead on one which I found was a little better. This is my favourite chicken tender recipe!
Delicious.
Single father so making complicated stuff(a million seasonings) is tough.
Very good thank you.
Wow mmmmmm wow wow wow I made these in my deep fryer mmmm m m mmmmm wow i have tried alot of chicken tenders recipe’s but mmmmmm m m mmmm NONE of them could do any justice to yours, Mmmm I just ending a 4 mth diet, please believe that is out the window. Mmmmm
Signed MMMMMM
TJE
That’s probably why they tasted so good Tammala. LOL. 4 months on a diet and a brick would be good! Hahahaha! –Rachel
Just made the recipe for first time. I am sure it will not be the last time. Theses are wonderful.. Easy and quick. Great with you favorite dipping sauce.
Have you ever tried this recipe in an air fryer? Or do you have a recipe you would recommend for an air fryer?
Hey Andrew, no I haven’t tried it. I’m not a gadget person and I don’t own air fryer. I suspicion they wouldn’t be quite the same (nothing beats really frying something) but you’re welcome to give it a go and see what happens! –Rachel
Yes you can use your air fryer andrew, all I did was google it hun. Nothing compares to deep frying though mm……..
Good Luck Hun !?
Fabulous Recipe!!! A classic must try!!!
These look fantastic.
What do you do with the oil after you’ve fried the chicken? Can you reuse it?
Hi Jamie, Every oil has a smoke point. If oils are heated to smoking or beyond they become unstable and even toxic. Sometimes oils that have been used very briefly and are very clean can be reused once. The oil used for frying chicken tends to have lots of flour sitting at the bottom of the skillet and isn’t clean enough to be re-used unless you don’t mind whatever you use it for next tasting like fried chicken! Some people strain their oil and use it again but it’s simply not safe to do that when it’s been heated for 30 or 35 minutes as it is in this recipe. I scrape my old oil out in the pasture (farm benefit) but you can let yours cool and put it in an old container to throw out. –Rachel
Loved this recipe and my cast iron skillet did them justice. They were so juicy and tender l loved them.
Super duper easy to make, which I looooved! I added some parsley, onion powder, and garlic powder for extra flavor. All 4 kids (ages 1-17) asked for more. I love it when that happens! This recipe is a gem. Thank you for sharing it! 🙂