
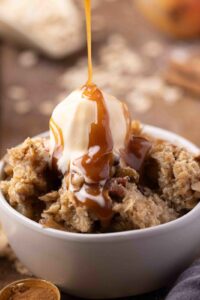
Homemade Cocoa Powder Brownies
Homemade cocoa powder brownies are one of those pantry staples everyone loves and there’s no melting chocolate to get it done. Throw in a bit of coffee for a richer flavor and dig in!
Jump to Recipe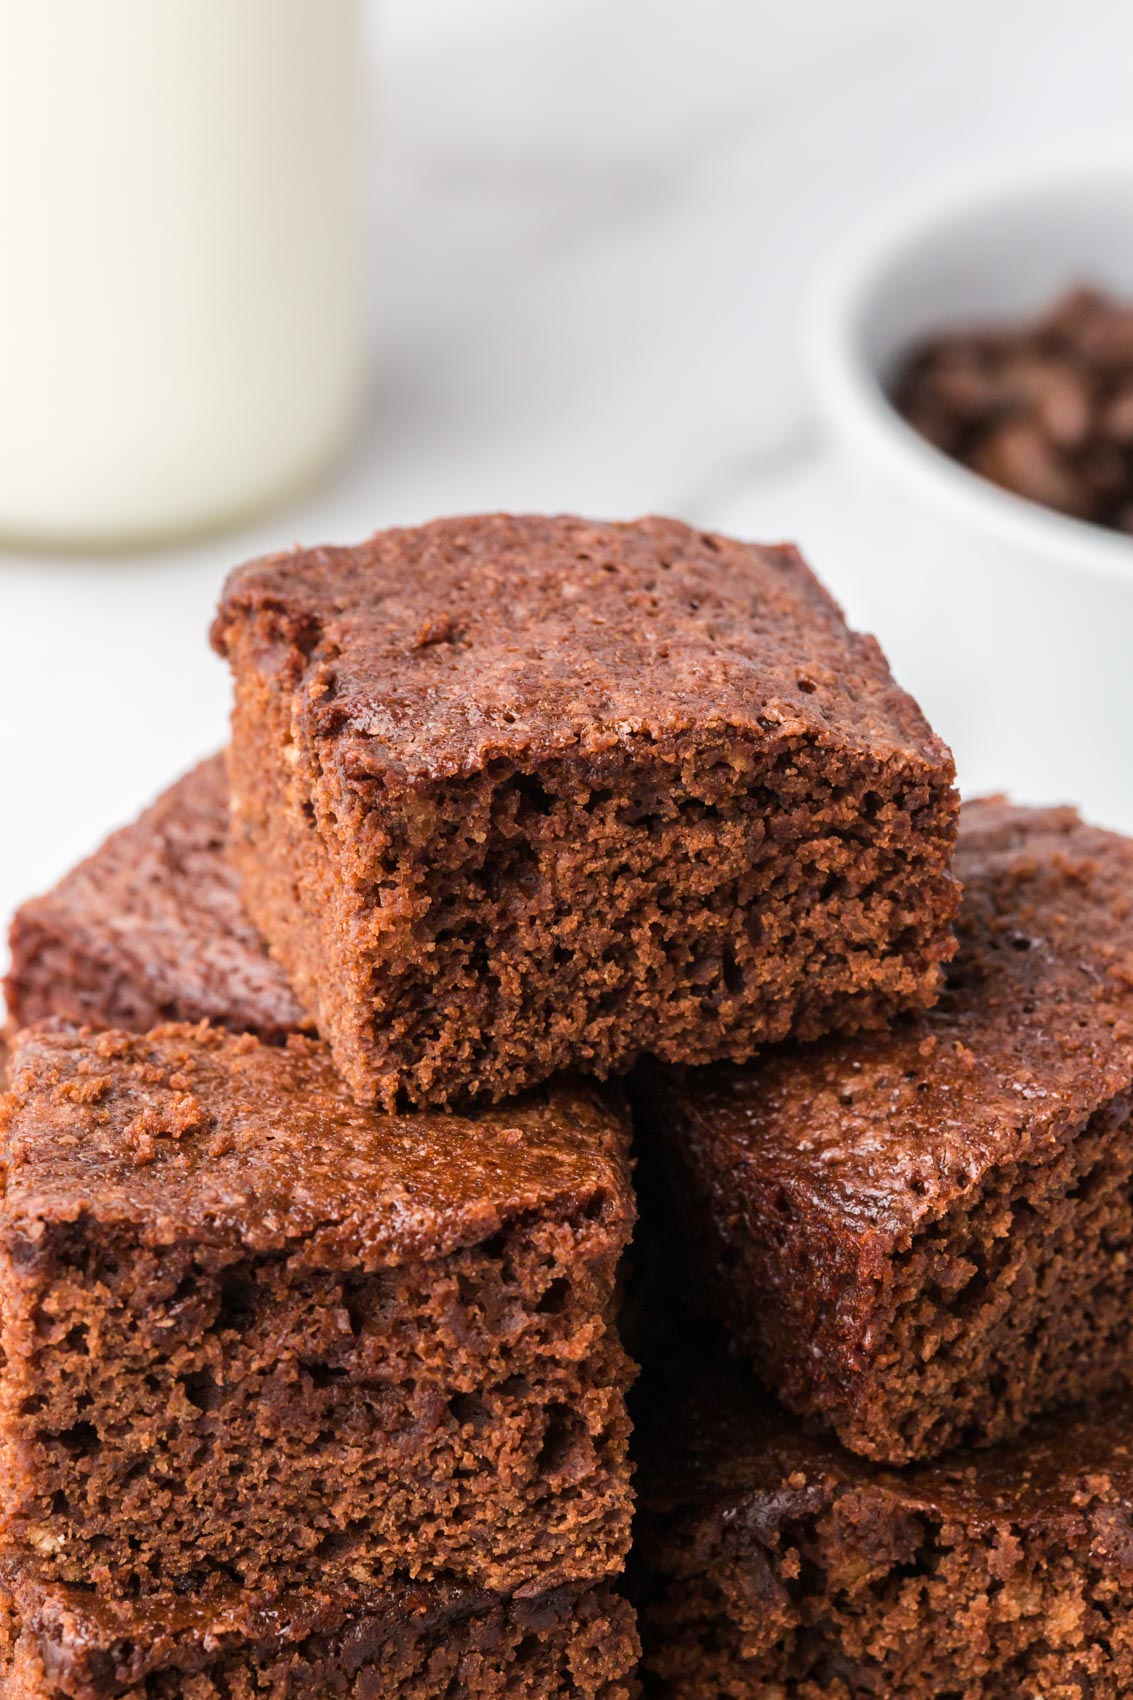
A good brownie can feel a little bit like a unicorn hunt, can’t it? When you’re ready to give up the box and make them from scratch they can be wonderful or wonderfully awful.
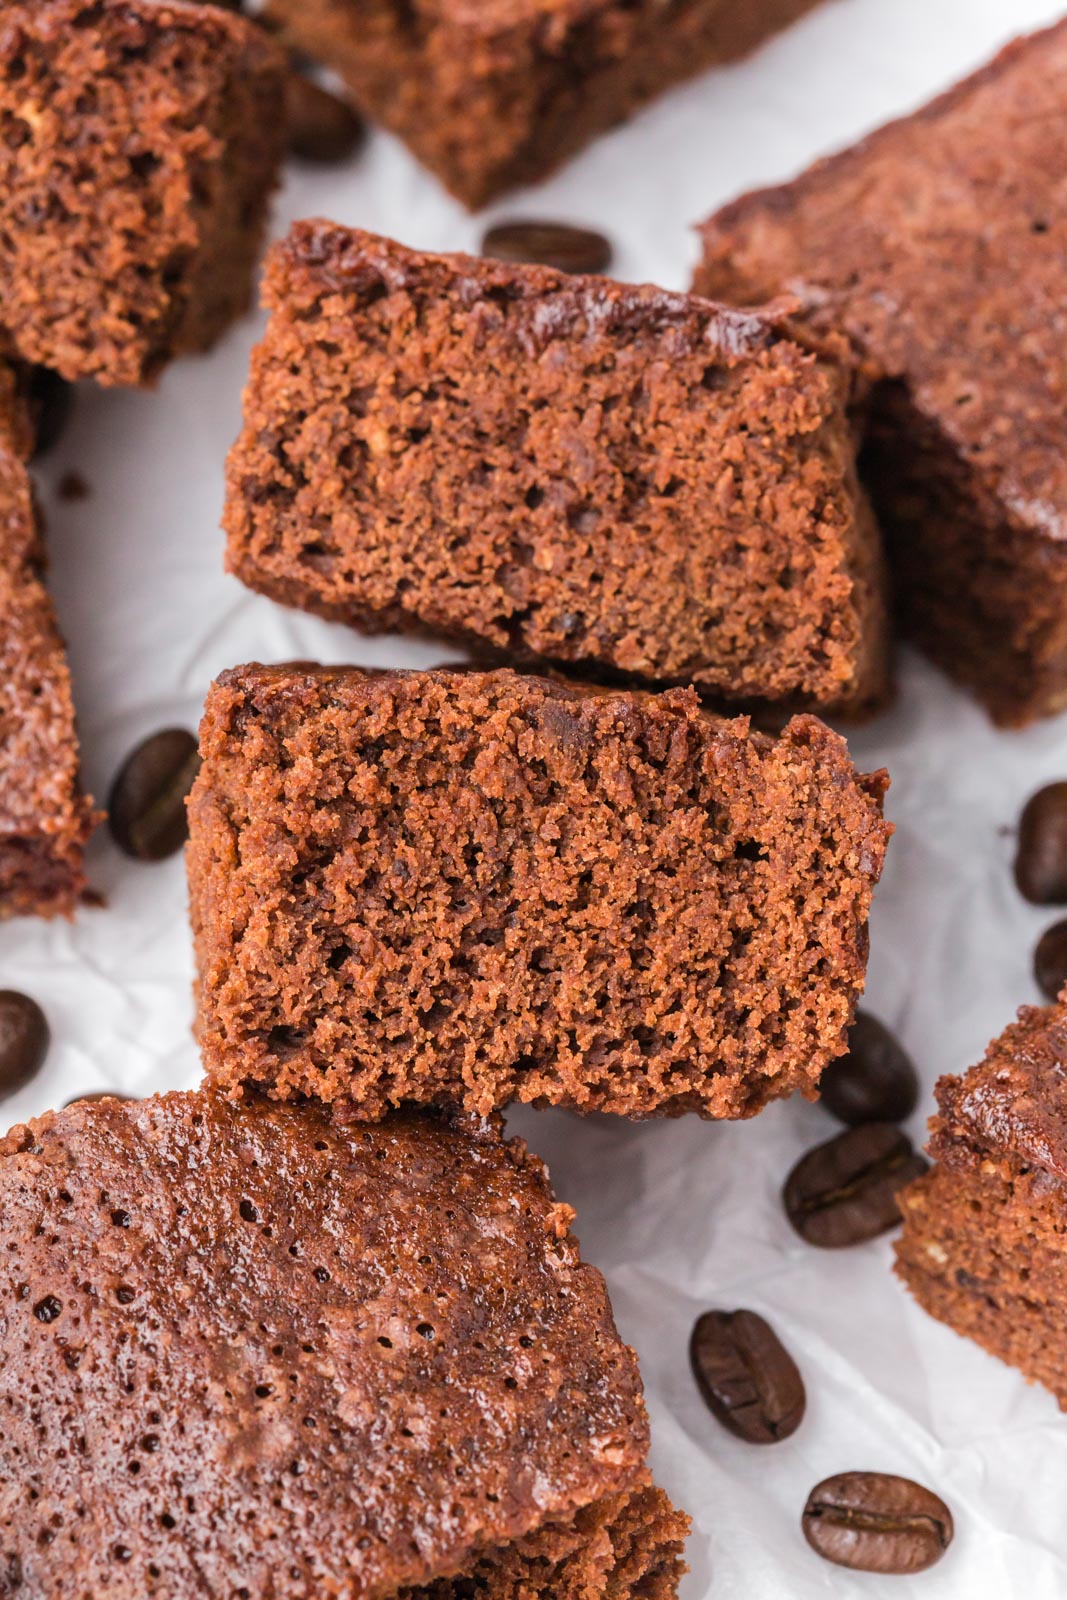
This version is moist but not dense for my friends who like a more cake-like brownie. And they handle substitutions like gluten free flour and sugar alternatives too so you can think a little healthier and enjoy a treat too.
Why coffee makes these brownies great
Fun fact. Coffee enhances the flavor of chocolate. Not only does it make us more sensitive to the sweetness in chocolate but it also decreases our sensitivity to its bitterness.
Adding coffee to a brownie recipe results in a perfectly balanced, just-the-right-amount-of-sweet bite of chocolaty goodness.
Should you use instant coffee or brewed coffee?
They both work beautifully in this recipe. If you are using brewed coffee, just replace any water added to the brownies with the coffee.
If you are using instant coffee, I suggest adding instant granules to 3 tablespoons of water. You’ll only need a smidge–1/4 teaspoon or so of granules. Instant espresso or a dash of brewed espresso will also work here.
Can you add coffee to boxed brownies?
You know my opinion. Homemade is always better. That being said, you can easily tailor this recipe to any boxed brownie mix.
Just replace the water in the recipe with brewed coffee or add instant coffee granules (see my notes above on quantity) and, voila!
Should you let brownie batter rest before baking?
Allowing brownie batter to rest before baking will leave you with a surprisingly delightful result. The flavors will be better blended. The brownies will be chewier (yum!) and you sometimes get that glossy top everyone loves to see in this classic dessert.
Just spread the batter in the pan, cover it with plastic wrap, and pop it in the refrigerator for up to 2 days.
Common brownie mistakes and how to fix them.
This is a pretty beginner-friendly recipe. That being said, there are a few common mistakes made by many bakers when making these tasty treats.
- My brownies are sticking to the pan. Line your pan with parchment paper. No more stuck brownies.
- My brownies are dry. Chocolate hardens at room temperature. So, instead of using chocolate, use a mixture of cocoa and butter. Overbaking is another common cause of dry brownies. Be vigilant and remove them from the oven the moment the top gets shiny and cracked. Use a toothpick to check the center. It should still be a bit gooey with bits of batter on it when you take them out of the oven.
- My brownies are stale. These decadent brownies are best enjoyed the same day they are baked. They tend to get stale quickly after this point. Place a couple of slices of bread over the top of the brownies and seal them in an airtight container. It might sound weird but they will steal some of the moisture from the bread and stay moist longer.
Possible substitutions
This recipe is pretty substitution friendly. Here are a few of my favorites.
- Use cacao instead of cocoa. This will give you a slightly more bitter brownie, but the results will be very similar otherwise. Cacao has more trace minerals and vitamins than the refined cocoa powders on the market.
- Swap coconut sugar for granulated sugar. A 1:1 substitution will work great and your body will be glad you left out the refined sugar. Sometimes I find coconut sugar bitter; you may want to do a half and half swap. Refined cane sugar can also substitute.
- Make your own self-rising flour if you don’t have any on hand. To make 1 cup of self-rising flour, mix 1 cup of all-purpose flour, 1-1/2 teaspoons of baking powder, and 1/2 teaspoon of salt. Use this mixture to replace the self-rising flour in the recipe.
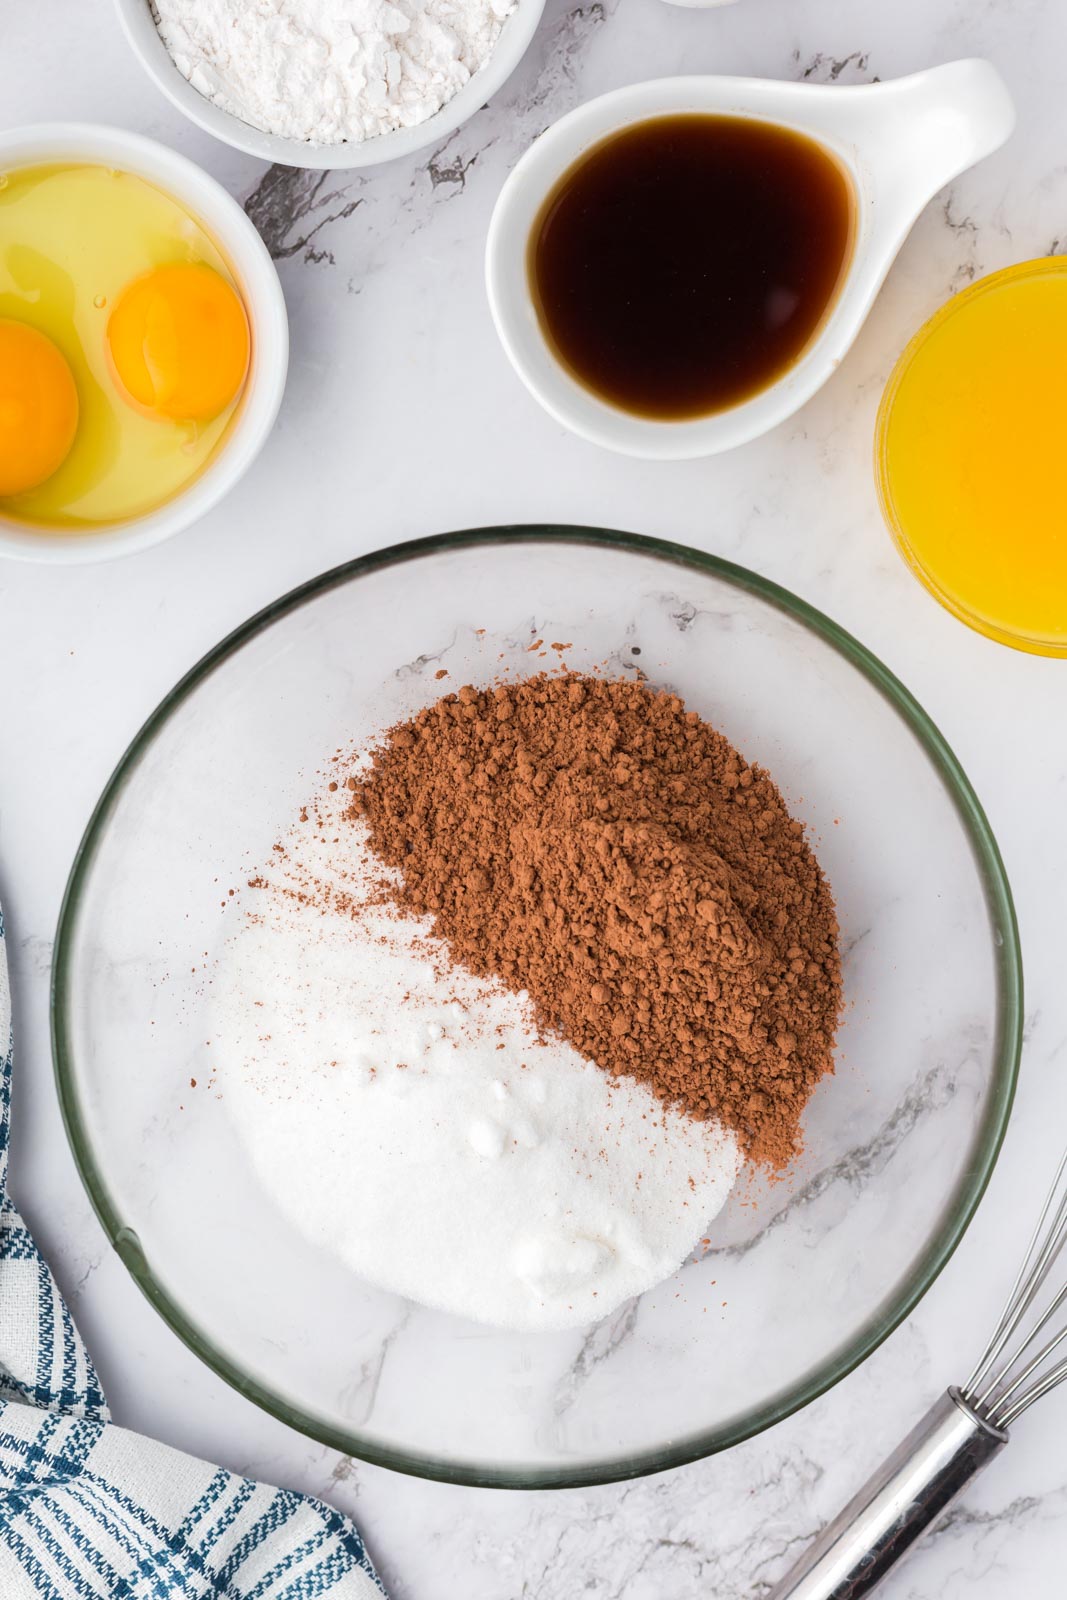
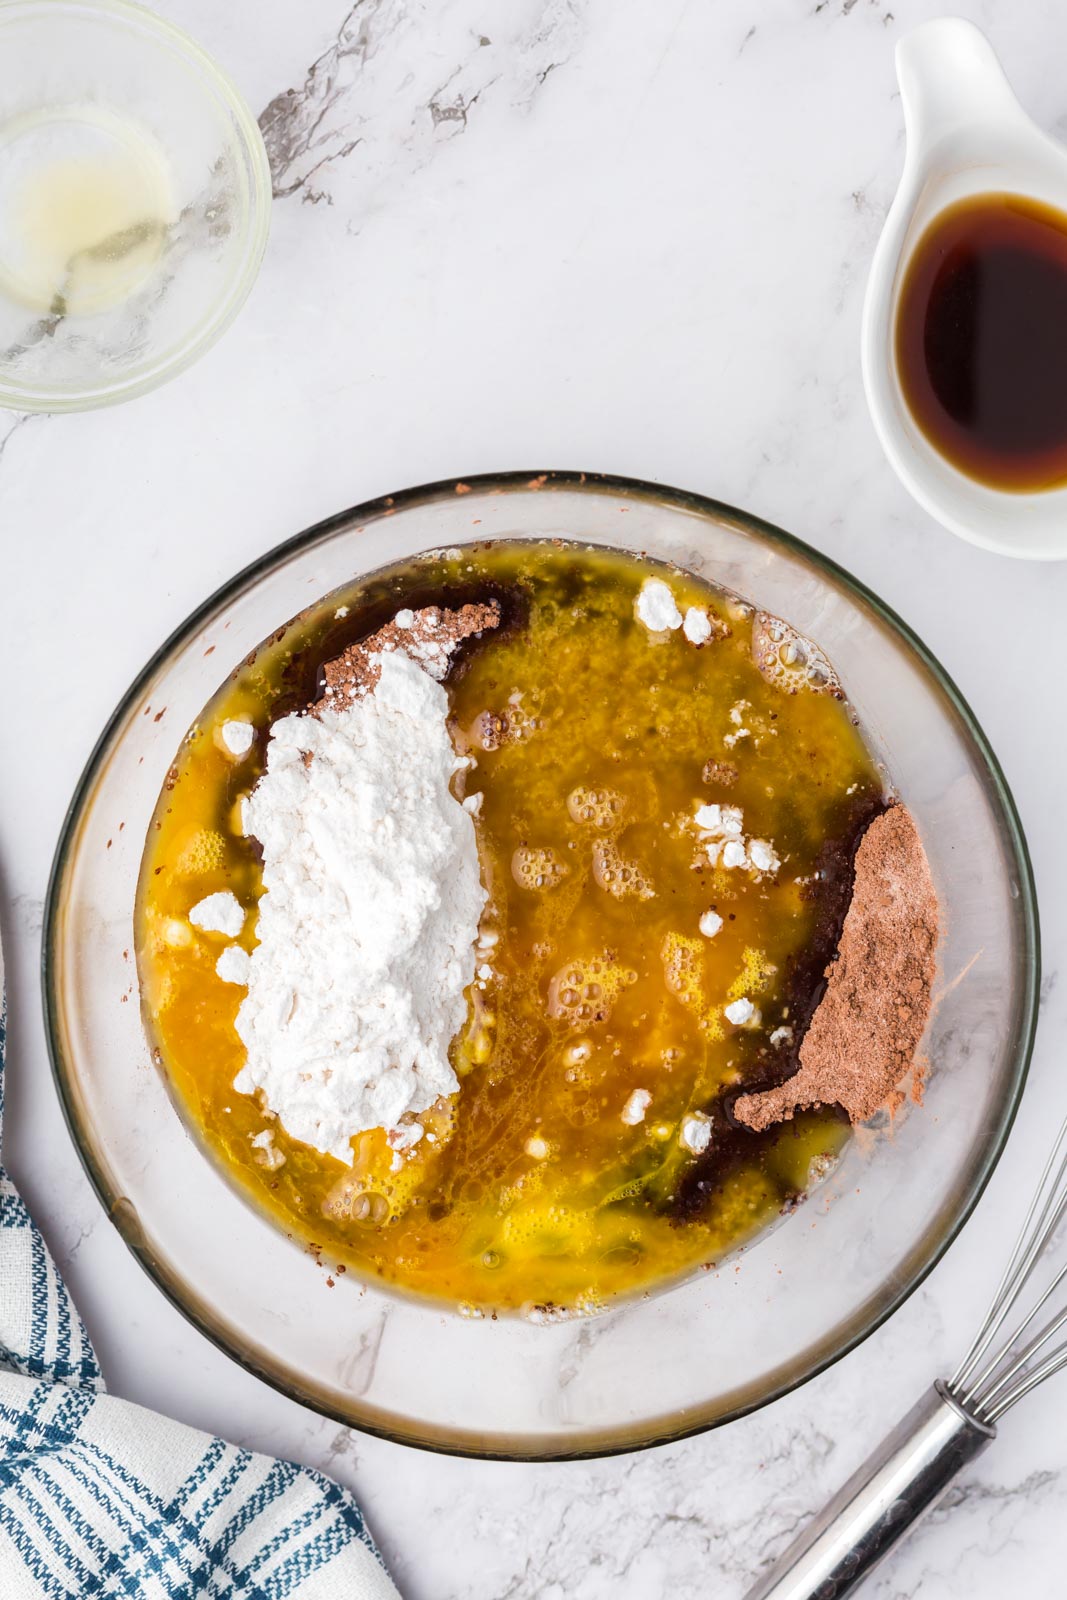
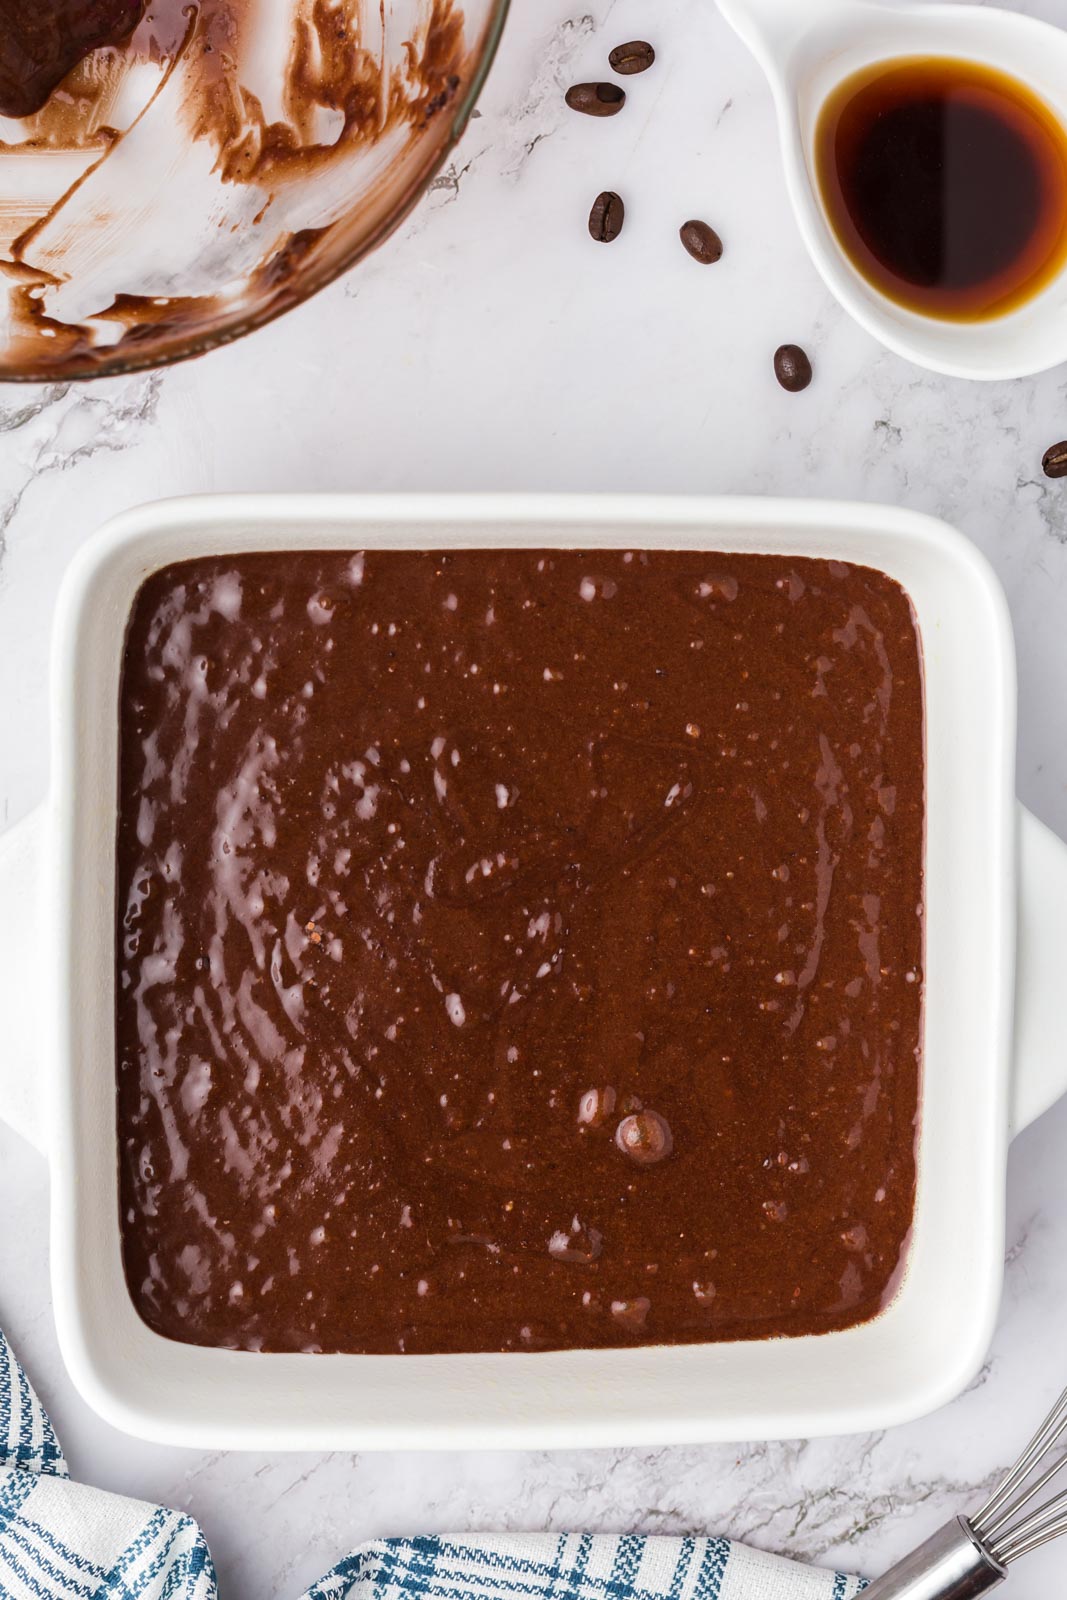
One bowl, mix and bake! How to make homemade brownies
Mix the cocoa powder and your choice of sugar in a bowl.
Add the eggs, coffee, vanilla, and flour and stir until no pockets of flour remain but don’t over mix.
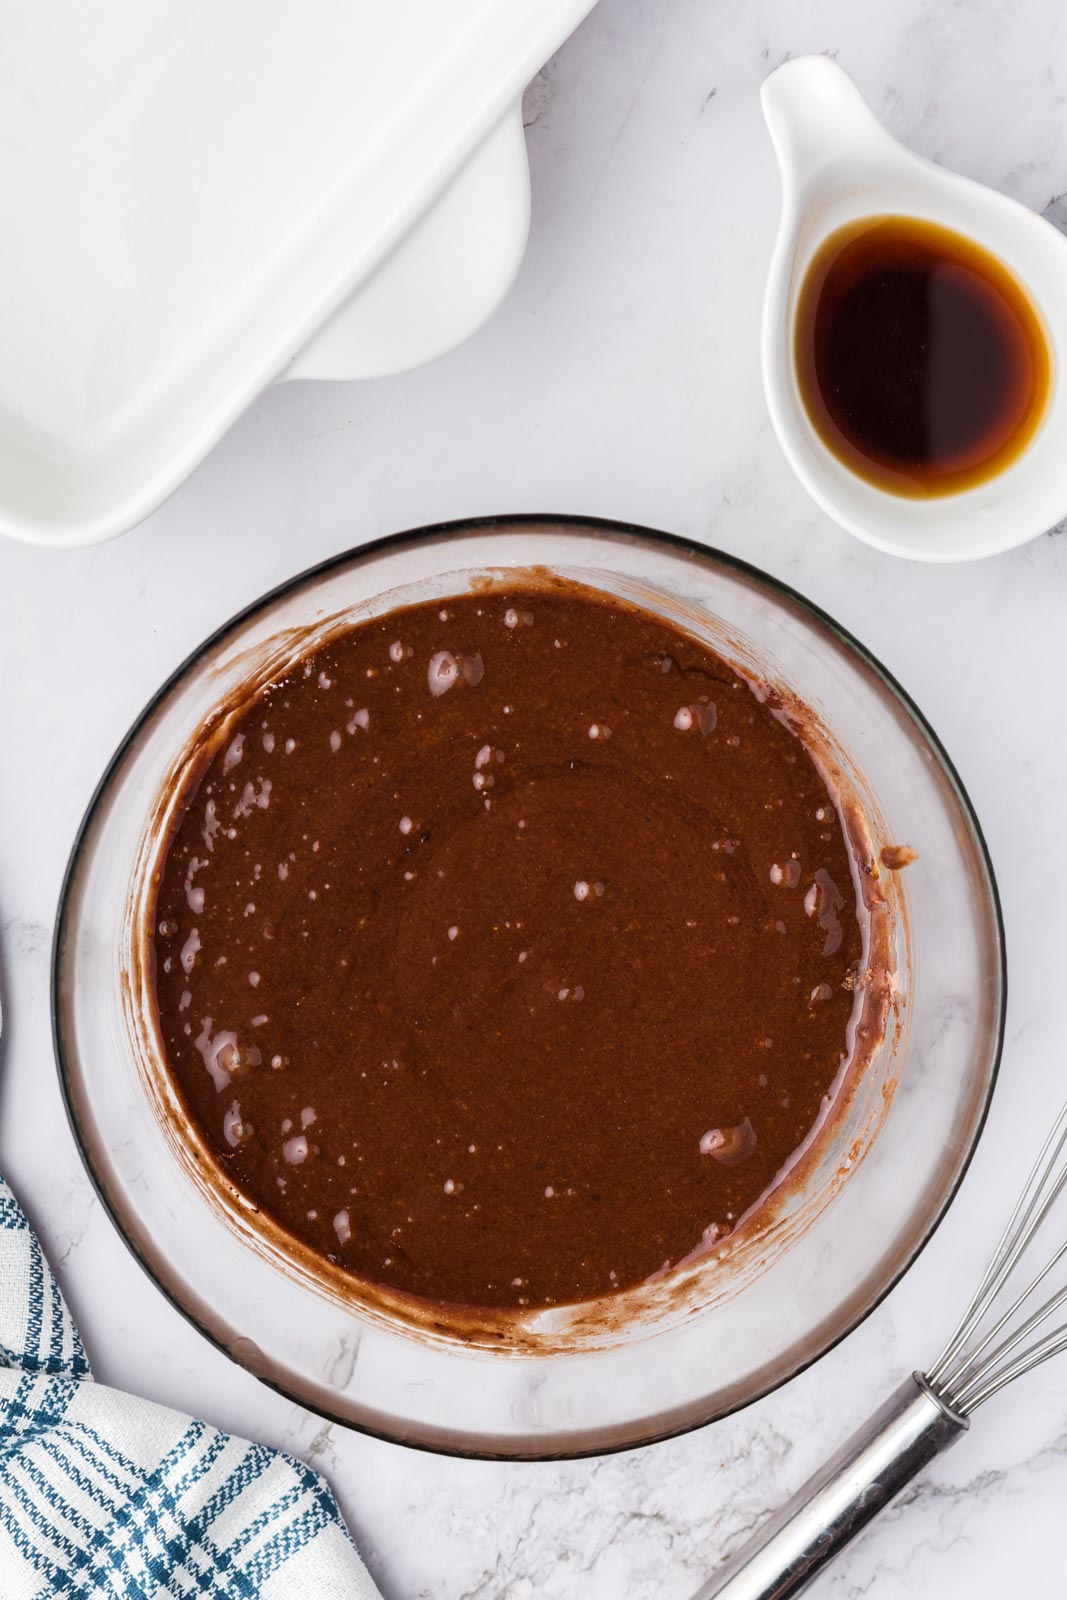
Pour the batter into a greased or lined 8×8 baking dish and bake until the edges are set and the center is a bit wet when a toothpick is inserted.
Liven it up with fun mix-ins.
Don’t be afraid to play around with these cocoa powder brownies. I have been loving adding mix-ins to the batter before baking.
- Chocolate chips. Milk chocolate, semisweet, and dark chocolate are all great options. Feeling frisky? Consider white chocolate chips, peanut butter chips, or even peppermint chips. I suggest adding anywhere between ½ cup and ¾ cup to the recipe.
- Nuts. Classic. I have been enjoying adding walnuts but hazelnuts or macadamia nuts are great choices too. Again, add ½ cup to ¾ cup.
- Cream cheese swirl. Add a whole new dynamic with a rich cream cheese swirl. Just whip up a quick cheesecake batter, layer it in with the brownie batter, and swirl with a knife to create a delicious, visually appealing masterpiece. Check out this recipe to learn how it’s done.
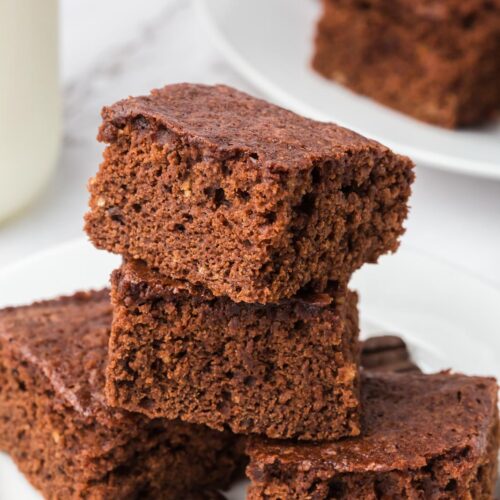
How to cut chewy brownies without them falling apart
No one wants a crumbly brownie. To avoid this, give the brownies at least 30 minutes to cool before slicing into them.
Alternatively, store them in the fridge or freezer overnight before slicing (see my notes on proper storing above). This will give you the cleanest slice.
I’ve also found that using a plastic knife to cut them makes much cleaner cuts than metal.
How to store cocoa powder brownies?
Allow the brownies to cool completely before sealing them in an airtight container. Wrapping them in plastic wrap or aluminum foil works just fine too.
Store them on the countertop for up to 4 days or in the refrigerator for up to 1 week. Remember to wrap up the brownies with a couple of slices of bread to help keep them moist.
You can freeze these chewy brownies for up to 3 months. Allow them to cool before wrapping the entire pan with plastic wrap and placing it in the freezer.
You can also wrap individual slices in plastic wrap and freeze them that way. I love this option because you don’t have to thaw the whole pan when you just want 1 brownie.
Craving more chocolate?
Try these recipes:
Homemade Cocoa Powder Brownies
Ingredients
- 6 tablespoons cocoa powder
- 1 cup sugar granulated, coconut sugar, organic cane sugar all work
- 1/2 cup butter melted
- 2 large eggs beaten
- 1/2 cup self rising flour see note 1
- 1 teaspoon vanilla
- 3 tablespoons strongly brewed coffee
Instructions
- Preheat oven to 350.
- Grease an 8x8 pan with butter or line with parchment paper.
- Combine cocoa and sugar in a medium bowl.
- Add butter, eggs, flour, vanilla and coffee.
- Mix until no pockets of dry flour remain and spread into pan.
- Bake 25-30 minutes, or slightly less to make them a little more gooey.

I made this last night and I think I messed something up because my batter didn’t look nearly as wet as the picture and the brownies didn’t rise very much. The taste is very good though! Next time I’ll do the 2x ingredients and let the batter sit for 2 days as recommended.
I tried to make these and they sunk in the middle and just created a huge mess. =(
Hi Joe–the most common cause of sinking is over mixing the batter or underbaking them. They could have looked done on the top but still been overly gooey in the middle. Did you use a toothpick to check them? And has your oven been calibrated for accuracy? Some can run 25 to 50 degrees hotter or cooler than what they say they are. I have my oven calibrated with a separate thermometer for accuracy so that baking time and temperatures are more reliable when I write recipes. –Rachel
Some of the most delicious brownies I’ve ever had!
The only problem I had was they turned out crumbly and wouldn’t come out in solid pieces. Any advice?
Usually crumbling is a sign they were overbaked. Try reducing the cook time by a couple of minutes, and line your pan with parchment paper that overhangs the sides so you can just lift the whole square out in one piece. –Rachel
These are delicious! Made a few times, added some slivered almonds as well and goes down a treat.
I love that Alex! Thank you for letting me know. I love them too. –Rachel
Super chocolate greatness!
Nice picture ! I have a hard time getting large items (like milk bottles) to show up in my photo’s …I always go in for the close shots. Occasionally gets me declined from Foodgawker as well…oh hum, old dog new tricks 🙂 Lovely post!
Kathi
What kind of lens do you use Kathi? I just got this 50mm 1.8 a few months ago and I thought it was gonna be a breeze to learn. Boy was I wrong. I think it’s about choosing the right props for your image and it doesn’t have to be a tall item like a milk bottle. Maybe just a shorter glass of milk and practice taking a bit of a wider shot then cropping it before you submit to Foodgawker. I have a love/hate relationship with them anyway.
Hi Rachel – I have 50 mm 1.8 as well…I just need to stand back a bit and take more time with my set up. I don’t always include a back drop so in order to hide my kitchen window I go in close. More time…you got any of that? That should fix my problem and yes, Foodgawker has mood swings, that’s for sure!
I wish I did! I think we could all use more!