
Soft Amish White Bread (Video, Beginner Friendly)
Amish white bread is a slightly rich, soft, yet sturdy yeast bread that’s perfect for beginners. I know bread recipes feel completely overwhelming, but this version (with video tutorial) has been successful for thousands of beginner bread bakers. You can master homemade bread!
Jump to Recipe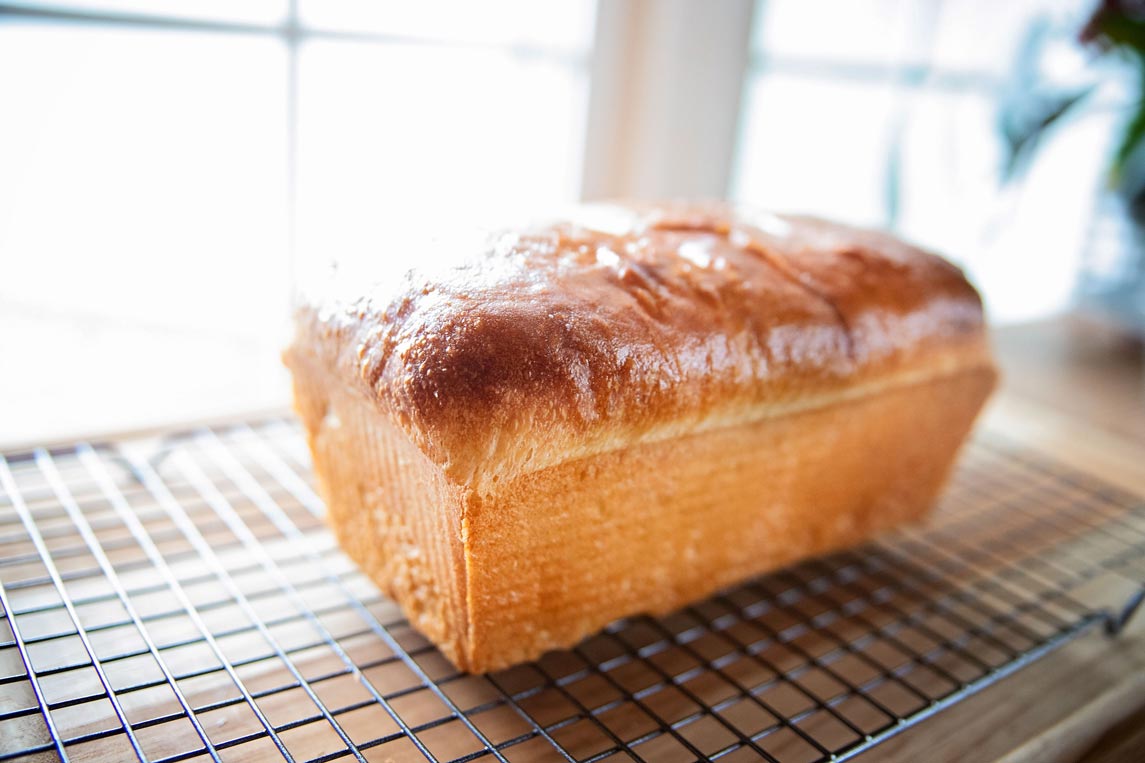
A bread baker for over 30 years (don’t tell anyone how old I am), I’ve taught beginner bread baking classes to dozens in my kitchen and to millions on YouTube. For every step in this post you can watch the companion video below and I encourage you to reference it often while mixing your first loaf.
I know all the things beginner bakers do wrong, and I’m going to help you fix those.
Watch the tutorial
Watch this video to see each step in action!
Table of contents
- Watch the tutorial
- 5 things beginner bakers do wrong and how to prevent them
- Common questions about Amish white bread
- For accuracy, measure your bread ingredients in grams
- Choose a loaf pan that heats evenly
- What your Amish white bread should look like at each stage
- Ideas for using stale bread
- Other ways to use your Amish white bread dough
5 things beginner bakers do wrong and how to prevent them
- Using water that’s too cold. Your yeast needs water slightly warmer than lukewarm. Like what you bathe a baby in, or about 110 degrees for those of you who don’t have kiddos. If it’s too cold, the yeast won’t activate or foam. This video shows you what yeast looks like when it’s alive. You can use active dry or instant yeast here. Activate them both in water the same way. Learn how to activate yeast in detail here.
- Cold ingredients will make rise time slow. Every ingredient you bake with needs to be room temperature. This includes your egg, and if you keep your flour in a freezer it needs to warm up too.
- Squishing the dough through your fingers and making a crazy mess. Your dough is not slime and you’re not a kindergartener. Keep your fingers closed like a scoop and work gently with the dough so it’s not stuck all between your fingers.
4. Smashing the dough too hard while kneading and making it sticky. Watch the video and notice that the dough isn’t getting smashed across the counter. Press down about 1/3-1/2 the depth of the dough. If you mash it too hard you’ll have a sticky mess. Learn more about kneading dough in this post.
5. Adding too much flour when kneading. This is so common when you start. I challenge you to use no more than an extra 1/3 cup of flour when kneading. Only sprinkle small bits on and under the dough as you go. Adding more than 1/3 cup of flour will make your bread heavy and crumbly after baking. If you knead lightly you won’t need too much flour.
Common questions about Amish white bread
You can swap half the white flour for whole wheat and it will turn out fine. You can’t sub more than half though without needing a recipe written for the behavior of whole wheat.
I like King Arthur bread flour. All purpose flour works just fine, your bread just won’t be as tall because it doesn’t have as much gluten.
I recommend that you do. Some have made it without it and they say it worked, but I can’t help thinking they missed out on some richness and moisture that the egg gives. Unless you’re allergic to eggs, leave it in.
You need some sort of sweetener and sugar was the classic ingredient. You can swap in a light honey if you’d rather but I haven’t tested it.
Instant yeast and active dry can be activated the same way. If you are a beginner, I recommend using either one as instructed in the recipe and activating it in water. I do not recommend using pizza dough or bread machine yeast and I don’t have any experience with fresh yeast.
Emphatically, absolutely no. Salt is a must.
Homemade bread will last about 3 days on your counter tightly wrapped. Never store bread in the refrigerator. You can freeze it with great success though! Slice it if you choose, then shape it back into a loaf and wrap it well in plastic wrap and two layers of foil or use an air tight bread box. Freeze for 6-8 weeks. Thaw at room temperature, in the toaster a slice at a time, or thaw all of it at once.
For accuracy, measure your bread ingredients in grams
Americans are the worst for not using scales. We do everything in cups/volume. But for bread and most baking recipes, how you measure that “cup” of flour can vary widely. Humidity also effects flour as moisture is absorbed from the air making the amount of moisture in your dough unpredictable.
That’s why using grams to weigh your ingredients means everyone gets the same amount of each whether they are in the tropics or the desert. Weighing ingredients is the key to success. You can pick up a scale at any grocery store for about $12 or you can get my favorite scale .
Choose a loaf pan that heats evenly
Believe it or not, glass loaf pans are supposed to be the best for bread. I can’t guarantee it won’t stick though–so use some parchment paper to line it. This glass pan is ideal. I’ve used USA Pans for years and love their durability but they are made from coated aluminum and I’m trying to get away from using aluminum when I cook.
What your Amish white bread should look like at each stage
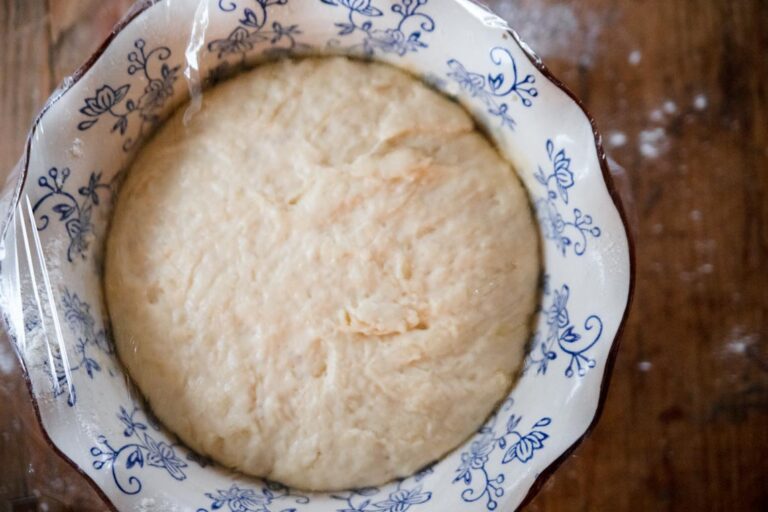
Wait until your dough doubles in size before kneading. Watch your dough and not the clock. If a recipe says it should take an hour but your dough hasn’t risen and you’re sure your yeast was alive, just wait. Your dough will do its thing soon enough.
Your dough should be kneaded until it reaches window pane–when you can stretch a piece of it and see a bit of light through it without breaking. This takes longer with all purpose flour. You can see window pane in the video but plan to knead for 10 to 15 minutes. Then let the dough rest about 5 minutes before shaping.
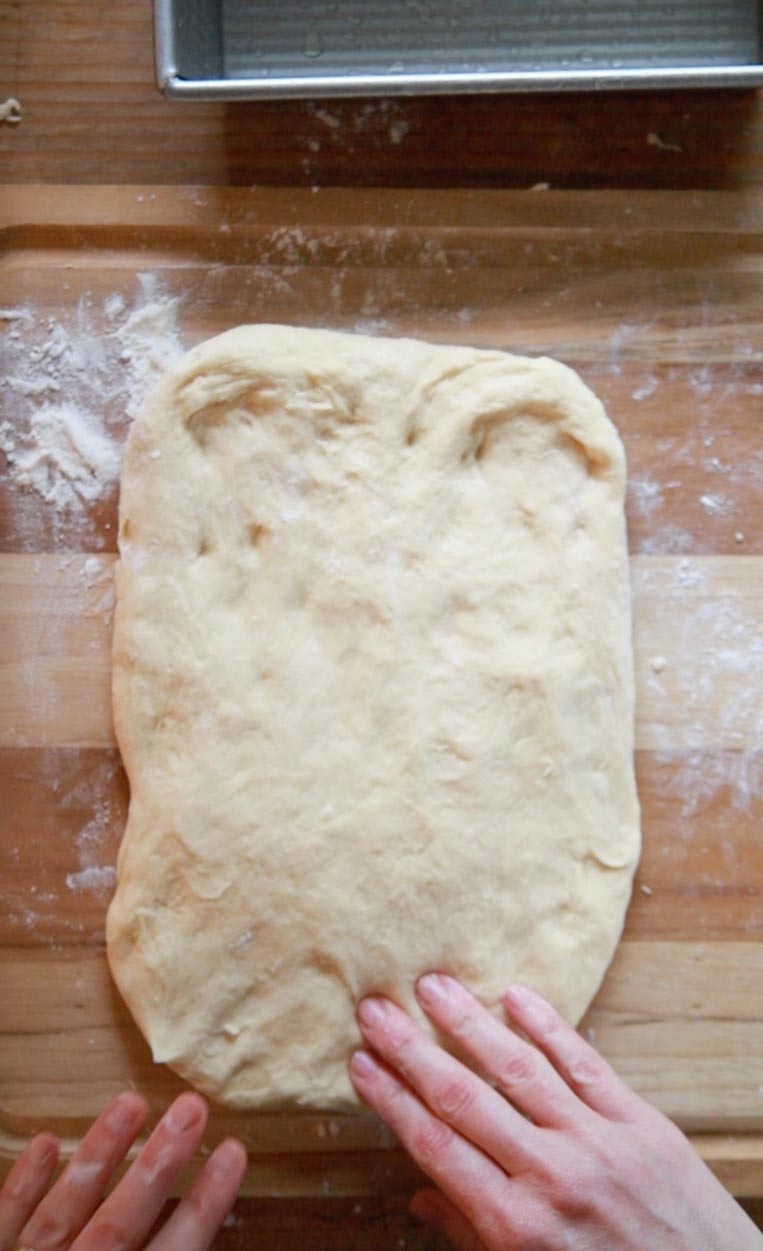
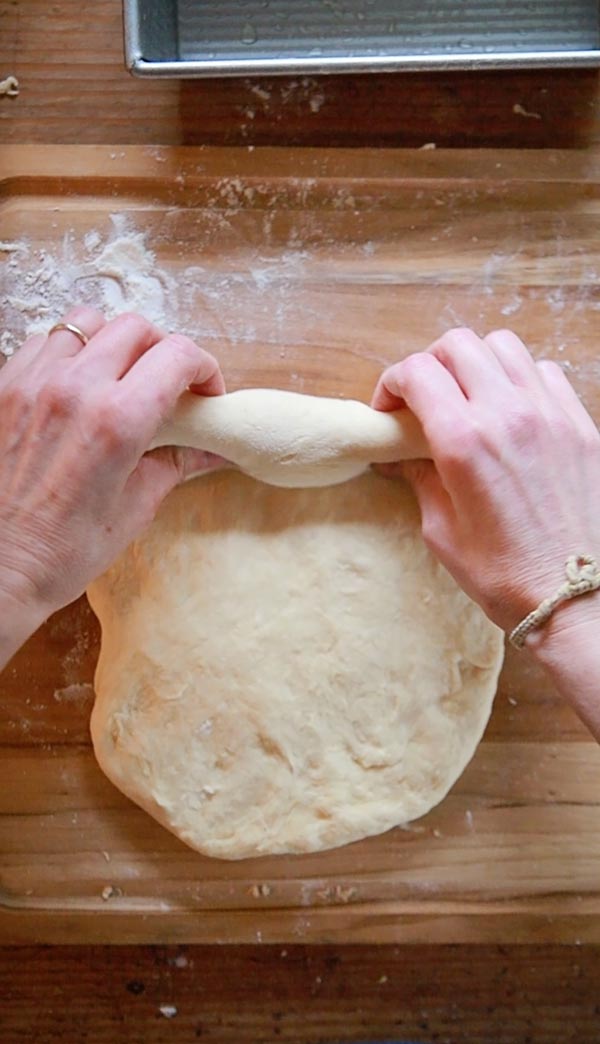
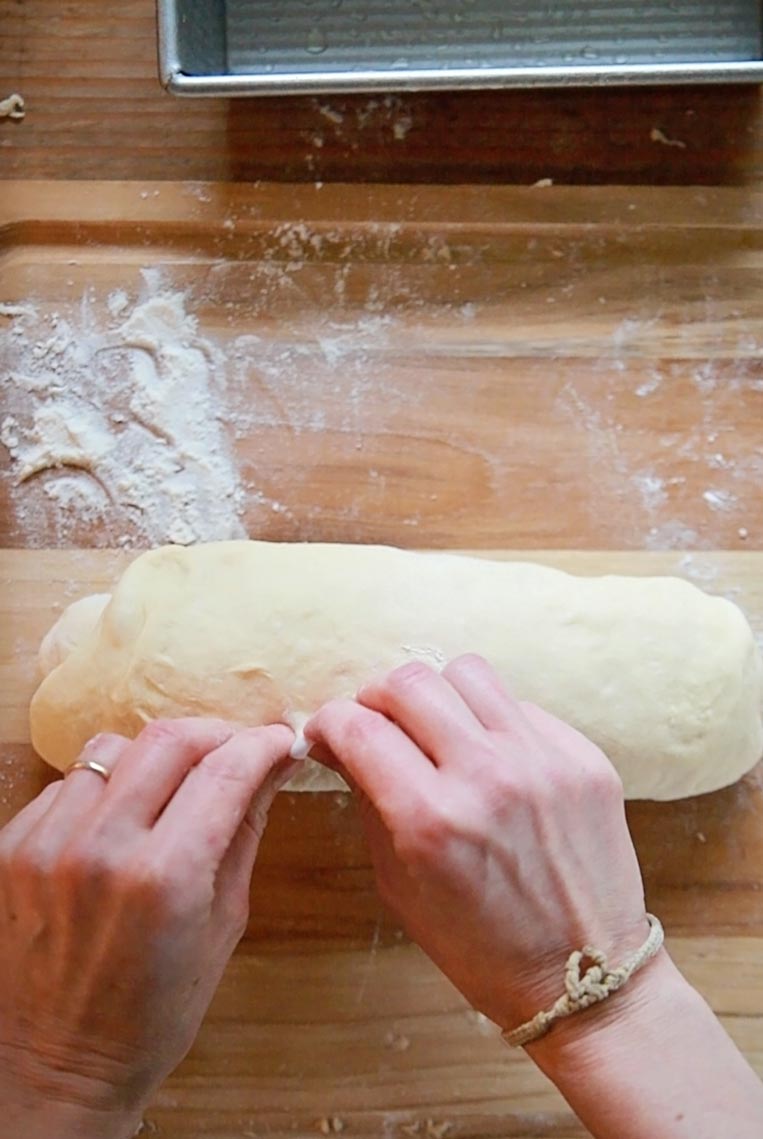
Press the dough out to a loose rectangle then roll it up from one end. Pinch the seam shut and place it seam side down in your baking pan.
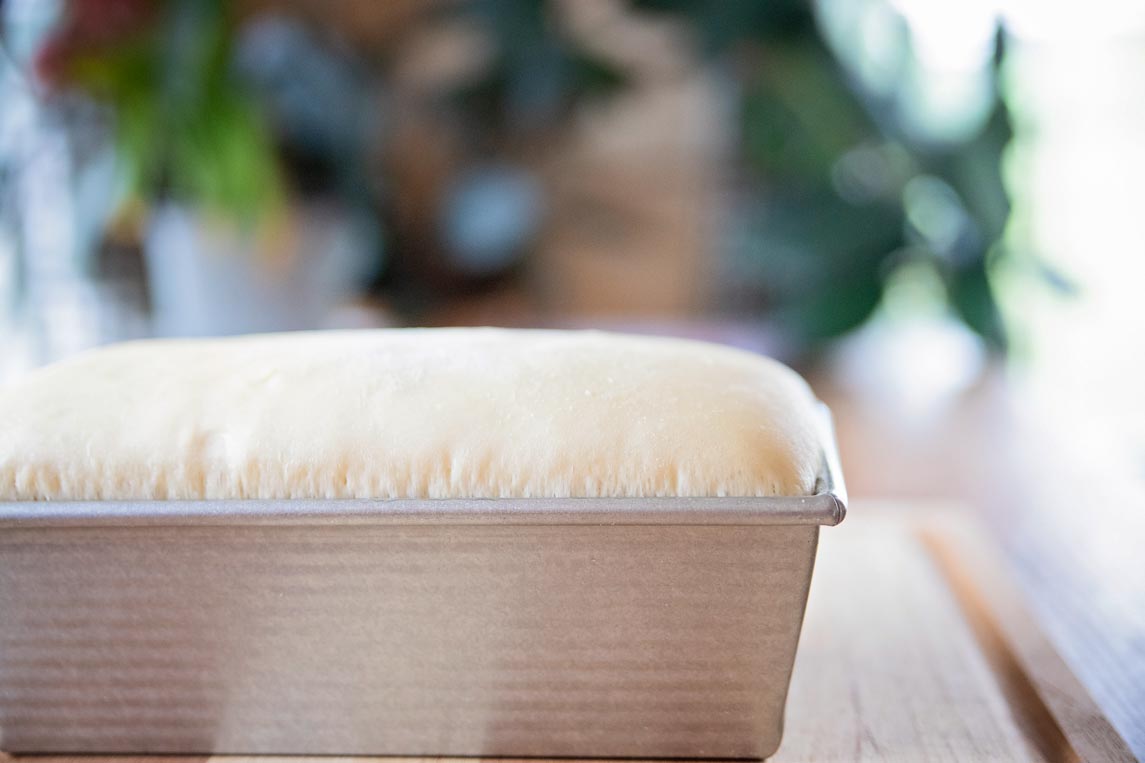
Let the dough rise uncovered until it’s about an inch above the rim of your pan or doubled in size. If you use a large loaf pan your dough won’t rise above the rim. If you decide to cover your amish white bread, use a damp towel or greased plastic wrap.
Take great care to make sure any cover doesn’t stick. Otherwise your homemade bread is ruined.
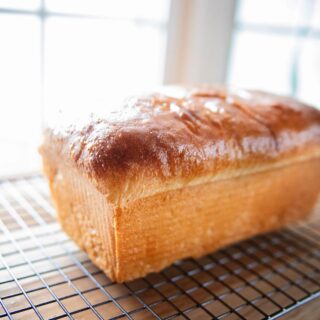
Bake your bread on the center rack in the middle of the rack (not pushed to the back or up near the door) for 25-30 minutes. You can take your bread’s temperature with a thermometer–it should read 190 or so if it’s done.
Tent your bread with foil during the last 10 minutes of baking if the crust is getting too dark.
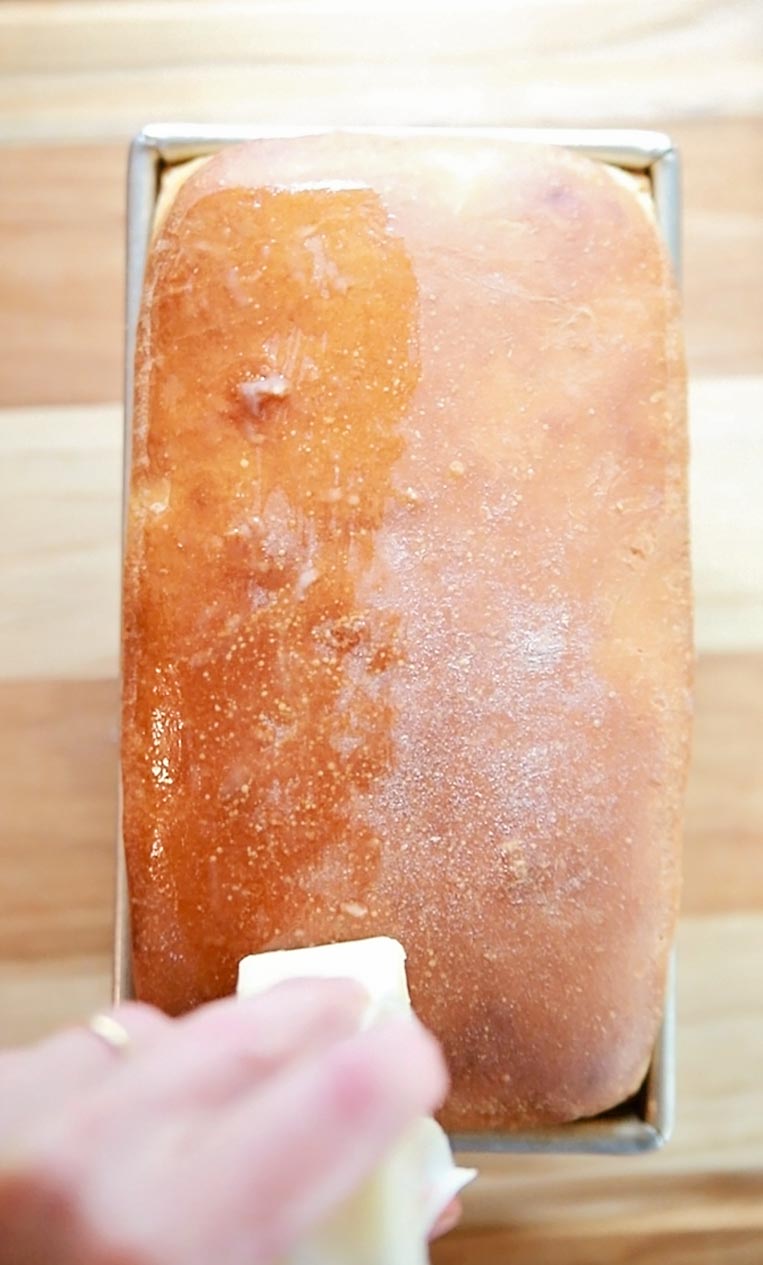
Let it cool 5 minutes then turn it out on a rack to finish. Rub it over with a stick of butter to soften the crust.
Ideas for using stale bread
Your homemade white bread will be heading toward stale in about 3 days. This really makes you think about all the junk in store bought loaves if they can last 6…8 weeks or more without molding. Gross! Make the most of your homemade efforts by using your stale bread too.
Stale bread makes amazing homemade croutons, or pulse your bread in a food processor and dry the crumbs out in a low oven (300 degrees) tossing often for bread crumbs. Store them in the freezer. Use bread cubes in an easy Panzanella salad so they can soak up the delicious flavors.
Other ways to use your Amish white bread dough
Soft Amish White Bread
Ingredients
- 1 cup lukewarm water (216 grams)
- 1 package active dry yeast (7 grams)
- 3 tablespoons sugar (50 grams)
- 1 egg
- 2 tablespoons flavorless oil (20 grams) I use avocado oil
- 3 1/2 cups bread flour (470 grams) all purpose will work
- 1 teaspoon fine sea salt (6 grams)
Instructions
- In a large bowl where you will be making your bread, add the water and yeast. Stir gently to combine and let it sit until you see some foam coming to the surface. This may take 5-15 minutes.
- Add the sugar and stir to combine. Add the oil and egg and use a fork to break the egg up.
- Add the flour and salt and stir to combine with a fork. Once it starts coming together, use your hands to work it in to a shaggy ball.
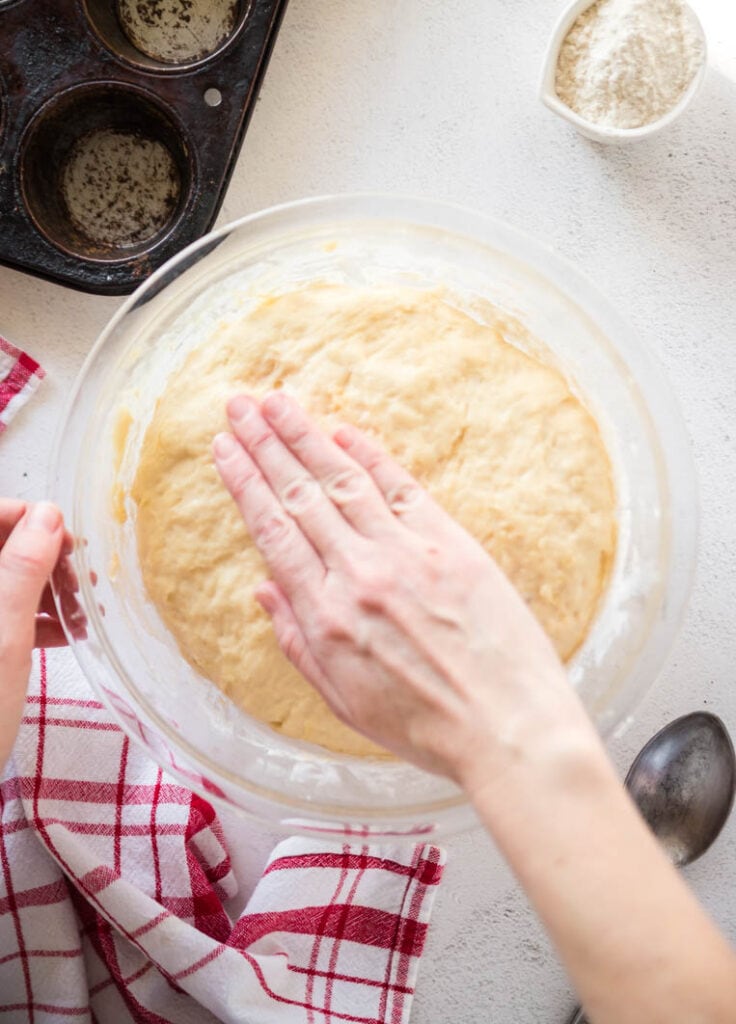
- Drizzle over a teaspoon of oil and pat it evenly over the surface. Cover with a damp towel or plastic wrap and let it rise until doubled in size. Just watch the dough and be patient but about an hour should do it.
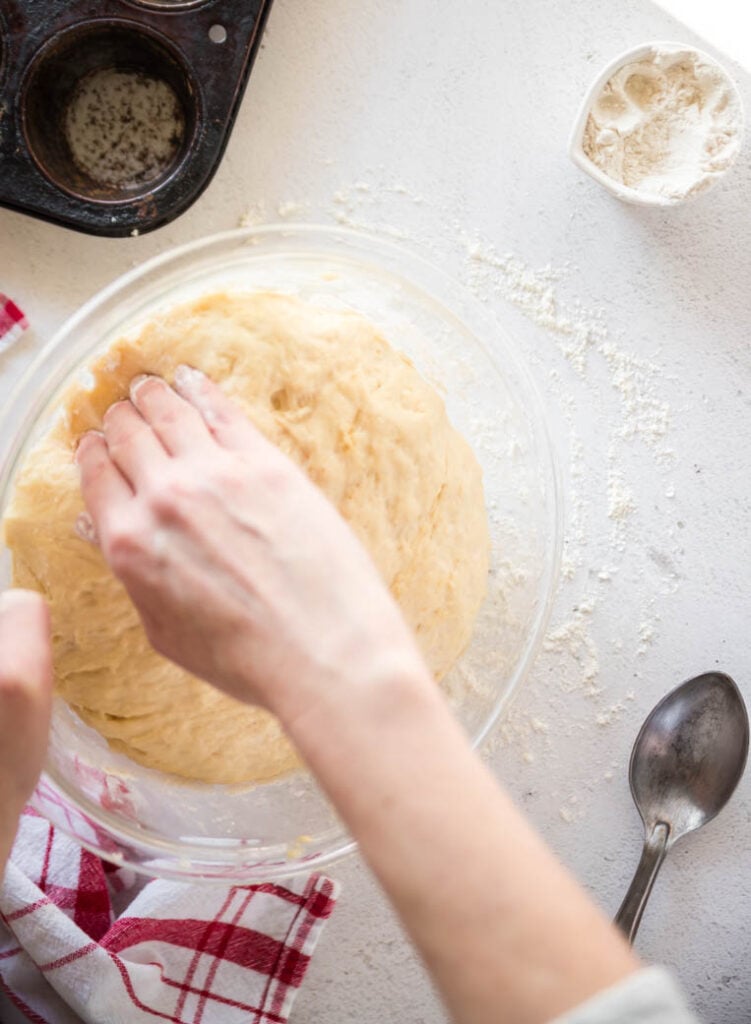
- After the dough doubles, sprinkle the counter with a couple of tablespoons of flour and transfer the dough to it by using closed fingers like a scoop to scrape it from the bowl.
- Dust the top with another tablespoon of flour and knead the dough, sprinking the top and bottom with no more than 1/3 cup of flour until it is stretchy and you can see a bit of light through the dough when it's stretched–about 10 to 15 minutes of kneading.
- Let the dough rest five minutes then use your fingers to form it into a rectangle about as wide as your loaf pan. Roll it up like a sausage and pinch the seam closed. Place it seam side down in a greased and parchment paper lined loaf pan.
- Let the dough rise uncovered (see note 1) until it rises 1- 1 1/2 inches above the rim of the pan. About 45 mintues to an hour.
- 15 to 20 minutes before the bread is finished rising, preheat the oven to 400.
- Bake the bread on the center rack in the middle of the oven (not in the back, and not up near the door) 25-30 minutes. Tent with foil for the last 10 minutes if your bread starts to get too dark. You can take the temperature of your bread–it should be about 190 in the center when it's done.
- Transfer to a rack to cool 5 minutes in the pan, then turn it out and brush the top with butter for a softer crust. (Optional)
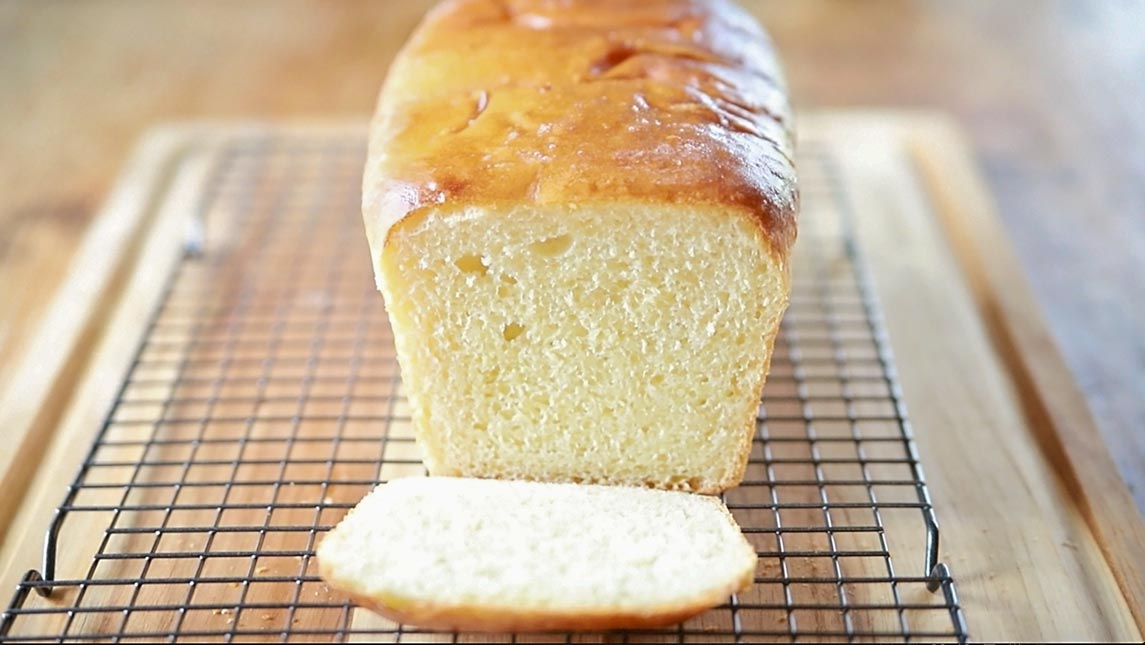
- Let the bread cool before slicing for the best texture inside.


Thank you for sharing your recipe! I am a novice bread baker and this was my first attempt with kneaded bread! Your recipe was very easy to follow! I even used a sprouted whole wheat flour that I bought from Nuts.com ! First attempt and it was awesome!
Robc2093@gmail.com
I made several bread loafs and none came out any good about average, When I made your recipe I knocked it out of the Park it was absolutely the best!!! Thank You! It was really good. Thank You Again.
Great job Robert!!
Thank you for your accurate step by step video. You are so thorough with your explanation. A relative of mine has just finished his Cancer treatments and he told my Father that all he is craving is my Grandmother’s homemade bread. I found your video and I am sure that this recipe will make him more than happy. Wish me luck!
Oh my husband is just finishing chemo himself. I know those food cravings can be major. I hope he loves the bread. –Rachel
Tried this recipe for 2 loaves, and I did everything by grams except the flour. Figured out after I made a mess that your grams measurements do not change from a single loaf so I ended up doubling the flour and having everything else be enough for one loaf. Idk if you can change that some how.
Hey Erin, You may have to clarify for me a bit here. What do you mean “the grams measurements do not change from a single loaf”? If you tried using the 1x 2x 3x buttons at the top, you’re right. The gram measurements are added in the notes area to the side and the computer will only increase the measurements to the left. You would need to simply do the math on the grams and double them manually. I know sometimes when I’m doubling a recipe I can get part way through and forget I’m doubling and end up with some things out of whack. If that’s what you did, just try again and write down your doubled measurements. –Rachel
I have tried numerous recipes to make bread that has the same texture as sandwich bread and could not find one that worked. Until now. This loaf turned out perfect. Living at 4800 ft., I added a couple extra tablespoons of water as we have very low humidity. I also have to agree that measuring in grams is much better and easier if you want to multiply or cut back the amounts. I also used rapid rise yeast and it worked fine. I bought a scale and always use it when measuring flour for baking. This recipe is a keeper.
I have rapid rise fast acting yeast, what do i do?
Hi Debbie, I cover the use of fast acting/rapid rise yeast in the commonly asked questions area of the blog post. You can check that out for all the details. –Rachel
I made this for the first time yesterday and the bread taste amazing! It’s very soft, but it is crumbling quite a bit. Could overcooking cause this? Any insight would be helpful, thank you!
Hey Leslie–Yes I’d say over baking is the most common cause of crumbling. If you have a thermometer, it’s best to take your bread’s temperature and take it out of the oven at about 180 degrees or so. It can also crumble and be dry if you sliced it hot. The steam needs time to set the texture of your bread so let it cool totally before slicing. –Rachel
tried your recipe for this bread, came out excellent, what a delight, thankyou. norm
Can his recipe be made in a stand mixer?
Hey Laura, it can as long as you are confident reading the dough and know when to stop mixing. New bakers often over work dough if they aren’t sure what they are doing and I always recommend starting with hand kneading first until confidence builds, but yes, it can be made in a stand mixer. –Rachel
Hi there
How do I change the method if I use fast action yeast which goes straight into flour ?
Hi! That’s covered in the common questions section of the blog post. You can take a look there and it will guide you. –Rachel
I have a question…. can I leave the dough to rise for longer than the recommended time? If I’m out doing errands can it rise for two hours instead of one hour and still be okay? Have baked this bread many times now and it is my regular morning toast. Love your clear directions…. and reassurance.
Yes you can, but only during that first rise. You really can’t hurt it too much by letting it rise for two, even three hours but on that second rise you certainly can ruin your bread if you let it rise too long. Put your dough in a cooler location in your house if possible if you are going to let it rise longer and the temperature will slow how fast it rises. 🙂 –Rachel