
Easy Yeast Rolls
Just a dozen easy yeast rolls? You got it. No more, no less, and all the easy steps you need to make light, airy rolls anytime you need them.
This recipe was originally published in March, 2014
Yeast rolls seem like they terrify way too many people. Are you one of them? Or maybe you’ve been searching for the softest, most flavorful easy yeast rolls that don’t make a blue ton or use 3 pounds of flour to put together.
You just need 12!
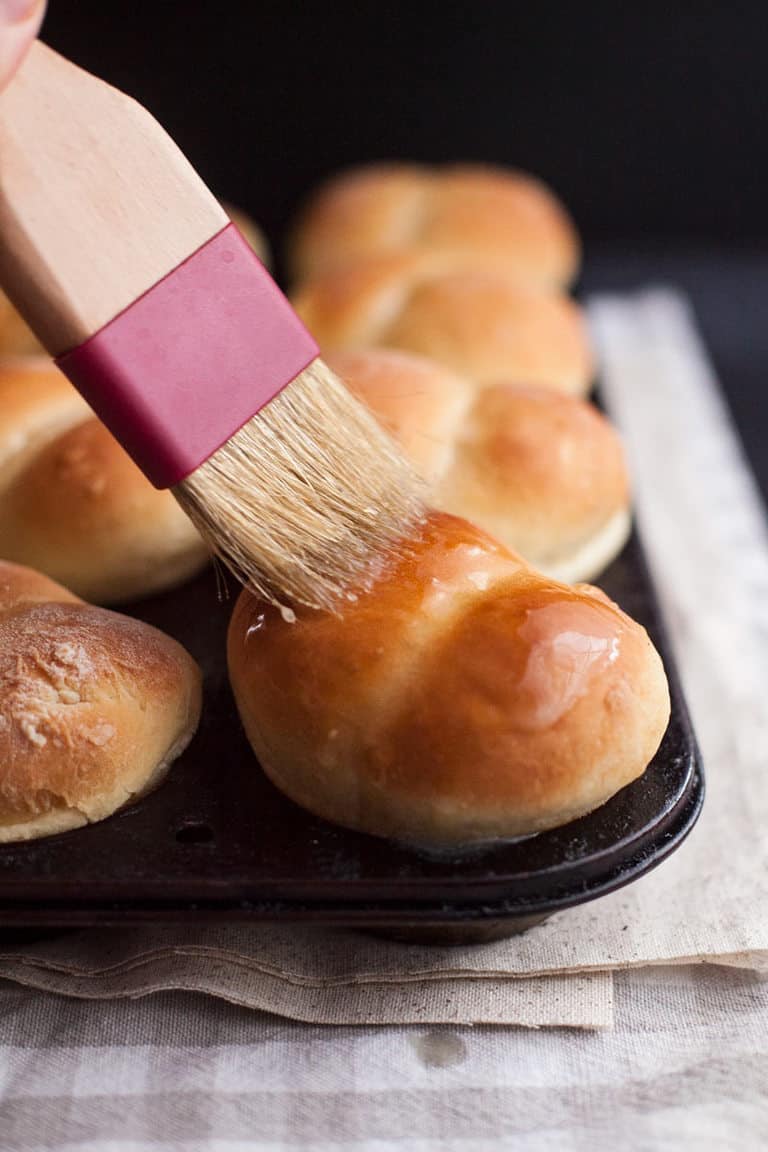
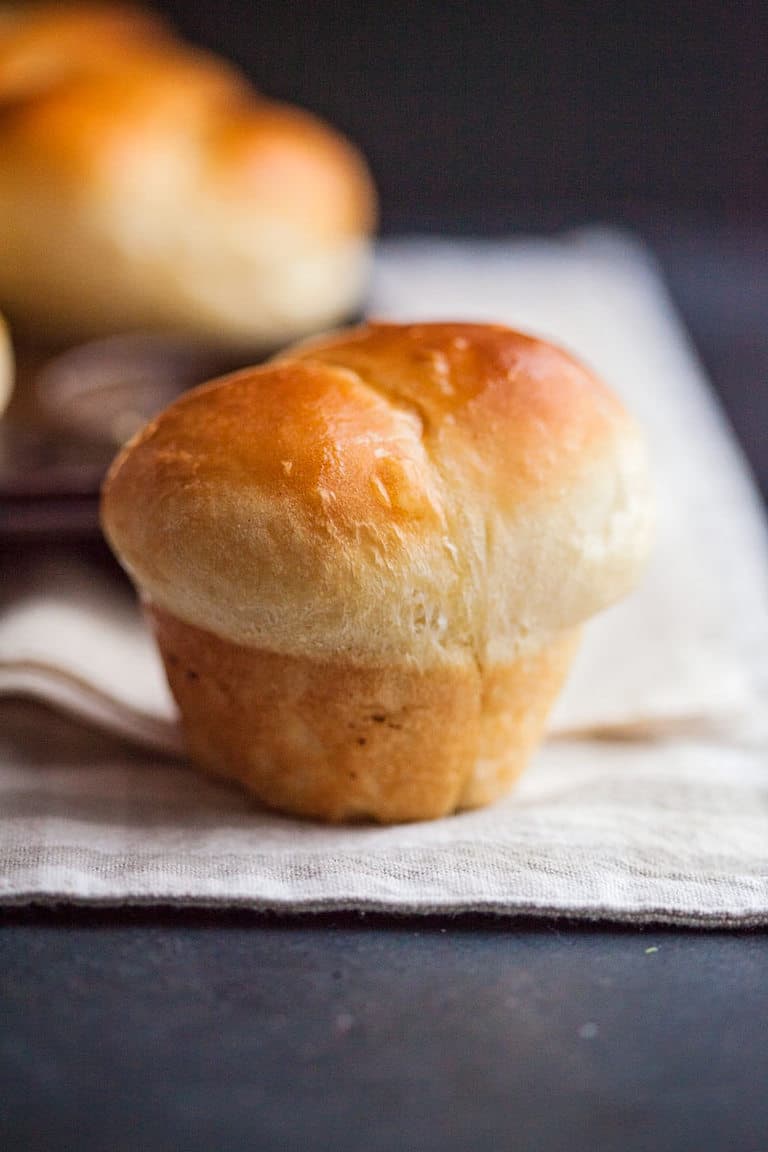
No matter what your situation, these easy yeast rolls will do it. This version is made by rolling two balls of dough about 2 inches in diameter and putting them side by side in a muffin tin to rise. That’s how you get the split down the middle. We called these butt rolls growing up. You can see why obviously.
If you don’t want to roll balls, just put them in the muffin tin in one larger ball or place them in a round cake pan barely touching–that’s another easy way to get your easy yeast rolls done with less fuss.
They’ll emerge from the oven so soft, warm and begging for a smear of butter and jam.
How to make these easy yeast rolls
- You’ll have to tackle yeast. Yes, I know. But you can do it. If you need some help, check out my post on how to activate yeast. It takes about 5 minutes. You can handle it. You can also watch me activate yeast on YouTube.
- Over the years I’ve tried a lot of flours–and a lot of brands of flours–to find one that works best. I actually find that the cheaper the flour is, the better it works, resulting in a lighter dough. If you want to use just all purpose flour, my favorites are King Arthur, Aldi’s flour or Hogsdon Mills from Walmart. I do not recommend Pillsbury or Gold Medal by any stretch.
- Bread flour is also excellent here and something that I really just started using in the last year and a half or so. I really like it here–it has more gluten in it and gives your dough more structure as it rises and I think the the yeast rolls are lighter. I like King Arthur for bread flour. You could also do half all purpose and half bread flour if you wanted to go that route.
- Avoid working too much flour into your dough when you knead it on the counter. A little stickiness won’t hurt anything. Keep your hands floured and avoid dumping it on the dough itself.
- If you want a stronger yeast flavor in your dough, let it rise in a cooler area for longer–the yeast will develop more fully and give you that signature flavor.
The difference between active dry yeast and instant yeast and how to swap them
There have been tons of questions about the difference is between active dry and instant yeast. This recipe calls for active dry yeast which needs to be activated in warm water before using it. I use active dry yeast because it was the standard type of yeast developed before instant and most time trusted recipes are written for that type–but one isn’t necessarily better or worse than the other.
Instant yeast can be activated in water OR it can be added dry right into the flour or dry ingredients and then added to your recipe. Instant yeast does not rise faster than active dry despite the “fast rise” on the package.
If you only have instant yeast on hand
If you only have instant/rapid rise yeast on hand, add the water (warm) that’s used in the recipe in with the eggs and oil. Then open the package of yeast and add it into the flour before adding it to the recipe and proceed as the recipe instructs.
Remember: Instant yeast can still fail
Just because you don’t have to activate instant yeast doesn’t mean it will just automatically rise. Your water must still be the correct temperature (luke warm) and your other ingredients needs to be room temperature as well. Too cold and the yeast still won’t wake up and leaven your rolls.
Not looking to work with yeast? Try my no-yeast quick rolls and give either version a big smear of my slow cooker apple butter.
How to develop a stronger yeast flavor
Yeast doughs develop flavor while they rise. The longer the rise, the more yeasty flavor that will develop. In order to do this, rise your dough in a cool location.
70-80 degree rooms will produce a doubled dough in 1 to 2 hours but to boost flavor, try moving your dough to a cooler part of your house or even a garage or closet that’s about 60 degrees until it doubles in size.
You can rise the dough in the refrigerator but only until it’s doubled–3 to 4 hours.
Can I rise the dough all night in the refrigerator?
Not in this case. I’ve tried it and the yeast amount is too aggressive for a long slow rise resulting in the digestion of all of the gluten in the flour. When morning comes you have a soup of sloppy dough you’ll have to throw out.
If you want to do an overnight or refrigerator roll, you’ll need a recipe written specifically for that process.
Watch me make these rolls on YouTube
Get instructions for this recipe as a loaf of bread here.
How to make these rolls ahead
Freeze them unbaked
The best way to make these ahead is to do the first rise, shape the dough, then freeze the dough balls on a cookie sheet or in the baking pan you want to bake in.
When you want to bake, remove from the freezer, place the dough balls in a greased muffin tin (if you didn’t freeze them in it) and cover with greased plastic wrap. Let the dough rise until doubled which will take 6 to 12 hours then bake.
Freeze them already baked
You can also bake the rolls and freeze them in an air tight container then wrap them in foil and reheat in a low oven for 10 to 12 minutes.
Homemade Yeast Rolls
Ingredients
- 1 cup water about 110 degrees or just slightly warmer than lukewarm
- 1 package active dry yeast *see note 1 for using instant yeast instead
- 3 tablespoons granulated sugar
- 2 tablespoons flavorless oil I prefer avocado but vegetable or canola also works
- 1 egg at room temperature
- 3/4 teaspoons salt
- 3-3 1/2 cups all purpose flour
Instructions
- In a large bowl, dissolve the yeast in the warm water.
- Add the sugar, oil, egg, salt, and half of the flour and mix until just combined.
- Add one more cup of flour and mix until the flour is combined again.
- Add between 1/2 of a cup to 1 whole cup of the remaining flour as needed until the dough comes together and is soft but not gooey. (Usually takes about 3/4 of a cup for me, but will depend on weather and humidity)
- Spray the top with cooking spray and cover with plastic wrap.
- Allow to rise in a warm place for one hour or until doubled.
- Turn dough out onto a floured surface and knead 4 or 5 times until the dough is slightly smooth.
- Spray muffin tin with cooking spray.
- Pinch off balls of dough about 1 1/2 inches in diameter and place two in each muffin tin side by side.
- Allow to rise about one hour more until doubled again.
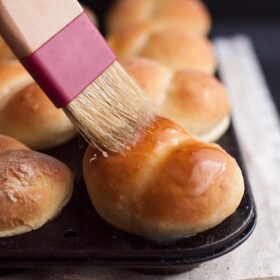
- Bake at 400 for 12-15 minutes and brush melted butter over the tops when you take them out of the oven.


Ok,so a single guy attempting thanksgiving dinner like mom and my big momma made and no feast is complete Without Yeast Rolls And Due To Covid We Must Make Roll; so thank U And Happy Thanksgiving To U And Ur Family.
Same to you KO!
first time I ever tried making rolls, thank you!
I hope you loved them Carol! If you tackled this, you can do anything! -Rachel
I use a bread maker for the whole process. Can you use the same recipe.? The only difference is you add all wet ingredients, to the container first then the dry ones and then the yeast on top. I would love to see some recipes for the bread maker.
Oh and if you add more surger will it give bread a more yeasty taste ? Thanks
Linda I’m zero help on this because I’ve never touched a bread maker in my life. I do it all by hand. I can tell you though that adding sugar won’t increase the yeast flavor. Only time and a cooler, slower rise will do that. Maybe another reader can advise you on the machine. –Rachel
Great technique and beautiful aroma of the ingrediants only to be rewarded with the soft and tasty texture of this loaf bread. Nice one, thanks!
Glad to hear it Sam!
Rachel, love your videos. Made the yeast rolls and followed your instructions exactly.. but I didn’t get the taste Or smell of the yeast that I have tasted in other yeast breads.. any suggestions?
Hey Melody, really? Well, you can always make the yeast flavor stronger by slowing down the rise times. If your house was very warm and your dough rose quickly then there’s just not time for the yeast to develop much flavor. Try placing your dough in a cooler place for the first rise and see if you can prolong that time. Even in to the fridge for a few hours would be fine. You may also like more salt or sugar in your recipe based on your personal preference. You can add a tad more of either without any issues. Let me know if that helps. –Rachel
I made this recipe as a loaf of bread. I added half a cup of sourdough to the mixture. It came out great. I wasn’t sure it would work. It’s a keeper.
Thanks,
Bonny
Hey Alison, did the sourdough starter add much to the flavor? I can’t imagine it would but tell me about it! –Rachel
It didn’t add much flavor, but I always have sourdough starter on hand. I think when you add the sourdough it’s a good carbohydrate option because of the low glycemic value. –
Only if it has time to work it’s fermentation. (I teach and eat exclusively sourdough) and it won’t give you any health benefit without 12-24 hours to break down the wheat. Good for a bit of tangy flavor though perhaps… –Rachel
I watched your video twice, followed your advice and made a loaf of bread. The crumb was good, the loaf was well shaped and tall and it makes the best toast. I would consider it a great success, except the top was too dark, maybe slightly burned. The bottom and sides were a beautiful color. Any ideas?
I love your concepts and your work. Anxious to fix this problem and move on with more of your recipes and ideas.
Kathleen there are a couple of simple adjustments you can make. First make sure you bake your bread on the center rack and closer to the front of the oven (the back is hotter). Once your bread is golden brown, cover it with a tent of foil for the remainder of the bake time. It will be perfect! –Rachel
Thank you so much for this recipe! I followed your video through out the process of making my bread( I made a loaf instead of rolls) although it tasted absolutely delicious, I am curious why my consistency was more crumbly (The loaf does hold its shape and doesn’t fall apart there is just a lot of excess crumbs when cutting and eating) than yours. The only thing I did different was I used half the sugar.
Any Advice would be wonderful!
Thank you again,
Caroline
There are tons of factors to consider. The first is the flour you used–what brand and type was it? Also bread can be crumbly if the moisture ratio was off (that takes practice to get right) or it gets over baked and dries out. Also, while the sugar isn’t a deal breaker, remember that sugar isn’t here just for sweetness but it is part of the rise and structure of baked goods–a lot of people think we throw it in for kicks but it has a scientific role to play as well–especially in items like cakes and muffins. Let me know how I can help further! –Rachel
Rachel,
I was using wholes foods 365 organic bread flour ( was the first bread flower I saw in the isle) my bread was definitely more on the moist crumbly side. I am going to make it again tomorrow and I Will let you know how it Goes with the full amount of sugar. I am also second guessing if I used the whole amount of flour or not. I will keep you posted!
Thank you again!
Moist and crumbly, huh? Usually if it’s crumbly it’s because it’s dry. Hmmm…try again and follow the recipe fully then we will troubleshoot again.
Thank you! These yeast rolls were easy and damn delicious! This is my first experience with yeast rolls but it won’t be my last. These rolls were easy to make and smelled delicious while baking. This is definitely in my dinner rotation. Quick question: can these be frozen?
I always make double rolls and freeze. So far i have had luck freezing up to 2 months in air tight ziploc bags. Take one out microwave for 30 seconds taste like I just baked. Honestly it keeps be from over eating as i love homemade rolls and breads. ? ok it helps. Sometimes i still cheat and get two out ?
Many people do not realize grocer bakery bread comes in as frozen dough or prebaked and frozen for them to bake or thaw and sell. My sister supervised a large chain grocery bakery for many years. She educated me.
I watched your video on making bread and i must say my first loaf came out beautiful. I have a question and that is how can i make the inside a little less heavy or a bit more fluffy or light. New to this but i love to putz in the kitchen and was always afraid to make bread, not any more.
Thank you and if you can offer any advice please let me know.
Bob
Hey Bob, bread is usually heavy because of two possible causes 1) it was overworked/kneaded or 2) (more likely) too much flour was added to the dough during kneading. How much flour do you think you added during that process? –Rachel