
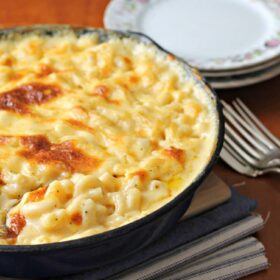
Baked Macaroni and Cheese
Baked macaroni and cheese doesn’t have to be complicated with layers of ingredients to be the soul-warming food you crave. This homemade baked macaroni and cheese is my most favorite and has pleased crowds, small families, kids and picky eaters alike–give it a try and you’ll see why.
Jump to Recipe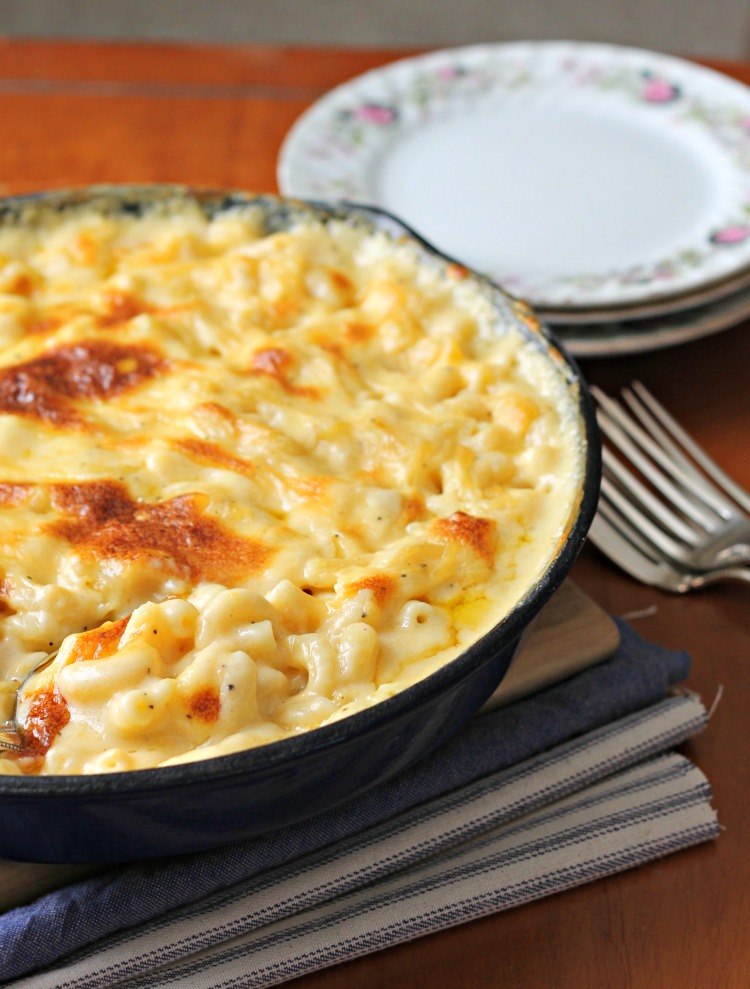
Key Takeaways
- Stir constantly so the sauce doesn’t split and keep the heat down low.
- Use strong flavored cheeses like Swiss and sharp cheddar grated from a block and never bagged pre-shredded.
- Make sure to taste the sauce before baking and adjust with more salt or a dash of red wine vinegar to your preference.
- You can make this mac and cheese up to three days in advance and bake it later.
- It will get dry and mushy in a slow cooker. I don’t recommend one.
- Prep and bake later: Just let it cool down, put some plastic wrap right against the surface of the mac and cheese (to keep it from forming a skin) and stick it in the fridge. When ready to bake, cook until the edges are bubbling and the center is warm.
- To freeze: Can’t freeze it.
Other tips:
- Never stop stirring your milk once it hits the pan. If your skillet is too hot or you walk away and for a minute you could scorch the white sauce and it will curdle. It doesn’t really hurt the taste, but it will look sort of clumpy. Some readers have called it “grainy”. It only takes 5 minutes. Just hang out and stir until that sauce is thick enough to coat the back of your spoon.
- Use good cheese in your baked macaroni and cheese. That means avoiding bagged, pre-shredded cheeses because they contain cellulose (an anti-caking agent) that can cause your cheese not to melt as it should.
- Try to choose a melting cheese and a flavor cheese for the best flavor and texture in your baked macaroni and cheese. Sharp cheddar and Swiss are my favorites but you can go as bold as you want!
- Taste as you go. Taste your cheese sauce before you add your pasta. Is it bland? That can be because of the cheese you used or even the kind of salt you seasoned with. If it doesn’t have enough flavor, add a pinch more salt, stir it in and taste it again until it suits you.
- Feel free to add more pasta if you want to. Some people say that this recipe doesn’t have enough noodles in it, but I’ve never had that problem. And yes, you should cook your pasta before adding it to the cheese sauce.
Try a dash of vinegar for more zing
Because of the fat in the dairy, mac and cheese often needs some acid to bring the flavors to life. I love adding 1-2 teaspoons of red wine vinegar to the sauce before stirring in the pasta. Avoid strong vinegars like apple cider or white distilled.
To measure the pasta: Please follow the volume instructions and measure your pasta dry in a measuring cup meant for dry items (not a liquid one). Small pastas like ditalini or little wagon wheels can go up to about 2 cups and be fine in the recipe, and large ones like bow tie or cellentani can as well. If you will stick to elbow pasta until you get the hang of things you’ll be better off.
To double, triple or quadruple: Simply multiply the recipe below (look for the 1x, 2x or 3x on the right side of the recipe to double or triple the ingredients). Then place it in a 9×13. The bake time should be close to the same. Just bake until the center is hot and the edges bubble.
Other macaroni and cheese recipes you’ll want to devour:
- Lobster mac and cheese
- Spicy baked macaroni and cheese
- Creamy ham and sage macaroni and cheese
- Three cheese stovetop ultra creamy mac and cheese
- The best baked macaroni and cheese with tomatoes
- Truly easy microwave easy mac and cheese
- Super Creamy gluten free mac and cheese
Baked Macaroni and Cheese
Ingredients
- 1 1/2 cups dry elbow macaroni shells or cavatappi
- 3 tablespoons butter or margarine
- 3 tablespoons all purpose flour
- 2 cups milk not skim
- 1/2 teaspoon each salt and pepper
- 2 cups shredded cheese I like 1 cup each of sharp cheddar and Swiss
Instructions
- Preheat oven to 350 degrees.
- Bring a pot of water to a boil; add a generous sprinkling of salt the pasta.
- While the pasta cooks, melt the butter in a skillet or pot large enough to hold the pasta when it’s done.
- Add the flour and stir over medium heat until the mixture is lightly browned; 1-2 minutes.
- Add the milk and whisk to remove any lumps and add the salt and pepper.
- Cook over medium-high heat until the sauce thickens and starts to bubble. About 6 minutes.
- Stir in the cheese and whisk until smooth and melted. Turn off the heat.
- When the pasta is almost done but still firm, drain it and add to the sauce.
- Stir the pasta into the sauce and bake in a greased 2 quart dish (or an 8×8 pan works pretty well) 20-25 minutes until browned and bubbly. You can also skip baking it if you want it super creamy and just put it under the broiler to brown the top (keep an eye on it) and then serve.


This is yummy, but I have to agree; mine had a slight grainy texture as well, and I was very diligent at tending my roux. I also did 2 cups of noodles based on other comments and I’m glad I did.
Losa, sometimes it’s just a heat issue. I say try again and turn the heat down a little more. It’s about the temperature of the milk getting too high too fast, so if you had your heat up (even if you stirred the whole time) it may have just gotten too hot. Give it another go soon! –Rachel
Easy and delicious! I used 2 cups elbow macaroni and added a pinch of cayenne – everyone loved this mac-n-cheese. Thank you for the quick and inexpensive recipe!
You’re very welcome Laura!
I love Mac and cheese, but never had a great recipe for it. I’ve searched and searched. The recipes either had the wrong taste, weird texture, or just not worth the effort. I’ve tried versions for the stove top, crock pot, and Instant Pot. Finally, this recipe is a winner! I’m seriously thrilled over this Mac and cheese!
Denise, I love you. 🙂 I appreciate your honestly about all the ways you can mess up a good mac and cheese because I was beginning to think I was the only one who found some of those versions you listed as gross and boring. But most of all, I’m so thrilled that you are thrilled! Keep making it and experimenting with it. You’ll find even more ways to love it. –Rachel
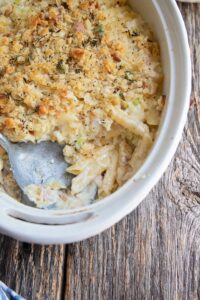
I agree, great receipe! This is so much better than the store box Mac and cheese. I did turn off the heat when I added the cheese. This prevented the cheese from over cooking and get grainy. I also added more cheese/panko on top before baking. Thank you for sharing.
What if you only have 2% milk
That’s what I usually use and it works just fine!
I made the original recipe and Gluten free. They were both really yummy! I have not had mac and cheese in about 10 years… I followed your advice and used cornstarch instead of gluten free flour it took more time to thicken but it was worth it! Thank you for the recipe!
Yes Tina! I’ve made this gluten free as well and we like it too. I’m glad you enjoyed it–10 years without mac and cheese is a long time. 🙁 I’m glad you found a version you can make now. –Rachel
The best Mac n cheese I have ever eaten!
Thank you for sharing.
Carol R, Massachusetts
Carol, thank YOU for saying so! I’m so glad you enjoyed it! –Rachel
Hi! I would like to know what cheeses could be better and if I can bake it in a aluminum foil tray. Thanks!
Glory are you asking what cheeses are best? I always recommend sharp cheddar (not extra sharp) and Swiss. And yes, a foil tray is fine but you may want to double them up or put it on a cookie sheet because those trays get pretty flimsy when they heat up and picking it up out of the oven can get dangerous. 😉 Enjoy! –Rachel
I love this recipe. We had an hour to make something for the Broncos game and we chose this. Best choice ever! Really simple and I used heavy whipping cream with a little bit of milk and it is soooooo creamy and good. You have to taste it as you go to see if it needs more seasoning. I used sharp cheddar and pepper jack cheese it was so good. I will make this all the time. Thanks Jessica
Ah man Jessica–football and good mac and cheese. Sounds like a nice evening at home to me! And you are right about tasting it for seasoning. Thank you so much for saying that. I’m glad you caught on to that. I hope you will make it all the time–come back and see me again soon okay (and try some other stuff!). –Rachel
Very easy and delicious. No need to go to the grocery store for fancy ingredients!
Nope nothing fancy needed Susan–I think that’s why it’s so good! –Rachel
I made this exactly as it said. For some reason, the only way I was able to achieve the golden brown crust was by using the broiler option… Not sure why, but o my goodness it was so good! I added a touch of garlic and onion powder to mine… Yum! Thank you for a great recipe, I will never make boxed again! So many things I can do to this!!
That’s perfectly fine to use the broiler Tiffany. Originally this recipe called for a 40 minute bake time which was plenty to get that top golden brown but I decided to shorten that down some after people complained that they lost a lot of the creaminess. That means that it does get a bit less golden brown in just the oven. But either way you made it work and that’s so exciting! Thank you for letting me know and come back soon! –Rachel