
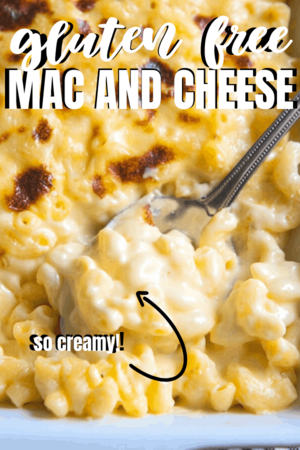
Super creamy gluten free mac and cheese
Craving gluten free mac and cheese? There’s no reason to miss out on the just because you’re skipping gluten. I’ve been making this variation of my most popular baked mac and cheese for years so get ready to celebrate everything you love about this homemade classic made just for you.
Jump to Recipe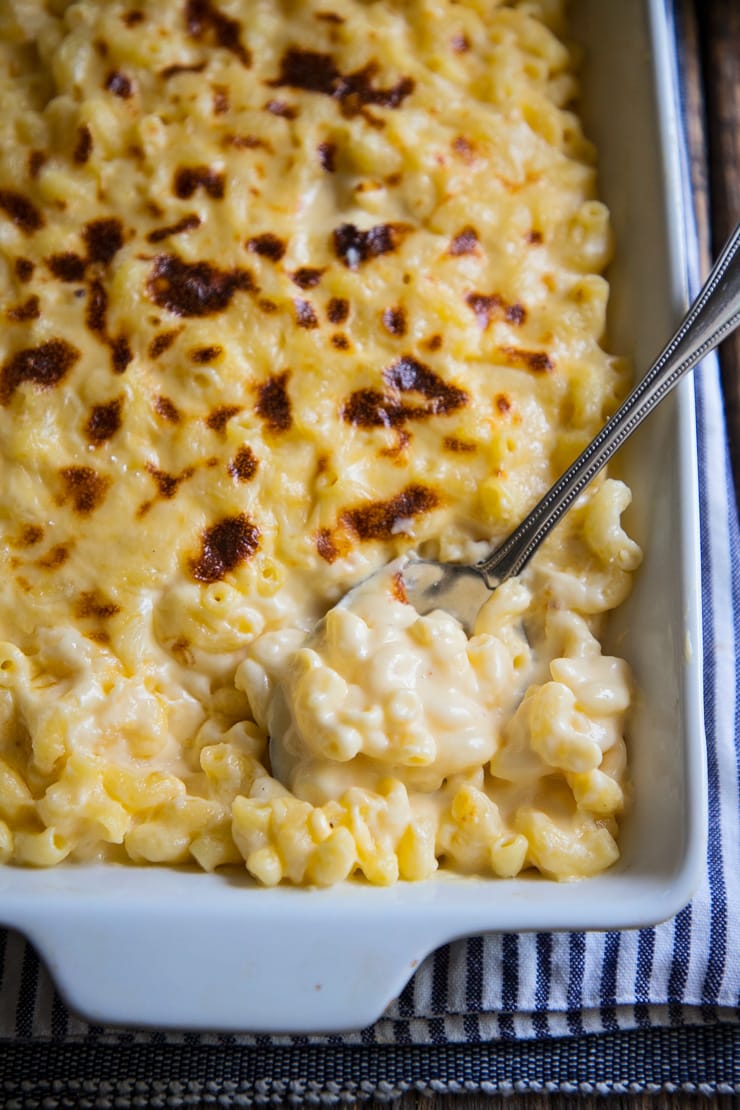
If you’ve tried to buy a good gluten free mac and cheese at the store, your options have been mostly pre-packaged foil squeeze pouches over gluten free noodles or something frozen and they are all–eh. Not only do they not taste great, they are still full of preservatives, additives and flavors we don’t need.
Instead, indulge in a version that’s truly creamy (almost too creamy for me but we’ll get to the tweaks in a second) and free from that curdled “there’s an egg in this” appearance a lot of baked versions have. I hate that.
You should be able to have a homemade version that no one–and I mean not one single soul–should be able to detect as any different than traditional.
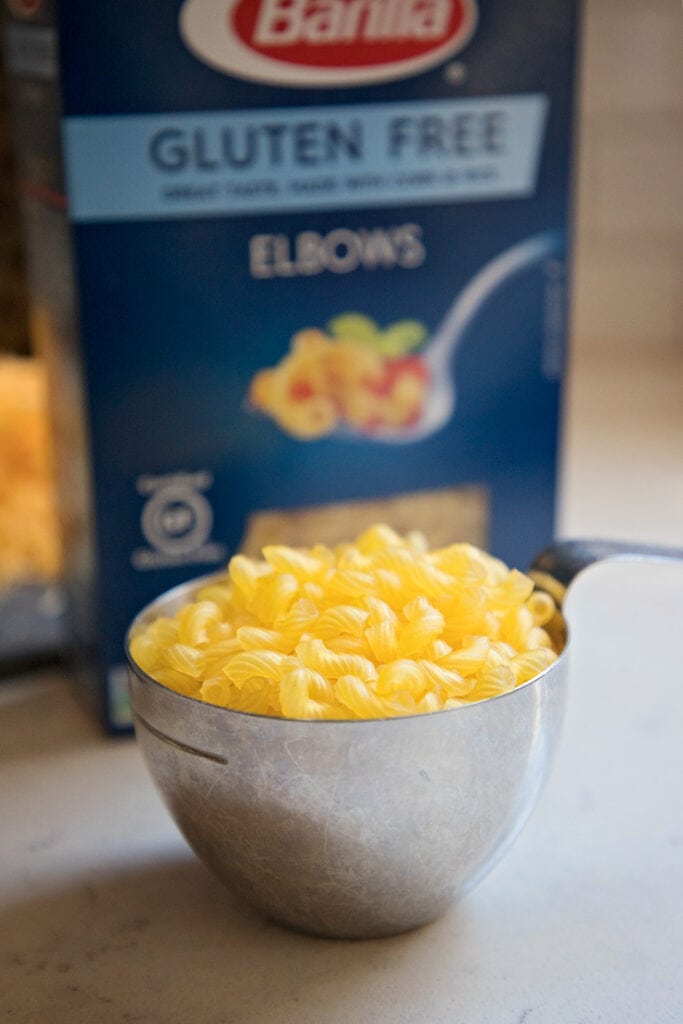
What pasta makes the best gluten free mac and cheese?
I’ve tested a ton and my favorite forever will be (affiliate link) Barilla’s Gluten Free Elbow Macaroni. Any shape of pasta will really work here as long as it’s short (like penne, cavatappi, elbows, etc.) and I find that Barilla’s blend of gluten free flours really eliminates that sticky, goopy brown-rice nastiness I just hate.
Barilla is available in just about every grocery store these days or you can get it on Amazon here.
Pro tip: If you plan to bake your mac and cheese in the oven, make sure to cook your pasta to just al dente or a little bit firm. If you over cook it you’ll have mush after it’s been baked.
What gluten free thickener should I use?
I know a lot of mac and cheese recipes use some blend of cream, eggs, and cheese and just stir it together and toss it in the oven and that’s fine…sorta. But my version is going to require that you make a roux or white sauce first and that means you’ll need a thickener.
In my original baked macaroni and cheese I use flour of course but here I recommend an all purpose gluten free flour blend with xanthan gum in it. I LOVE (affiliate link)King Arthur’s Measure for Measure Gluten Free Flour blend. It works like a champ. You should be able to buy it just about anywhere these days or online as well.

Could I use cornstarch instead of gluten free flour?
You can thicken your pasta sauce with a cornstarch slurry if you don’t want to use a flour blend. To do that, melt your butter, add the milk of your choice reserving about 1/2 cup to the side. Add a tablespoon and a half of cornstarch to the cold 1/2 cup milk, stir well, then add that to the milk in the skillet. Bring to a simmer to thicken, and then add your cheeses.
Pro tip: remember that if you simmer cornstarch too long it will lose its thickening power and go runny on you again. Once your sauce comes to a bubble, add the cheese.
We are dairy free. Can I use a different milk or cheese?
You can! I haven’t tested this particular recipe as dairy free but lots of people have made my other mac and cheese recipes with almond and soy milk and it has been just fabulous.
You won’t need to adjust any measurements or the cook time.
As for cheese you’re on your own there. I’ve never tested with anything other than the real deal.
Tips for the best gluten free mac and cheese
- If you haven’t seen my 18 Secrets to the Creamiest Mac and Cheese check it out for cheese swaps, and flavor boosting ideas.
- Always salt your water before cooking your pasta and taste your white sauce for seasoning after adding the cheese. If it needs more salt, add it.
- Choose cheeses with flavor. Sometimes when people tell me their mac and cheese was bland it’s because they chose plain cheeses with no flavor punch. We love sharp cheddar and swiss and it works great. Avoid subtle cheeses like mozzarella and colby jack on their own. You won’t get much flavor from them. You can also check out this cheese list for ideas.
- Always grate your own cheese to avoid the additives in bagged. When in doubt buy a block of cheese and grate your own. It will melt better and won’t have any powdered anti-caking cellulose in it which could make your sauce lumpy or split.
- When making your white sauce, keep the heat low, be patient and stir like the dickens. Once your butter and flour come together in the skillet (image step 2), add the milk and turn the heat to medium low and stand there and stir (see image step 3) . Don’t go feed the dog or make a snack for the kids or your white sauce may get too hot (even if it’s not boiling) and may split or look a little grainy. If that happens, don’t worry. Just use it anyway. Your texture will be a little off, but the flavor will still be fine.
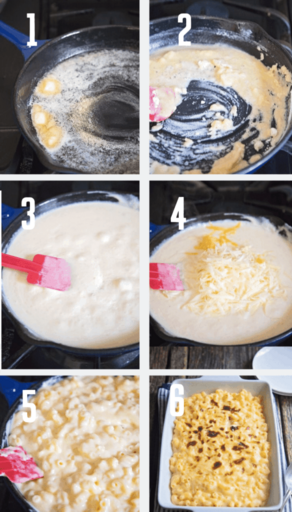
Pro tip: If you don’t want to bake your mac and cheese, skip it or just stick it under the broiler for 4 or 5 minutes to brown the top. It will be ultra creamy!
How to make gluten free mac and cheese ahead
To make this ahead, add the pasta and stir then allow the whole dish to come to room temperature. Transfer to a baking dish if needed and place a layer of plastic wrap right against the surface to prevent a skin. Refrigerate for up to 2 days. To bake, remove the plastic wrap and place in a cold oven (so you don’t crack your dish) then turn the heat to 400 and bake until hot in the center–about 25 to 35 minutes or so.
Want even more mac and cheese recipes?
Try these and check out even more side dishes here.
- Baked mac and cheese with tomatoes
- Spicy baked mac and cheese
- Stovetop three cheese mac and cheese
- Microwave easy mac and cheese
Super Creamy Gluten Free Mac and Cheese
Ingredients
- 1 1/2 cups gluten free elbow macaroni dry (measure first then boil it)
- 4 tablespoons butter
- 4 tablespoons gluten free flour blend *see note 1
- 2 cups whole milk *see note 2
- 1/2 teaspoon salt
- 1/4 teaspoon black pepper
- 1/2 teaspoon dry mustard powder
- 2 cups shredded cheddar and swiss cheese 1 cup of each; measure after grating
Instructions
- Bring a 3.5 quart pot of water to a boil. Add a teaspoon of salt and the pasta. Cook according to the package directions for al dente. Do not over cook. Drain, and rinse with cool water. Set aside.
- In an oven-safe 10" or larger skillet, melt the butter over medium high heat. Add the flour and stir until no pockets of flour remain and the flour taste cooks out–one minute.
- Add the milk and stir to combine. Reduce heat to medium-low and add the salt, pepper and mustard powder. Stir continuously and slowly until the mixture thickens–6 to 8 minutes. Be patient.
- Once thickened enough to coat the back of your spatula, turn off the heat, add the cheeses and stir until melted. Taste for seasoning and add more salt if needed.
- Add pasta and stir to coat. You can serve from here or transfer to the broiler for 4 to 5 minutes until the top just starts to get brown and bubbly.
Notes
Nutrition


It turned out soooo delicious and perfect. I’ve always struggled with making gluten free macaroni, with it being too dry, but this was the perfect consistency and so flavorful. It reminded me of a fancy buffet. Thanks for sharing this recipe!
How would I change the recipe if I wanted to cook a full box of pasta instead of measuring it out?
Well, a lot of brands of pasta vary in how much is in the box so I’d still tell you to use the cups measurement and measure out the whole box. If it’s double the original recipe amount then go ahead and double all of the other ingredients. –Rachel
This was my first attempt at making gluten free Mac n’ Cheese and your recipe did not disappoint! Honestly, it was superb. I did end up baking it for 30 min at 350 and I think it made the dish that much tastier with perfect creaminess and texture. I used Old Cheddar, Swiss and Parmesan cheese. I think next time I will try Very Old Cheddar for a little more ooomph, but this (along with baking it) would be the only 2 changes I would make. Thank you!
Those are great tips Lisa! I’m glad you enjoyed it–we don’t have to be sad about cutting gluten with so many great options available now. 🙂
This looks fantastic! Do you think it would work to reheat in a crockpot? I would like to make for a party where everyone will be eating at different times. Thank you!
Hey Brittany–You know, slow cooker mac and cheese is really just terrible. It gets dry and the pasta goes almost to mush while it sits in the warmth. You are welcome to do it if you want to but it’s not something that’s going to hold up well for hours and hours. It’s really a dish meant to be served soon out of the oven. –Rachel