
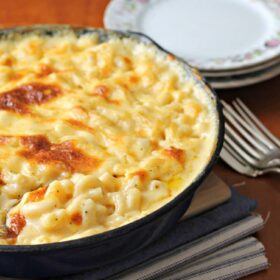
Baked Macaroni and Cheese
Baked macaroni and cheese doesn’t have to be complicated with layers of ingredients to be the soul-warming food you crave. This homemade baked macaroni and cheese is my most favorite and has pleased crowds, small families, kids and picky eaters alike–give it a try and you’ll see why.
Jump to Recipe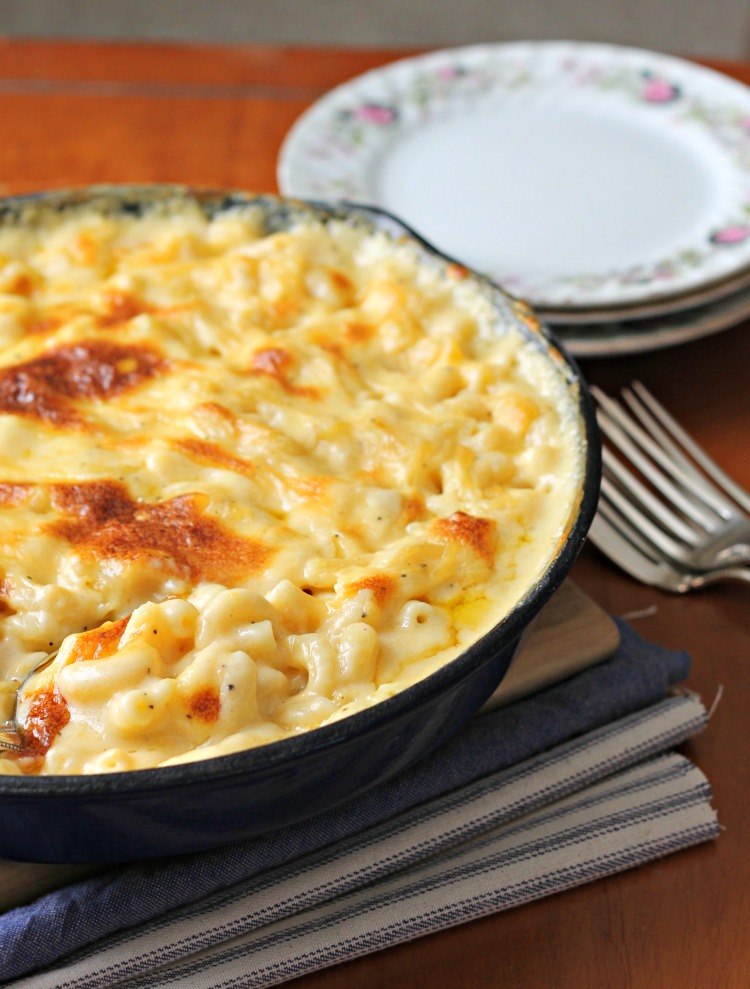
Key Takeaways
- Stir constantly so the sauce doesn’t split and keep the heat down low.
- Use strong flavored cheeses like Swiss and sharp cheddar grated from a block and never bagged pre-shredded.
- Make sure to taste the sauce before baking and adjust with more salt or a dash of red wine vinegar to your preference.
- You can make this mac and cheese up to three days in advance and bake it later.
- It will get dry and mushy in a slow cooker. I don’t recommend one.
- Prep and bake later: Just let it cool down, put some plastic wrap right against the surface of the mac and cheese (to keep it from forming a skin) and stick it in the fridge. When ready to bake, cook until the edges are bubbling and the center is warm.
- To freeze: Can’t freeze it.
Other tips:
- Never stop stirring your milk once it hits the pan. If your skillet is too hot or you walk away and for a minute you could scorch the white sauce and it will curdle. It doesn’t really hurt the taste, but it will look sort of clumpy. Some readers have called it “grainy”. It only takes 5 minutes. Just hang out and stir until that sauce is thick enough to coat the back of your spoon.
- Use good cheese in your baked macaroni and cheese. That means avoiding bagged, pre-shredded cheeses because they contain cellulose (an anti-caking agent) that can cause your cheese not to melt as it should.
- Try to choose a melting cheese and a flavor cheese for the best flavor and texture in your baked macaroni and cheese. Sharp cheddar and Swiss are my favorites but you can go as bold as you want!
- Taste as you go. Taste your cheese sauce before you add your pasta. Is it bland? That can be because of the cheese you used or even the kind of salt you seasoned with. If it doesn’t have enough flavor, add a pinch more salt, stir it in and taste it again until it suits you.
- Feel free to add more pasta if you want to. Some people say that this recipe doesn’t have enough noodles in it, but I’ve never had that problem. And yes, you should cook your pasta before adding it to the cheese sauce.
Try a dash of vinegar for more zing
Because of the fat in the dairy, mac and cheese often needs some acid to bring the flavors to life. I love adding 1-2 teaspoons of red wine vinegar to the sauce before stirring in the pasta. Avoid strong vinegars like apple cider or white distilled.
To measure the pasta: Please follow the volume instructions and measure your pasta dry in a measuring cup meant for dry items (not a liquid one). Small pastas like ditalini or little wagon wheels can go up to about 2 cups and be fine in the recipe, and large ones like bow tie or cellentani can as well. If you will stick to elbow pasta until you get the hang of things you’ll be better off.
To double, triple or quadruple: Simply multiply the recipe below (look for the 1x, 2x or 3x on the right side of the recipe to double or triple the ingredients). Then place it in a 9×13. The bake time should be close to the same. Just bake until the center is hot and the edges bubble.
Other macaroni and cheese recipes you’ll want to devour:
- Lobster mac and cheese
- Spicy baked macaroni and cheese
- Creamy ham and sage macaroni and cheese
- Three cheese stovetop ultra creamy mac and cheese
- The best baked macaroni and cheese with tomatoes
- Truly easy microwave easy mac and cheese
- Super Creamy gluten free mac and cheese
Baked Macaroni and Cheese
Ingredients
- 1 1/2 cups dry elbow macaroni shells or cavatappi
- 3 tablespoons butter or margarine
- 3 tablespoons all purpose flour
- 2 cups milk not skim
- 1/2 teaspoon each salt and pepper
- 2 cups shredded cheese I like 1 cup each of sharp cheddar and Swiss
Instructions
- Preheat oven to 350 degrees.
- Bring a pot of water to a boil; add a generous sprinkling of salt the pasta.
- While the pasta cooks, melt the butter in a skillet or pot large enough to hold the pasta when it’s done.
- Add the flour and stir over medium heat until the mixture is lightly browned; 1-2 minutes.
- Add the milk and whisk to remove any lumps and add the salt and pepper.
- Cook over medium-high heat until the sauce thickens and starts to bubble. About 6 minutes.
- Stir in the cheese and whisk until smooth and melted. Turn off the heat.
- When the pasta is almost done but still firm, drain it and add to the sauce.
- Stir the pasta into the sauce and bake in a greased 2 quart dish (or an 8×8 pan works pretty well) 20-25 minutes until browned and bubbly. You can also skip baking it if you want it super creamy and just put it under the broiler to brown the top (keep an eye on it) and then serve.


Thank you so much for such a simple delicious recipe. I have researched so many mac & cheese recipes and they were very expensive to make and tons of steps. This recipe was great and thanks to you you I will no longer need to buy box mac & cheese.
Hey Melissa! I’m so glad it worked for you! Now you’ll see why I do what I do here on this blog–so you can be successful without needing a mass of extra ingredients or work and you STILL get great food. And YES to no more boxed mac and cheese. You are a superstar! Way to go! –Rachel
Hi, I made this before and it’s delicious!:) Now I’m going to make it for a thanksgiving side and wanted to know if it would be ok to make the sauce and noodles ahead of time (keep them separate) mix and bake when I get to my parents? Thanks
Hey Jonina, it’s actually better to make the sauce, add the pasta, put it in the baking dish you want use and then let it cool down. You can put it in the fridge then take it to your parents and bake it there. If it’s had time to get really cold, you’ll want to bake it 10-15 minutes longer. If you tried to make the sauce separately it would cool and get hard–you’d never get the pasta to mix in. Then you’d be mad and I don’t want you to have to fight with that! Happy Thanksgiving!–Rach
Thanks!:) I will make it tonight because we leave early in the morning.
Happy Thanksgiving Jonina and safe travels.
Happy Thanksgiving!!?
Hi how many people does this search!? I’m hosting thanksgiving and feeding 7! Need to know if I should double the recipe or not!
Thank you!
Jenny you’d probably want to double it. Depending on how heartily your crew eats, it serves (on average) about 5-6 adults. So you’d have some leftovers, but better than running out! Happy Thanksgiving! –Rach
Great thank you so much last thing is have you ever used homemade pasta with this recipe and if so does it work well. Just got new pasta attachment and I want to use it! I’m just nervous !!!
No Jenny I never have. Making fresh pasta is on my list of things to do but I’m not there yet! Usually it’s a better idea to try those kinds of experiments when you aren’t planning to feed it to others and they aren’t counting on you to bring a dish. 😉
Can I use hemp or milk, or does it have to be fresh milk?
Do you mean can you use hemp milk Taina? I have no idea. I don’t cook with hemp milk, but you are certainly welcome to try. Around here, it’s all dairy all the way.
How would using buttermilk affect this recipe?
Well, in my mind using buttermilk here would be totally gross, but if you want to use it you certainly can. Buttermilk is thicker than regular milk on its own and I’m not sure how it will affect the final product. I’m going to recommend you use regular 2% or whole milk here but you’re welcome to give it a try and see what happens. Thanks for asking Apollo!
I really didn’t believe it was that easy but it was. I made a practice dish this weekend lol! I was a bit impatient waiting for the sauce to thicken and added too much flour but I won’t do that again. Thank you again for sharing this recipe
Yes Dissie it is! And I know it’s hard to wait for the sauce to thicken but trust me Jedi Master. Trust me. And besides, if you just dump extra flour in that hasn’t had time to cook down you’d make an awful raw flour pasty mess. Anyhow, I’m so glad you can see the hope in the recipe and that you’ll make it again soon! Let me know if it turns out better the second time. 🙂 –Rachel
Hi!!! If I double the recipe what size pan would I need? Are there any special instructions if doubling? I can’t wait to try this for turkey day!
Hey Christine! Good question. You can use a 9×13 pan. You won’t fill it all the way up (maybe just halfway at best). No real major instructions for doubling. Just keep an eye on the bake time and only bake it till it bubbles and you get a little bit of brown on the top. The thinner it is in your dish, the faster it will cook. Start checking it at 30 minutes until it looks right. 🙂 Happy Thanksgiving and let me know if you have any other questions. –Rachel
I am going to try to make this for Thanksgiving, I was wondering if I use the dry mustard like everyone keeps mentioning they’ve used, how much do I use and at what point would I add it?
Also breadcrumbs… I would top the dish off before baking right? about how much breadcrumbs and melted butter??
You can do it Reena! Put about 1/2 teaspoon of mustard powder in to the milk once you’ve added it to the pan and are bringing it to a simmer to thicken. And for breadcrumbs, I’d do about 3/4 of a cup of Panko or fresh bread that you’ve toasted and chopped in your food processor (not the regular powdery fine dry bread crumbs you get in a can) mixed with 2 tablespoons of melted butter. That should be plenty 🙂 Let me know if you have any other questions! –Rachel
Wow…I really did it! With the exception of adding 1/2 tsp. of dry mustard, I followed your ingredients and instructions to the letter. Not only was it super creamy and delicious, it really was simple and easy. I really like your style. Thank you very much.
Yes YOU did it Jack! Congratulations! Dry mustard is a great addition and one that lots of people love in their mac and cheese. I’m so glad you were able to find a version you like and that you took the time to comment and let me know and I like that style. 🙂 Have a wonderful holiday season and I hope you’ll come back often. –Rachel
Could I use bow tie pasta? Would it change the amount of pasta I would need?
Yes you sure can Stacy.Because bow ties are so much bigger than regular macaroni noodles, you have two options, either use half as many dry noodles or make one and a half times the sauce so you have enough to keep things gooey. 🙂
Hey can I add eggs and sour cream to the recipe
Hey Stacey–Good question and the answer is no. I’ll tell you why. Most people use eggs because when they bake their dish it helps it hold together and acts as a thickener. This recipe starts with a mixture of flour and butter that you cook and then heat milk and add cheese to make a sauce. You don’t need any eggs to make it thicken and secondly if you added eggs at just about any step of this recipe they would turn into scrambled eggs and instead of thickening anything you’d have little chunks of cooked eggs running through it. :/ And the sour cream wouldn’t add anything but maybe a little tartness. If you use a sharp cheddar, it will provide the tartness and be all that you need. So if you’re set on using eggs and sour cream, this recipe won’t be the one to use. –Rachel
I’m definitely a mac n cheese enthusiast from way back. First time I discovered actual homemade, baked mac n cheese with NO velveeta or processed cheese food, I was converted for life! Your recipe looks delicious, and I will definitely be trying the sharp cheddar, swiss combo. For those who like it extra cheesy, one thing I do is pour half the mixture into my baking dish, then sprinkle with 1/2 to 1 cup of shredded cheese, then pour the rest of the mixture on top, and top with an additional bit of shredded cheese. I also like to top it with some panko mixed with melted butter for some crunch. Definitely going to try your recipe the next time I make mac n cheese! I also wanted to give you kudos to keeping up with questions from people who are kitchen novices. It’s great to see someone willing to take readers by the hand and help them become great in the kitchen!
Hey Stefanie! Thank you for your kind comments. I’m with you on the processed cheese…I can’t. And that’s a great idea with the extra cheese between the layers! And a lot of people really like a breadcrumb topping. I just like the crispy browned cheese. 🙂 Did you see my post on the 18 tips for rich and creamy mac and cheese? One thing I like to do is make extra sauce and sometimes I dump in an absurd amount of cheese (just because I can) and I like that. It keeps things from being too dry. And as for the novices–I always say that this is a judgment free zone and people need to learn so I’m here to help. I love to see everyone succeed! Thank you for coming by–I hope you’ll be around more often. –Rachel