
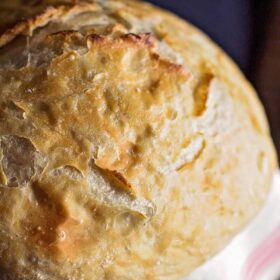
No knead dutch oven bread
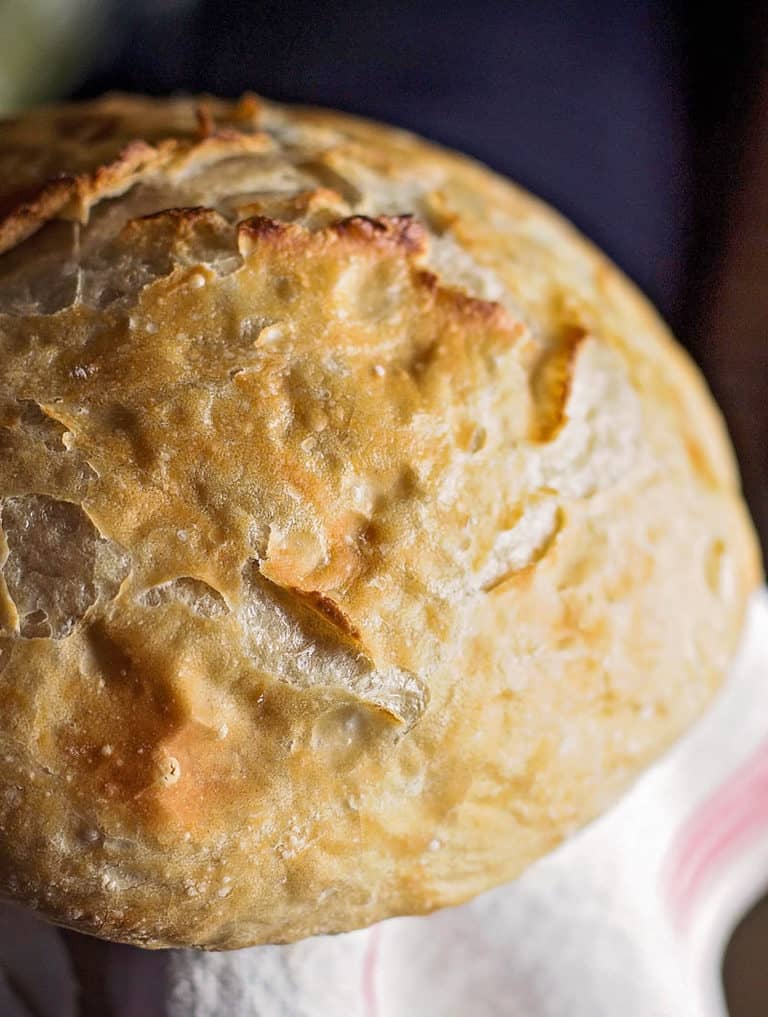
No knead dutch oven bread is truly one of the most hands-off baking challenges you can try. If you’re new to bread making and want to make a loaf of something that is free from crazy preservatives and stabilizers this is a fun place to start . Smear a warm slice with butter or dip it in some olive oil and herbs for a special treat.
It feels like the most terrifying thing ever–making bread. I can’t tell you how many people I know who just won’t go near it for a lot of reasons:
It’s too hard.
It’s too scary.
It’s too time consuming.
But I will say that you can take it from this girl, who made her first loaf of bread when she was 9 and who has invested up to 26 HOURS in a batch of croissants (but only one time–good Lord that was enough of that) you can make this no knead dutch oven bread even if you don’t know your whisk from your spatula.
When I made this, I dumped the ingredients in a bowl, stirred it up and stood there.
Uhhhh…that was all I had to do besides walk away from it. For a day and a half! I thought something was wrong with the recipe.
But no. It’s true that the longer and slower this no knead dutch oven bread can “prove” if you’re British or “rise” if you’re not will result in a more flavorful loaf of bread. The longer the yeast has to sit and mingle with the flour and salt, the more robust its flavor.
And I know you want to put a flavorful loaf of bread on the table–nothing boring.
This bread looks almost identical to those fancy loaves you buy at the grocery store. In my Kroger those loaves are sitting on a shelf with a big sign that says “PLEASE USE THE TISSUE PAPER TO TOUCH THE BREAD.”
Before I buy a loaf I always wonder what nose-picking three year old had their hands on it before I did.
Or better yet, what nose-picking adult.
Block it out. Just block it out.
All the better to just make it at home.
Tips for the best dutch oven bread
- Use active dry yeast here. It comes in a three-pack strip in your baking aisle. You’ll find instant yeast and active dry. Both will possibly work but you really want ACTIVE DRY if you can get it.
- UPDATE: Even though we aren’t using a full packet of yeast in this recipe, I have run into some issues recently with yeast that is simply more aggressive than other brands. I have found that after the 12 to 18 hour resting time my dough is liquefied which means that the yeast has dissolved the gluten structure of the flour. Here’s a yeast brand that shouldn’t give you any problems.
- No need to buy bread flour for this–plain old all purpose will work. If you have bread flour on hand, I’d try it because I’m like that. But the first time through all purpose is fine.
- I’d recommend using sea salt here if you have it. I’m just a big supporter of its clean flavor. If you can’t get it, table salt is okay.
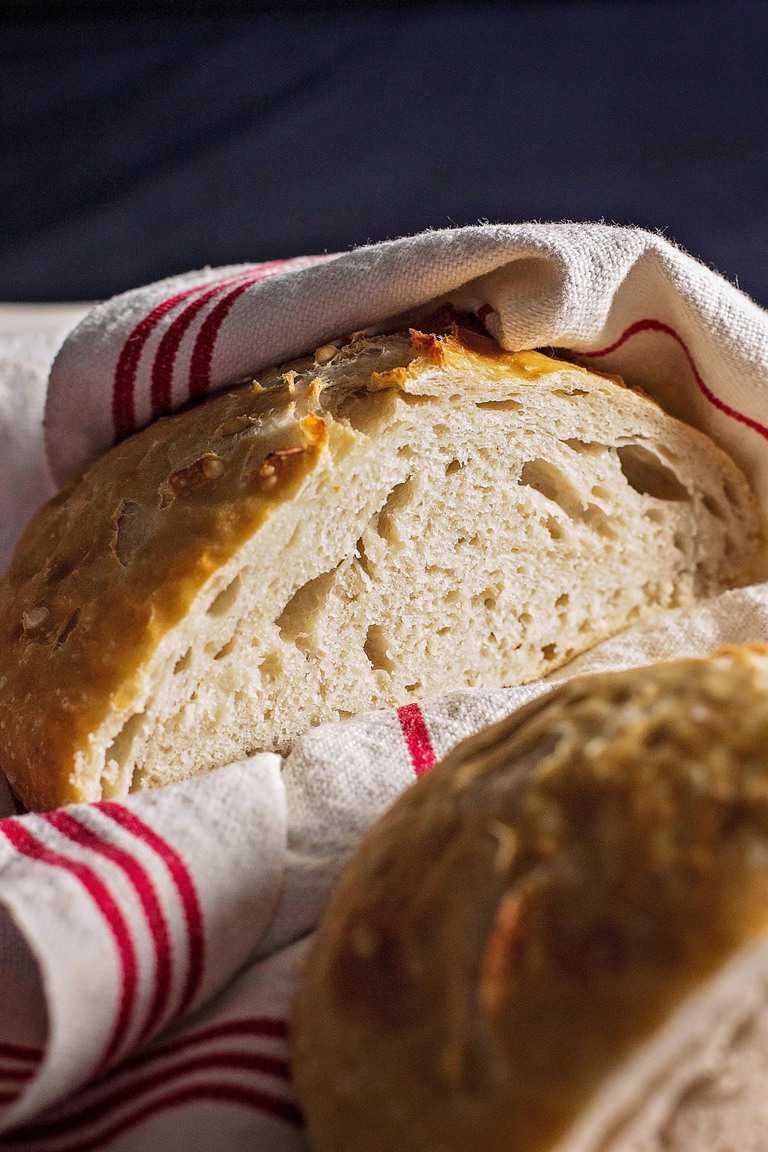
- Remember that even after the long rise this dough is quite wet. Work with it with flour on your hands but avoid putting a lot of extra flour in to the dough. That will keep the texture light.
- I used a 4-quart dutch oven because that’s what I have. If you have one a bit smaller, use that so your bread ends up taller. A bigger pot leaves room for the bread to spread out.
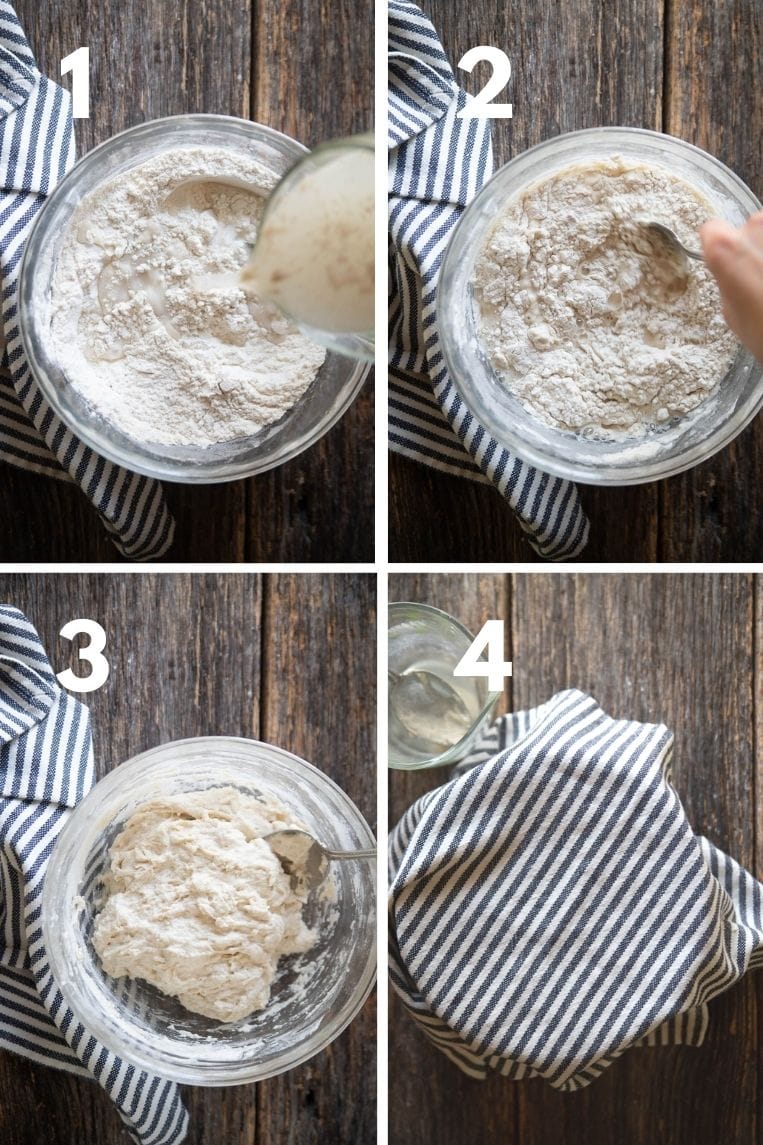
How to make Dutch oven bread step by step
What can I use if I don’t have a dutch oven?
A dutch oven is a heavy deep pot with a tight fitting lid. They hold heat in really well and in this case–they hold in the steam which is necessary for making the golden crust on your bread. I believe a dutch oven is a fundamental kitchen tool everyone should have.
If you don’t have one, you’d have to concoct some sort of air tight, oven safe contraption. You could do a deep pot and seal the crud out of it with aluminum foil…it may not be as crispy, but the flavor should still be there.
What could I add to my dutch oven bread for more flavor?
The sky is the limit! The first thing I think is cheese or whole roasted cloves of garlic. Yummmmm. Of course fresh herbs would also be great. Rosemary, olive oil, or a few tablespoons of my homemade ranch dressing mix would add some zing. If you add any of these ingredients in to your dough keep in mind that they can all slow down yeast development so if you need to let yours sit longer than 18 hours–even 20 to 24–it will be okay to do that.
Make a loaf of traditional loaf bread with this recipe.
This recipe is inspired by my friend Jo Cook’s version of crusty bread.
No knead dutch oven bread
Equipment
- Parchment paper for lining the dutch oven
Ingredients
- 3 cups all purpose flour
- 2 teaspoons flaked sea salt OR 1 3/4 teaspoons table salt
- 1 teaspoon active dry yeast
- 1 1/2 cups warm water
Instructions
- In a large bowl, mix the flour and salt and stir to combine. Add the yeast and water to the flour and stir with a spoon until a sticky dough forms and no pockets of raw flour remain. (If you wanted to add cheese or herbs, do that here and stir them in.)
- Cover with plastic wrap and set aside for 18 to 24 hours. Until the dough more than doubles and has lots of tiny bubbles in it.
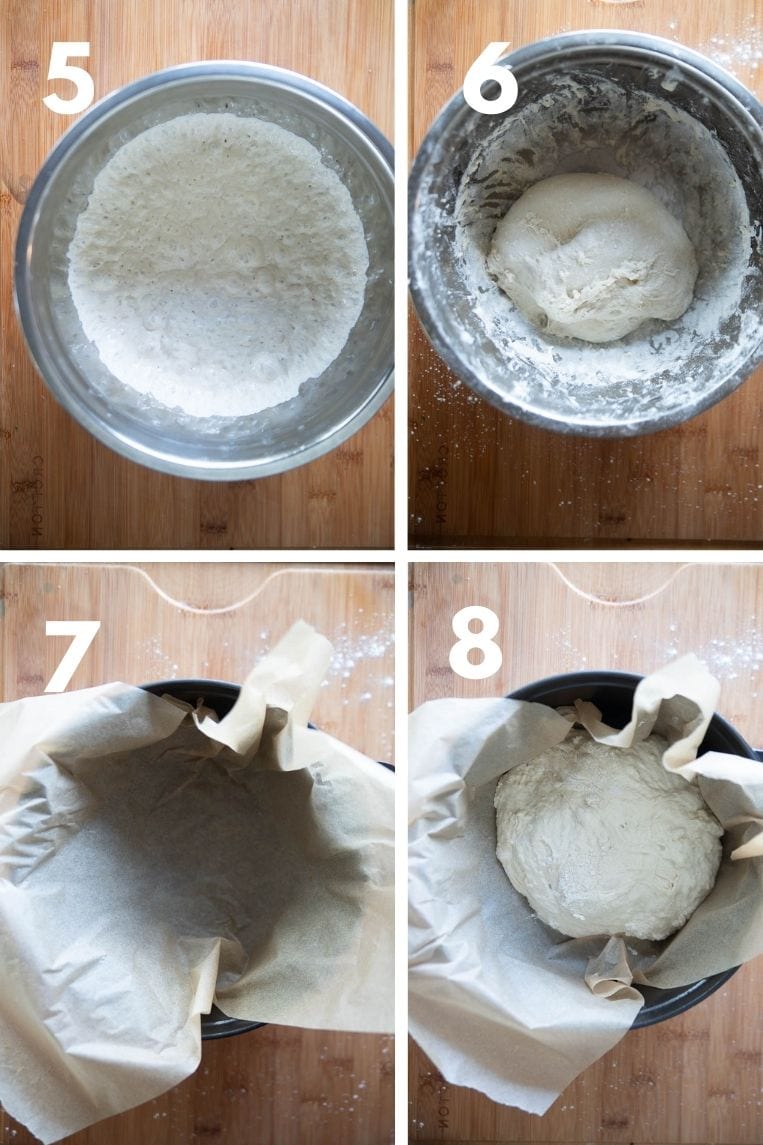
- When you're ready to bake, preheat the oven to 450 and put your 5 quart (or smaller) cast iron pot and the lid to heat up. Heat for 20 to 30 minutes.
- When the pot is ready, remove it from the oven and set aside. Sprinkle the dough with a tablespoon of flour or so and flour your hands well. Make a fist and punch right into the middle of the dough to flatten it. Then working gently, shape the dough into a ball. Flour your hands as needed, but avoid adding any more flour to the dough. It will still be sticky. That's okay. Transfer the dough ball onto a large square of parchment.
- Sprinkle another tablespoon of flour inside the bottom of your pot and then transfer the dough and parchment paper inside the hot pot. Cover with the lid and bake 30 minutes, then remove the lid and bake an additional ten. Transfer to a wire rack to cool.


Thank you, Rachel for that link, Rachel.
But actually, I didn’t state correctly. It is basically a convection oven. The air fry is only one of its features. I wouldn’t be using that.
King Arthur says: “The rule of thumb is this: Reduce the oven’s temperature by 25°F. Make your first check of baking time 10 minutes earlier than the recipe says.” It sounds a bit radical but I can always add more time and temp.
Judy
Ah! Oh gotcha Judy! Well, test it out and report back!
Hi Rachel,
I just bought a convection Smart Oven Air by Breville. It says I can use a lower temperature and can also bake things in less time. What time and temperature would you recommend for the bread?
Oh Judy I wish I could help! I don’t know anything about air fryers! I wonder if this article would help? https://www.foodnetwork.com/fn-dish/recipes/air-fryer-bread-i-tried-it And P.S. I LOVE Breville products! –Rachel
Super easy and delicious
Why are there so many different recipes for the plain white loaf of bread?
1. Temporature – of the oven
2. Length of time to cook
3. Number of times to set aside before baking
4. And many more
5.I am new to baking white bread in this manner, having for years used a bread maker.
I now use the machine to prepare the dough, let it rise for a few hours, knock it down, repeat, and put it in the preheated oven @230 C which is about 430 fahrenheit.
Any suggestions would be much appreciated
Michael Lorigan
Michael how can I help you specifically? Are you having problems with my no knead bread or are you frustrated with bread techniques as they vary across the internet? I can only speak for my recipes so feel free to let me know what exactly I can help with. –Rachel
I have a lot of instant yeast. Can I use it? And how will it change the recipe?
Thanks,
Judy
Yes. Just activate it as instructed in the recipe. It will work just fine! –Rachel
If I add wheat berries, or caraway seeds, do I need to adjust anything in the recipe? I also will try Kalamata Olives in the future. Thanks!
Not really Tom. It should handle those fine! –Rachel
Hi Rachel,
I’m a first time reader. I love your cast iron recipes.
Regarding the no-knead bread, I have a lot of whole wheat flour. What changes must I make if I use this instead of white?
Also, I live in an area that is not very humid, but I don’t have a stable place to proof the dough. There are drafts in my kitchen, also I don’t have any lights in my oven. What is the best environment in which to let it rise? (temperature, etc)
Judy
Hi Judy! Welcome! You can swap half the white flour for whole wheat in just about any recipe you just can’t swap all of it. The ratios of liquid get out of balance if you do and your loaf will be extremely dense. To proof your dough, just put it in a clean (non perfumed) trash bag or large shopping bag and fluff it out so it’s not touching the top of the bowl (you can still put plastic wrap on the dough if you want. The bag will keep the drafts out. –Rachel
Thank you for the answers to both questions.
I made the chicken pot pie yesterday. It was delicious! Next time I’m going to bake an extra crust on the side because we love crust so much.
Judy
This recipe is awesome. Super easy and fun. Due to covid there seems to be a shortage of yeast but I was able to find instant yeast instead of active dry. This was was first time making bread and the loaf came out perfect! I used my 6 quart Dutch oven. Thank you to the chef of this recipe!
You’re welcome Tony!
Hi there! My question is: how small of a Dutch oven can I get away with if I am making a 1 lb. load of bread? I have bad arthritis so the weight can be an issue for me. Thank you very much for your time. Once I get my oven I will come back to your blog. Some of the recipes look super yummy and we are looking to eat healthier, thank you again!
Hey Angela, you know I’ve never weighed this dough but the loaf itself isn’t very big so a small dutch oven–4 quarts or so–would hold it just fine. If you have one that size you should be fine. –Rachel
Hi Rachel,
I absolutely love your bread recipe! I have not been able to find dry active yeast in stores can I use instant yeast instead? If so how much instant yeast would I use? Will it change the rise time?
Thanks, Melissa
You can use instant yeast Melissa. It doesn’t rise faster than active dry. People think it does, but it doesn’t. In this particular recipe it can be swapped for the active dry yeast in exactly the same way with no changes to the recipe. –Rachel