
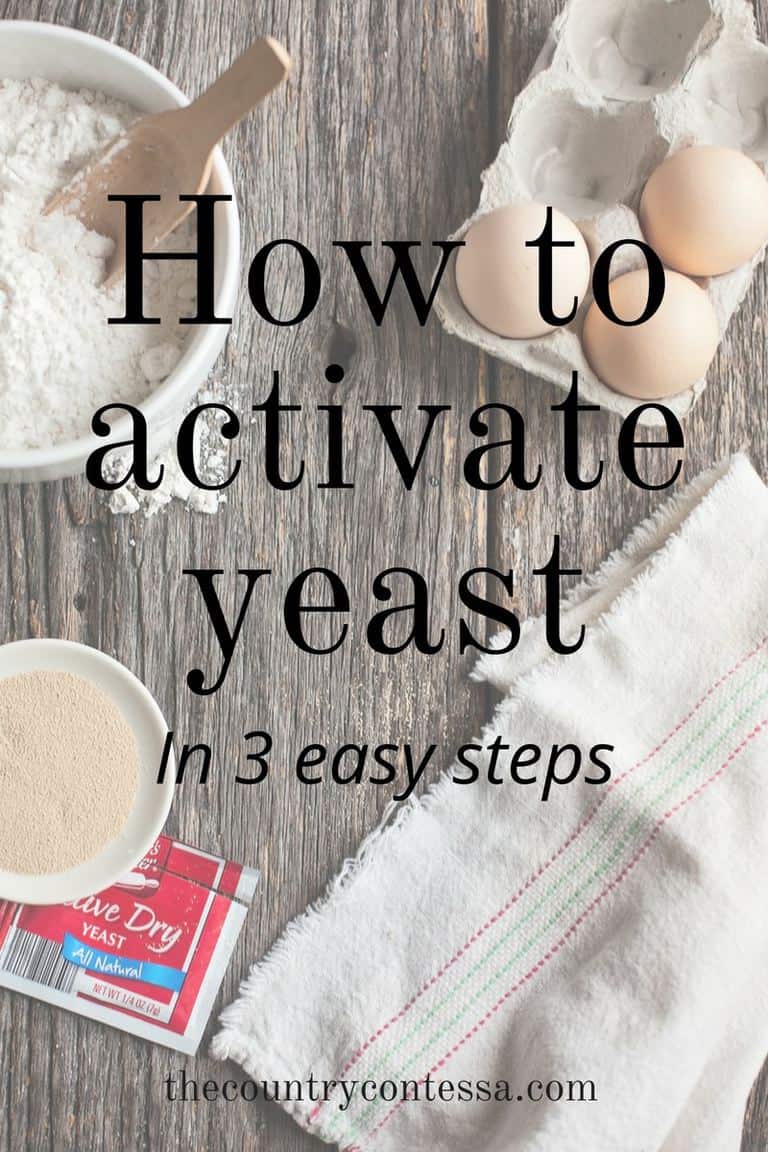
How to activate yeast in 3 easy steps
If you want to bake with confidence, learning how to activate yeast is the first step. For some reason, this terrifies about 99% of the people I know. Not just the activating, but the rising, kneading and baking that usually comes with it. But baking soft cinnamon rolls or a loaf of homemade bread won’t happen without it. This the part you don’t want to miss–let me show you how easy it is!
Maybe you’ve heard or lived the horror stories of trying to bake with yeast. You didn’t make bread. You made hockey pucks.
You didn’t make cinnamon rolls, you made petrified stone for your flower bed. Flat, hard, dry stuff that just didn’t do what you thought it would. What went wrong? It was something with your yeast which works as the leavening agent (the thing that makes bread rise).
There are only two things you can do to yeast: 1) not wake it up or 2) kill it. Both of which will make your bread flatter than a flitter. Because we all have absolutely no idea what a flitter is, but it sounds good.
Where do I get yeast?
You’ll find yeast in the baking aisle near the flour. It’s sold in a jar (way too much for most people to use) or in a three pack strip. Simply cut one or two packets from the strip to use as your recipe states. Each packet is about 2 1/4 teaspoons of the jarred kind.
Is there more than one kind of yeast?
Yep. You’ll probably see “fast acting” (sometimes called Rapid Rise) and regular. I just use regular. You aren’t going to save any time with the rapid rise kind really. There’s also fresh yeast, but it’s harder to find and not worth talking about right now.
Before you activate yeast
Before you properly activate your yeast with my method, do me a favor and check the expiration date on the package. Flip over the strip and make sure it’s still in date. Even if it expires that month, you should be fine. Just don’t use it if it’s out dated. It’s probably useless and there’s no point in risking in.
How to activate yeast: Step 1
This is the part that usually gets people, but it’s easy.
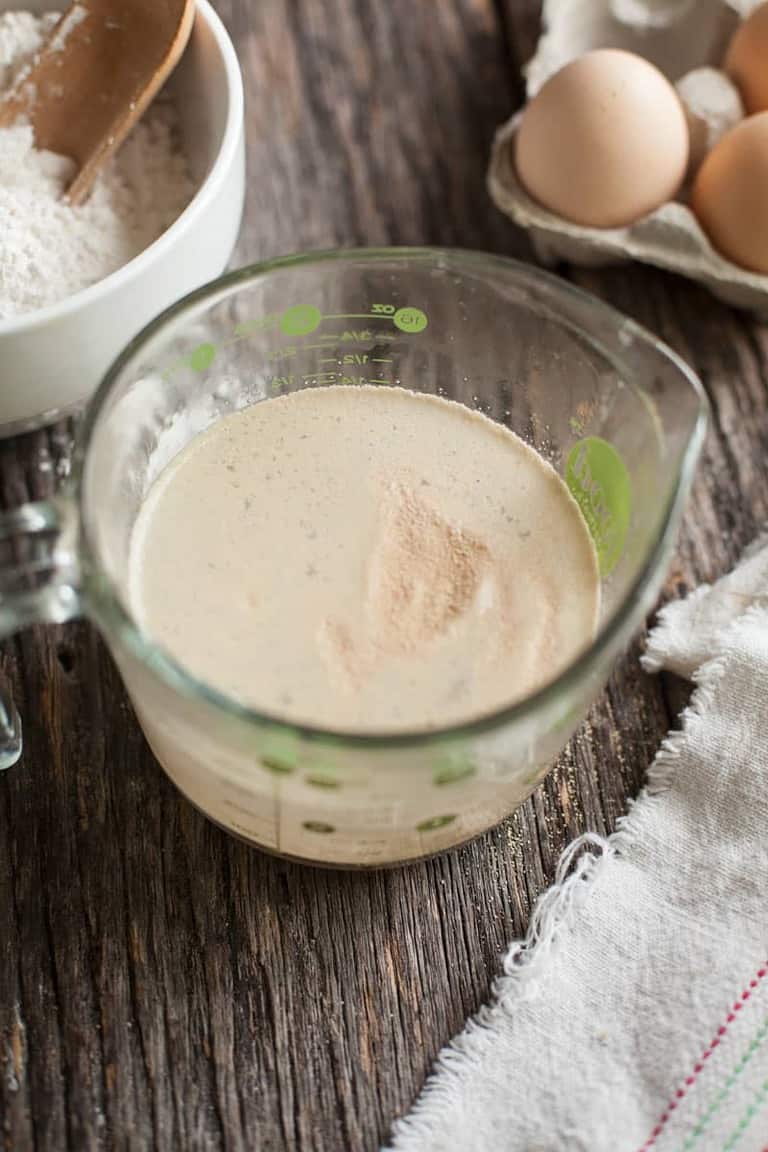
Yeast needs warm water to activate. How warm? Experts say about 110 degrees but who’s checking that?
Here’s how I do it: run some tap water until it’s warm. Not hot. Just warm. Now bump the faucet till you can say “Well, that’s definitely hotter than warm. Not so hot I want to wash dishes in it or anything, but hot enough.”
That’s the temperature you want. Fill your cup with the amount of water called for in the recipe (usually a cup) and sprinkle your packet of yeast over the top of the water. You don’t even need to stir it in. That’s what I did in this picture:
How to activate yeast step 2: Add a little sugar
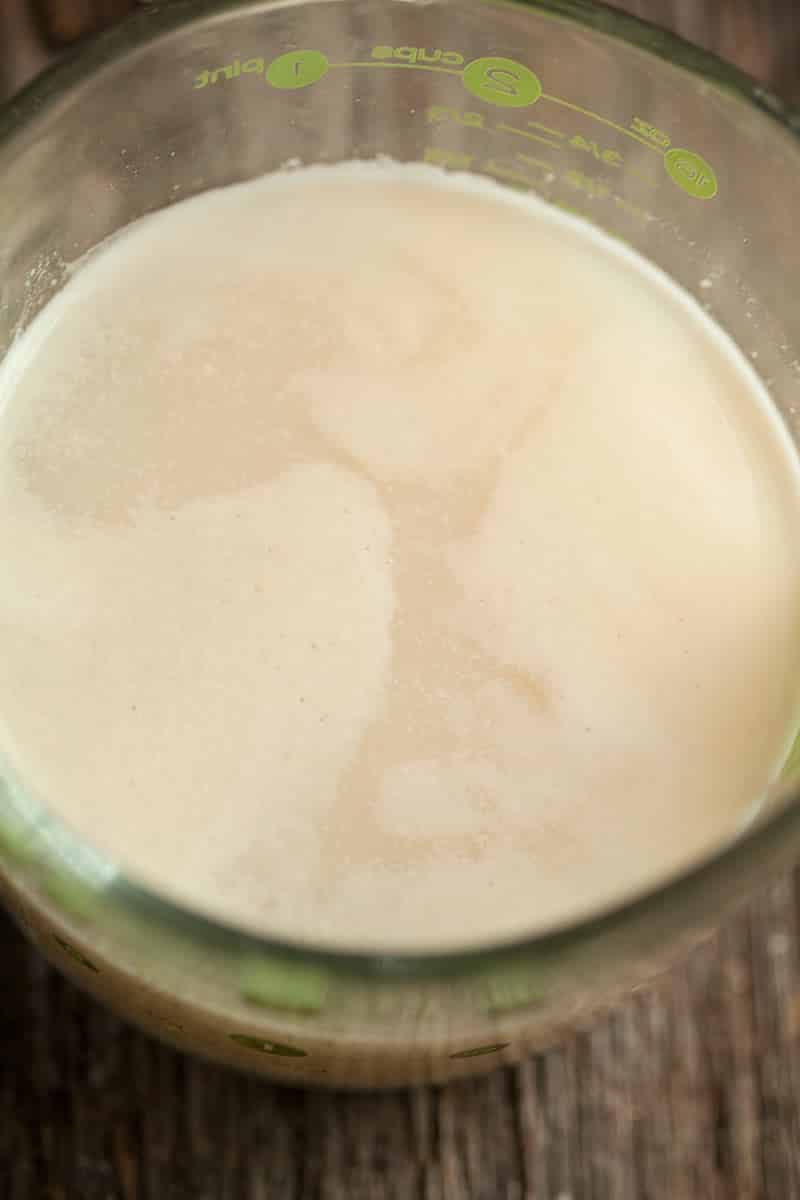
Once you get the yeast on the water, add about a teaspoon of granulated sugar. Yeast is fed by sugar and this will help it multiply and activate with a little snack in its belly. Basically it speeds up the process.
Drop in the sugar and give it a stir with a spoon. After a couple of minutes it will start to look cloudy and have a little bit of foam on top. Be patient. The time is not yet! It looks like this:
How to activate yeast step 3: Give it time
Depending on how warm your house is and how warm your water is, this step may take longer for some people. TV people say “five minutes” until your yeast starts to foam, but in my house where it’s cool right now, this step can take up to 15 minutes.
Sometimes I just stand there and watch my yeast like a nut case waiting to see something bubble to the top (and it will). When I see that, I just go ahead and throw it in my dough. But if you want to be totally sure, wait for this kind of foam or activity in the cup:
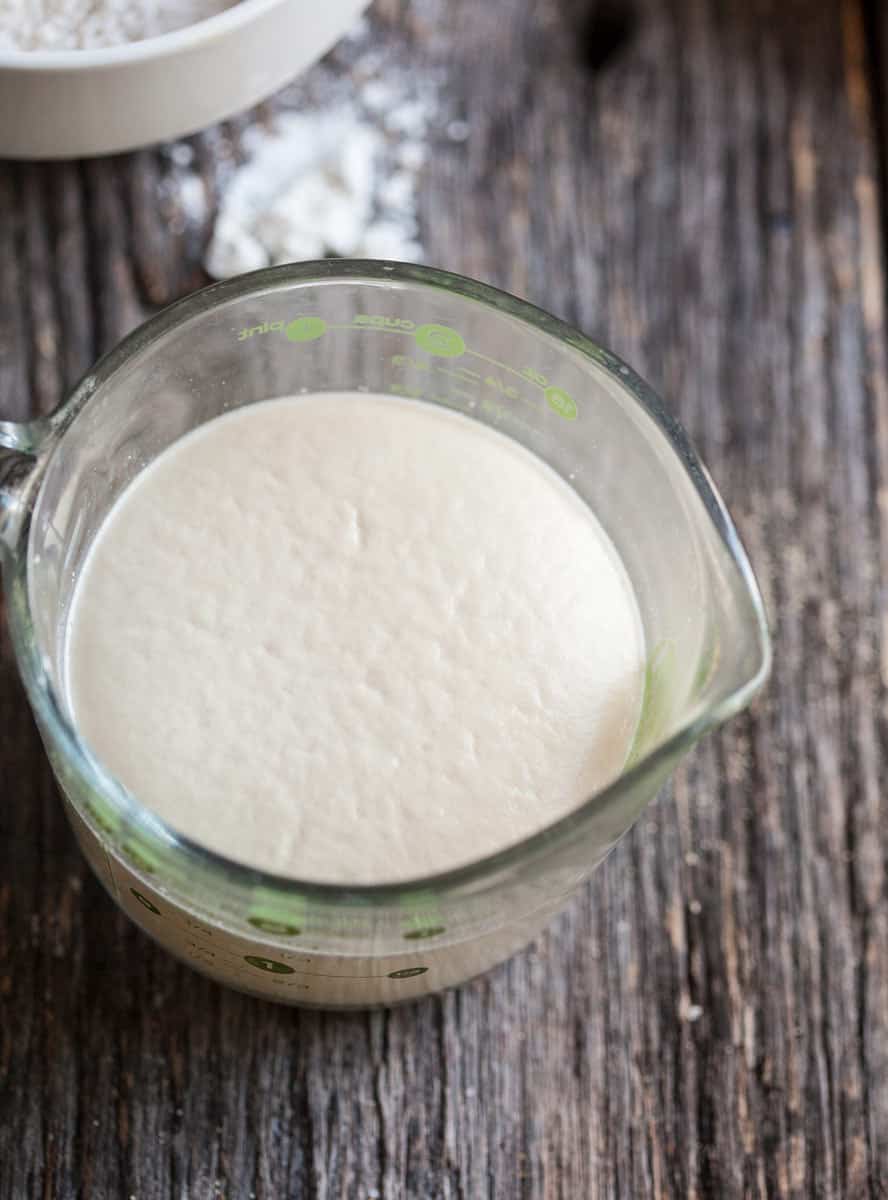
Once you see the foam, you’re ready to use your yeast in any recipe it calls for. If you DON’T see foam and you’ve been patient (given it 15 minutes or so), try again with another packet. If you made your water hot, try reducing that heat a bit and give it another try.
Just don’t go on and put it in your recipe like that. Lord knows nobody wants to waste hours baking something that is dead on arrival.
Still have questions? Watch me here:
Are you ready to bake? I knew it. 🙂
Get started with these easy recipes: Pull Apart Pumpkin Bread, Easy Yeast Rolls, or Soft Cinnamon Rolls.
Still have questions about how to activate yeast or anything on this topic? Comment below and let me know–I’m glad to help!


Hi Rachel, I make dough for pizza where I use 12.5kg bags of flour and add around 30 grams of dry yeast. What do you feel is the right amount of sugar I should be adding to this?
Great question. If your actual pizza dough recipe doesn’t call for sugar, there’s no need to add any. Yeast activates just fine with or without sugar. If your dough recipe does call for sugar, you could just take part of that amount and use it when you activate your yeast. But I wouldn’t add it if you don’t have to. –Rachel
What will happen if I just put the active yeast in warm water and not wait for it to grow? What will happen to the loaves made with it? Can I still save the loaves by letting them proof longer?
If you didn’t activate it, then you can’t be sure it was even alive and your bread may not not do anything. That said, if you let the dough sit long enough in a warm place, the yeast may eventually wake up and proof. You just don’t know if your yeast was good to start with. –Rachel
Is in your opinion 3pks of yeast enough yeast for 5 lbs of flour to make bread . I’m still thinking about what you said about making smaller batches. You have been a worth of information on my questions and i thank you
Hi Mullen, if you will, check out some of the bread recipes here on the site like this one: https://feastandfarm.com/soft-amish-white-bread/ It may give you some guidance. I use 1 pack of yeast to about 6 cups of flour.
When you put yeast in water do you stir the water and break up lumps or do you just leave it sit in water then add sugar or add sugar to water first stir and then add yeast
It won’t matter what order they go in Mullen. Sometimes I stir in my yeast, and sometimes I sprinkle it on and walk away. It will activate either way. –Rachel
This recipe was what my mom told me .to make 6 loaves of bread. 5lb bag (for bread flour ) 3 pks dry yeast 6 cups warm water 3tsp sugar 3tsp salt. Salt added as dry ingredient. I put yeast and sugar into 6cups . What you showed about what yeast looks like when ready was great. I have never understood why 1/4 cup of water and yeast to proof works. Where does rest of my water do. Sometimes the bread rises not all the same . I’m hit or miss what am i doing wrong. My moms gone so your advice will be helpful. Thanks
Hi Mullen, if your loaves aren’t rising equally, that sounds like an issue with mixing which wouldn’t be surprising given how large your batch recipe is. It would be easier to mix the ingredients evenly if you make the batches smaller. I usually don’t make a batch larger than 6 cups of flour per recipe. If I have to make a lot, I do it in two or three separate batches. You might give that a try and see if your bread turns out better. –Rachel
Can you use all purpose flour instead of for bread flour. If I can is there’s something to look for on the all purpose flour
You can. It doesn’t rise quite as much as bread flour but it works fine. Just avoid anything bleached or bromated. I like King Arthur flour.
So I know this Greek bread makes a ton of dough calls for 1/2 cup warm water, 6 pkg yeast and 1 cup flour? Tried it yesterday nothing happen just clump of dough that did not rise? Mom just died, was trying to make her bread?
Hey Andrea, I’m so sorry for your loss. I’d need to see the recipe to know what you need to do but that’s a tremendously large amount of yeast for 1 cup of flour and 1/2 cup water. Was that to make a pre-ferment/sponge that gets added to more flour and ingredients later? The yeast would need to be activated in water first if you are using active dry. I think I just need more information to be able to help you further. –Rachel
Just to chime in with the others: milk failed us twice (waited 30 minutes each–big fat nothing) 🙁 We even bought a thermometer. After reading one of your comments below, Rachel, that yeast would proof in one or two TBS of water, I added yeast from the *same packet* to the warm water, proofed in 5 minutes! So we’re just replacing 2 TBS of the milk called for with the water/yeast. Don’t know why milk wouldn’t work for us either, but it just wasn’t going to happen.
Oh that’s so weird Christina! I’ve used milk a lot but it makes me wonder if it’s doing something to the activation process. I activated some in milk just yesterday. Go figure. I’m glad you got it going no matter how you did it! –Rachel
It is suggested that hot water from the tap is not fit for consumption, due to the way it is heated. I boil a bit of water, and add that to cold. Easy to adjust if it’s too or cold.
Hmmm…well I have major issues with the quality of tap water but it’s not because of how it’s heated. Folks who use this recipe are welcome to use any type of warm water that suits their lifestyle. –Rachel
Sigh, so many questions! I made 2 bowls of water with yeast and used the second bowlful once it activated. When I was done I noticed the first bowl had activated too. How do I dispose of the extra bowl of water with activated yeast?
Your directions have been the most helpful, so thank you!
Gaby
Hey Gaby, you can just pour that yeast out and down the drain if you don’t want to use it. I keep frozen yeast granules in my freezer all the time but I’ve never tried freezing already activated yeast. It might work but you’d have to test that for me and report back. 🙂 –Rachel
What happens if you use more water than the recipe calls for?
Well, then you’d probably end up messing up your recipe and getting a super wet dough that’s hard to work with. You can activate the yeast in as little as a tablespoon or two of water if your recipe called for that, or if it called for several cups of water, your yeast would still activate just fine. If you have used too much water, better toss it and do it again. –Rachel