
How to dye Easter eggs your kids will love
Every family needs a few years with the classic cups, wire dipper and the fizzy colored tablets from a box. But when you’re ready for something more exciting, take on a couple of new (but still incredibly easy) ways to brighten up your holiday. Learn how to dye Easter eggs your kids will love and go wild!
Just when you thought seven cups of vinegar water and your kids trying to splash it all over tarnation wasn’t fun enough, open your mind to the possibilities of something way better. Its the kind of thing that waits for the unveiling and will be filled with lots of oohs and ahhs. Even my kids–who are way too big for anything that has to do with the Easter Bunny (my youngest abandoned that idea before Kindergarten) will still have fun getting creative here.
These ideas came courtesy of an episode of The Kitchen and after a few tests, I’ve perfected the steps you’ll need to do this with just about any little person you love.
#1: The Tie Method
What you’ll need:
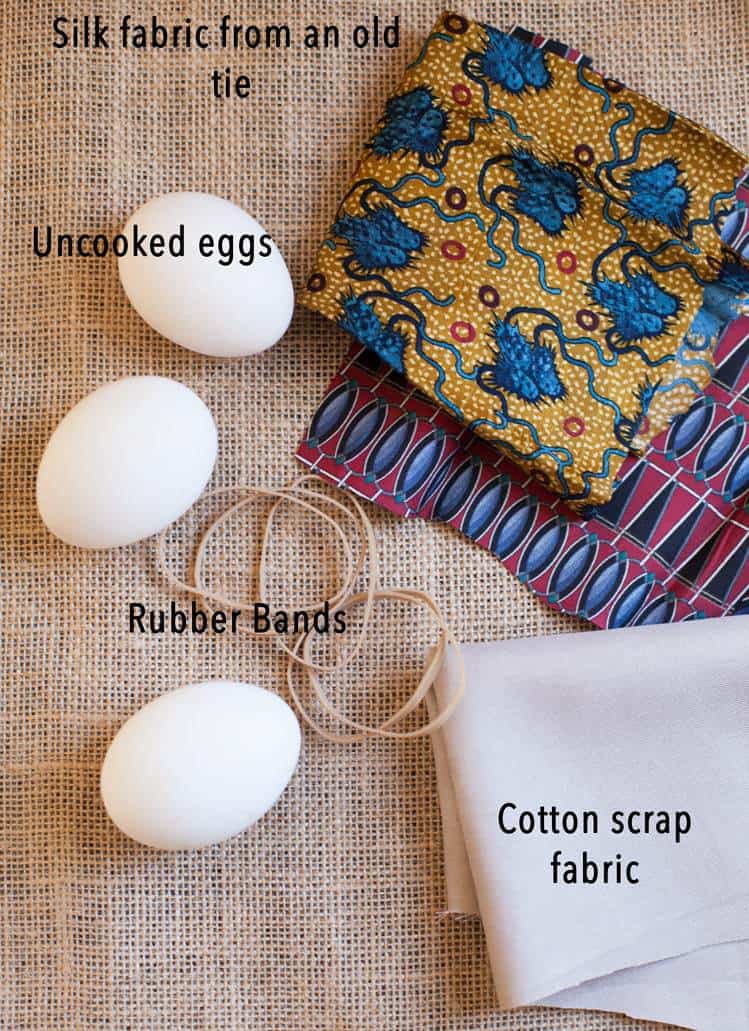
- Scraps from a silk tie about 6″x 6″ each. You’ll need one for each egg
- 4 rubber bands per egg
- Scraps of cotton fabric of any kind the same size as the silk or larger
- Uncooked eggs
- 4 cups water
- 1/4 cup white vinegar
This method is so much fun! It starts with scraps of a silk tie. If you have a silk shirt or skirt you want to cut up that would work fine–just make sure it’s 100% silk. I went by the Goodwill and picked up a couple for $1.75 because my husband wouldn’t let me cut up either of the two he owns. Two. We’re so fancy.
I found that the dark ties work best. I tried a pink one and was pretty sad to see it just wasn’t colored well enough to transfer. So stick with navy blue, red, green…stuff like that. I’m a little embarrassed to say that the yellow one you see in the picture was actually a reproduction of what a Cholera germ looks like…why would anyone wear a cholera germ on their tie? Or on their Easter eggs for that matter.
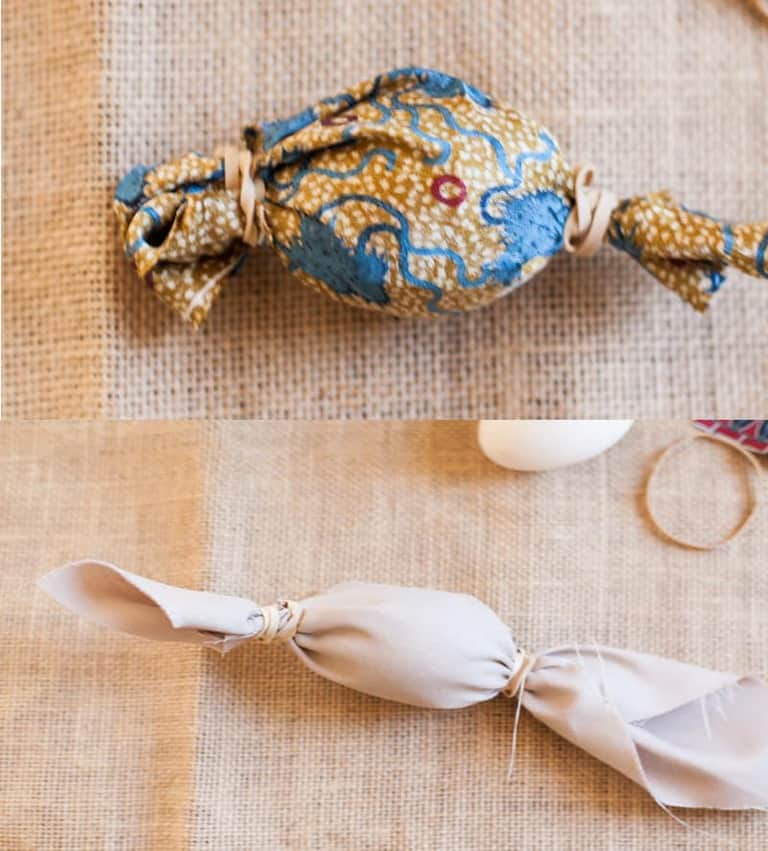
Step 1: Wrap your uncooked eggs in the piece of silk with the darker side against the egg. Twist the ends tightly so that the fabric stays in contact with the egg and secure each end with rubber bands.
Step 2: Wrap that layer in the cotton layer and secure that one with rubber bands as well. Repeat with all of the eggs.
Step 3: Place the tied eggs in a pot with the water and the vinegar. Make sure the eggs are covered. Simmer 20 minutes, turning often. You can also use an electric pressure cooker like an Instant Pot here. Cook 6 minutes then release the pressure.
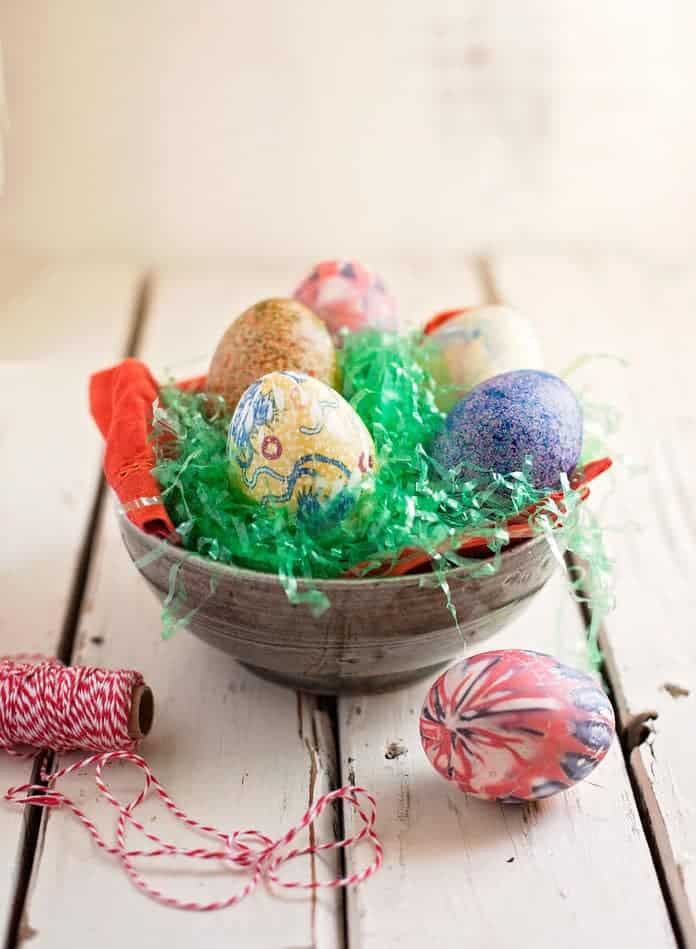
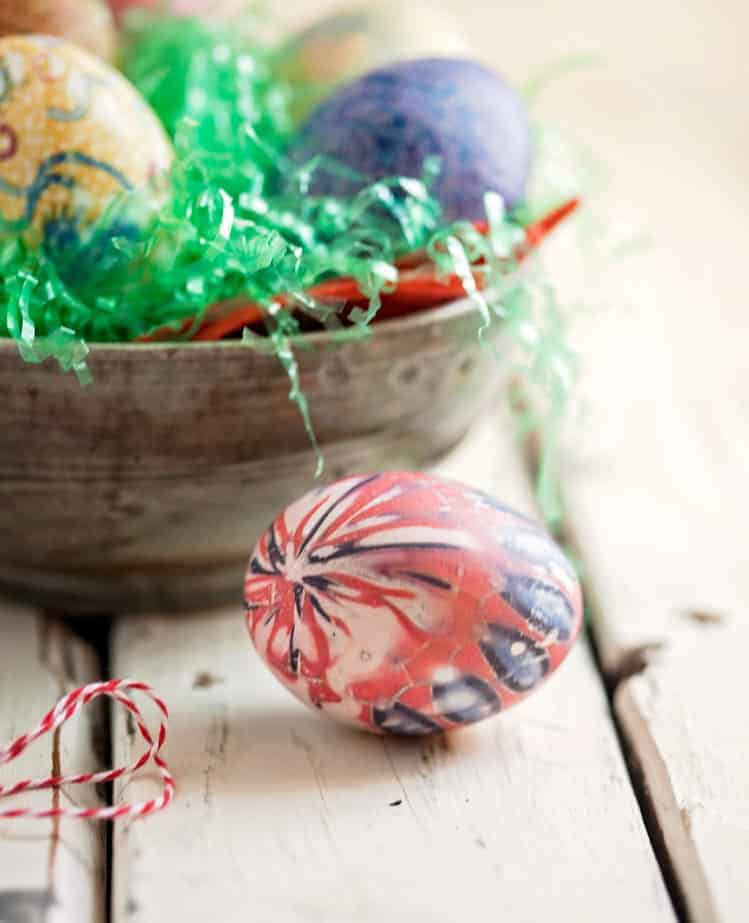
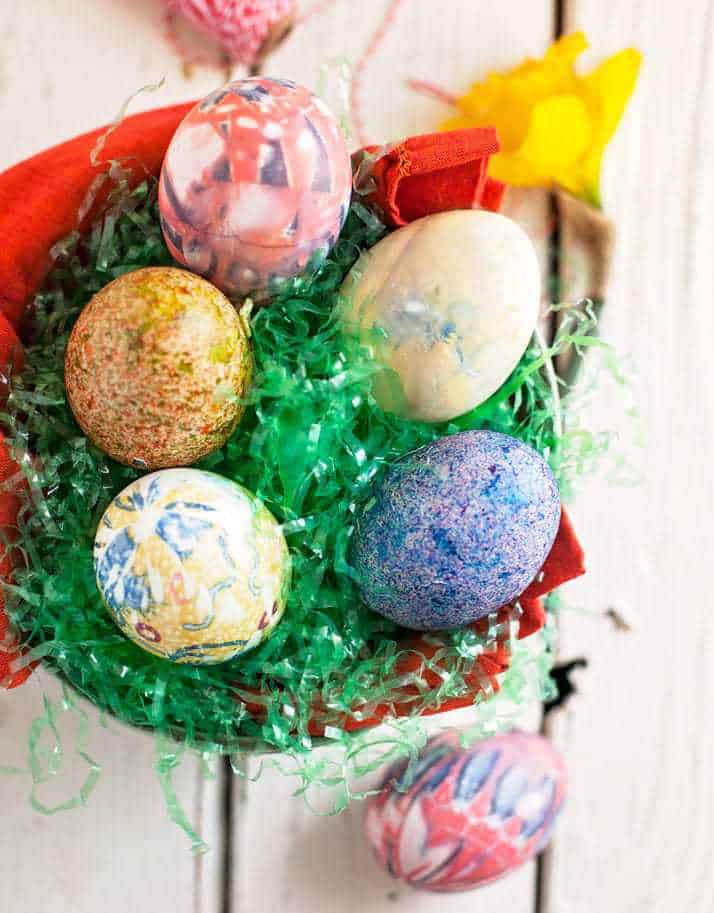
Step 4: Once the eggs are cool enough to handle, take off the bands and let the kids unwrap the eggs. Be amazed. Here’s how mine turned out:
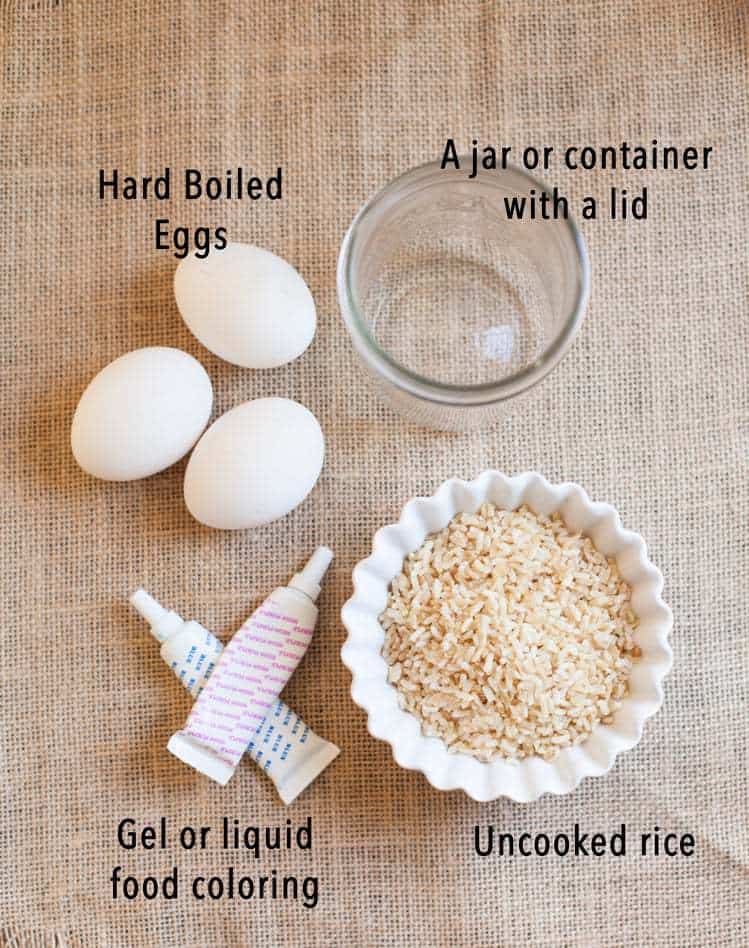
#2 The Rice Method
What you’ll need:
- As many boiled eggs as you choose
- A jar or plastic container with a lid for each color you choose
- Gel or liquid food coloring
- Dry uncooked rice (about 1/2 cup for each container)
Step 1: Pour 1/2 cup of rice in to each jar.
Step 2: Add food coloring to your rice–about 3 drops of liquid and a dime size amount of gel if you’re using that.
Step 3: Stir the color in with a knife or fork, rinsing it between jars.
Step 4: Add one egg to each jar then put on the lid. Gently roll (don’t shake!!!) your jar. This is fun for the kids to do. They can sit on the floor and roll it back and forth between them. Roll for a minute or so, then remove the egg and put it in to a second color of your choice. Repeat rolling until the egg is the color of your choice.
See the speckled ones here:
I’d love to see what creations you come up with! Make these with your kids or grandkids and send me a picture. I can’t wait!


About the Author
Rachel Ballard, RN, BSN brings more than 20 years of professional nursing expertise to Feast and Farm. With a love for nutrient dense foods that support wellness, she works to distill complex health information and current trends into recipes that fuel the best version of yourself. Read more about Rachel here.