
How to start seeds in milk jug greenhouses
When it comes to starting vegetable or flower seeds, I’ve tried just about every method out there–and most of them have ended in frustration or taken hours of hand holding just to get them to the garden. But when I learned how to start seeds in milk jug greenhouses, I grew the strongest, healthiest plants ever. You can do it too! Here’s how!
This post contains affiliate links
Milk jug greenhouses produce hearty, healthy plants that are ready to transplant long before any indoor grown plants. Because they have been exposed to temperature shifts for the duration of the growing season, these plants suffer almost zero transplant shock and often grow larger and produce more fruit than plants sown with other methods.
What you’ll need for your milk jug greenhouses
The supply list for these isn’t long, but you do need to pay very close attention to buying quality supplies. I accidentally bought enough supplies to last me through almost three gardening seasons last year so I’m all set.
Remember: if you want strong plants, you can’t skimp on quality. Here’s what you’ll need:
- Milk jugs: get the ones that are semi-transparent and not the solid white ones. You need some light to come through. 2 liter soda bottles also work pretty well with this method if you have those. Calculate up how many plants you want to sow, and plan (depending on the plant type) to put between 3 and 5 seeds per jug.
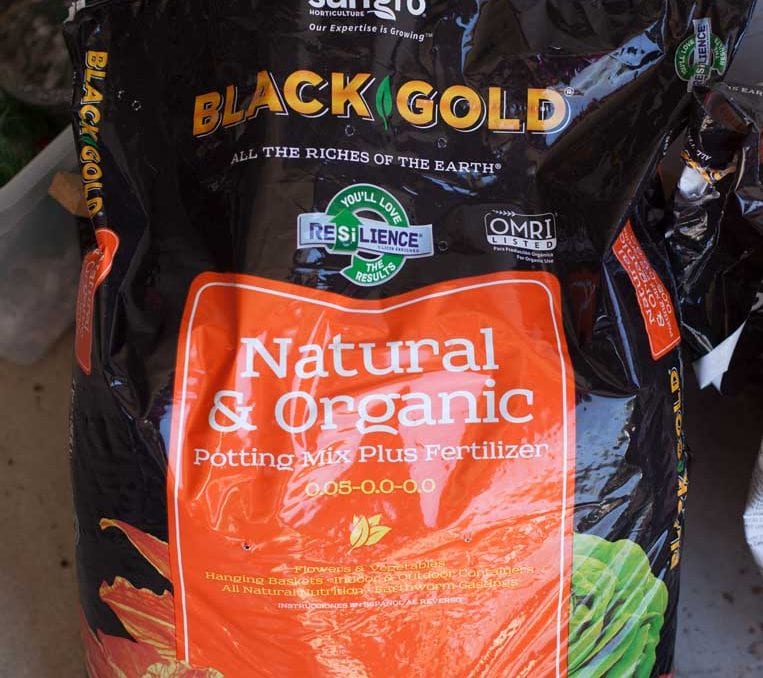
- Awesome quality potting soil. Note: DO NOT USE SEED STARTING MIXES. Seed starting mixes are way too light and don’t have the nutrients necessary to sustain your plants in their greenhouses for an extended period of time. You will not be transplanting these plants until you put them in your garden, so they need high quality potting soil. I use Black Gold. It’s not cheap, but it pays off in the end when your plants are super strong and healthy.
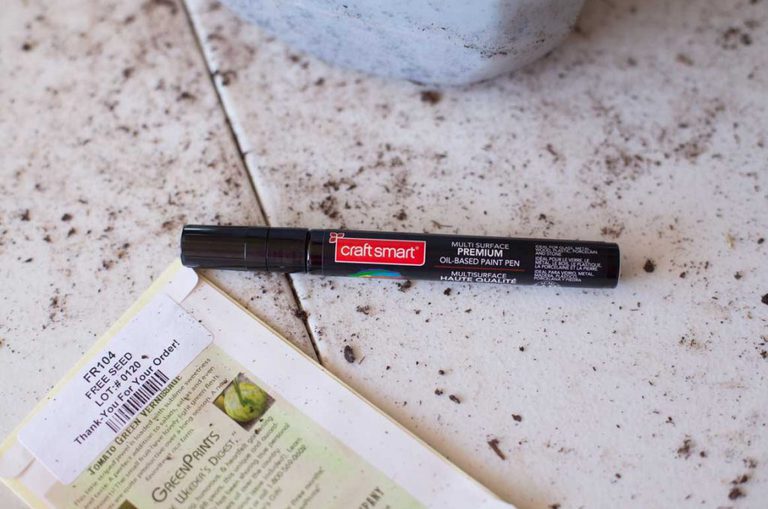
- A paint pen Some gardeners have had trouble with their labels wearing off their jugs while they sit outside. I used CraftSmart oil based pens and my labels never budged. You can also place labels inside your jugs if you’d like extra reassurance that you’ll know what’s what.
- Duct tape to seal the jugs closed.
- Vegetable or flower seeds of your choice. I’m a huge fan of Baker Creek Heirloom seeds, but I also buy them at Walmart and my garden center if I’m after something specific.
How to start milk jug greenhouses step by step:
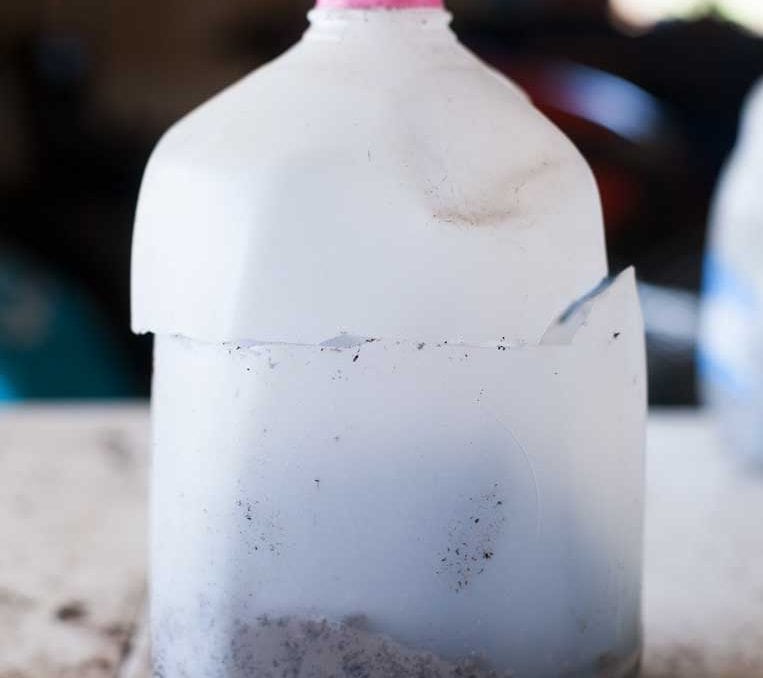
Step 1: Cut your jugs in half and toss out the lids. NEVER put the lids on your jugs once they are sown–so just toss those out right now. Using a serrated knife, cut your jugs in half, leaving the handle attached like a hinge. Poke 4 1-inch holes in the bottom for drainage. I like to cut my jugs a couple of days before I want to sow seeds so I don’t feel so overwhelmed with the process.
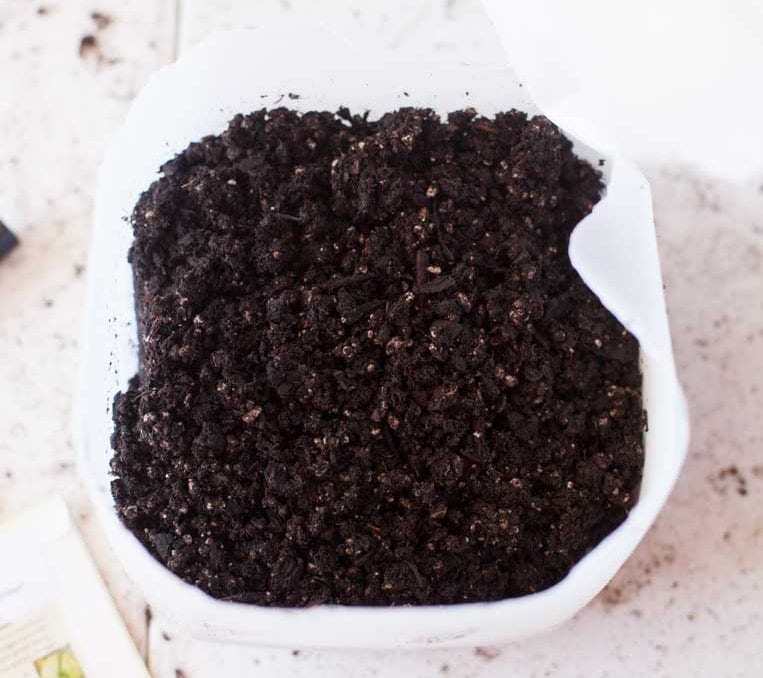
Step 2: Moisten the soil really well. I started by putting about half of a bag of potting mix in a wheelbarrow. I added water by the gallon until it was heavy with water, but not swimming in a pool of it. Keep stirring it in and leet it absorb. When it’s thoroughly wet, add about 6 inches of it to the container. Remember your plants will need plenty of room for their roots to grow and expand so this much soil is necessary.
Step 3: Add seeds. How many seeds you add to your jugs will vary depending on what you’re raising. I tend to do 5 per jug usually. One on each “corner” and one in the center. NOTE: BE CAREFUL NOT TO PUT THE SEEDS TOO DEEP IN THE SOIL OR THEY WON’T SPROUT. I barely cover mine. 1/4″ of soil is plenty. If you shove them an inch deep, you’re never going to see them again and you’ll be mega disappointed. Add your inside labels now if you are using them.
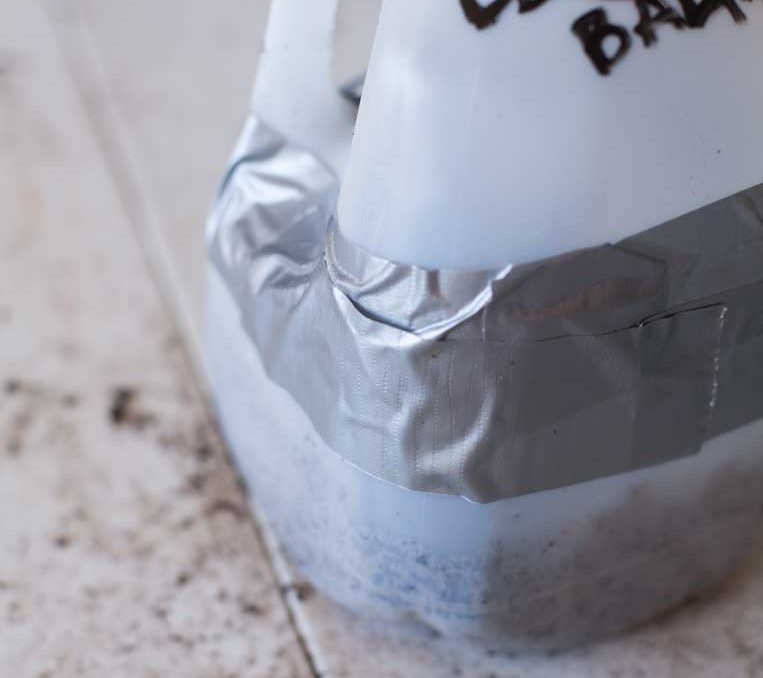
Step 4: Close your container and seal all air gaps with duct tape. Make sure you get every spot of air sealed or your greenhouse effect won’t work. I have found that only traditional flat gray name brand Duck Tape is the only kind that seals properly. Make sure you don’t have lots of soil stuck on the outside of the jug that would prevent sealing.
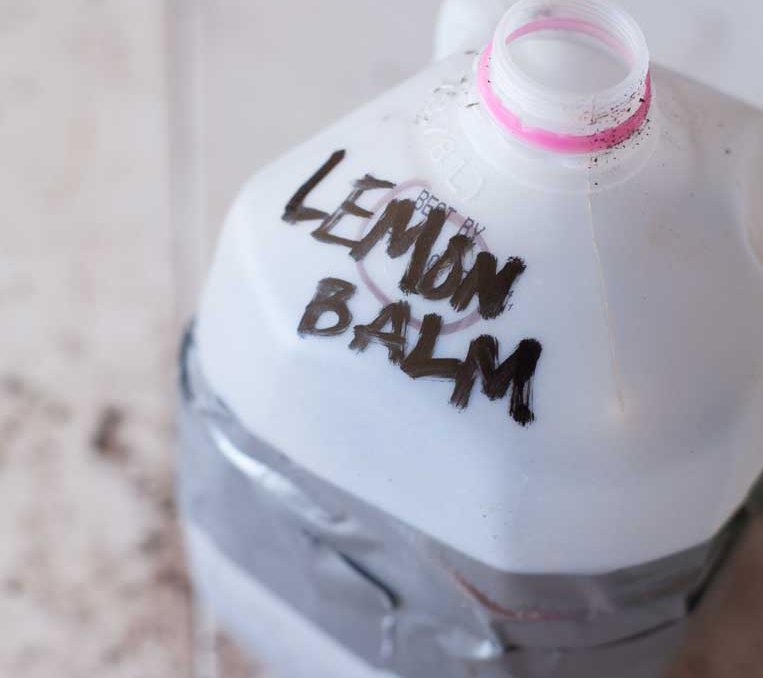
Step 5: Label the jug. Use your paint pen to write on the jug. You can write just the plant name or the date you sowed them if you choose. Whatever keeps you organized. I like to use the seed starting guide inside my Farmer’s Friend Planner for this. It keeps me super organized and lets me track how well my seeds do from year to year.
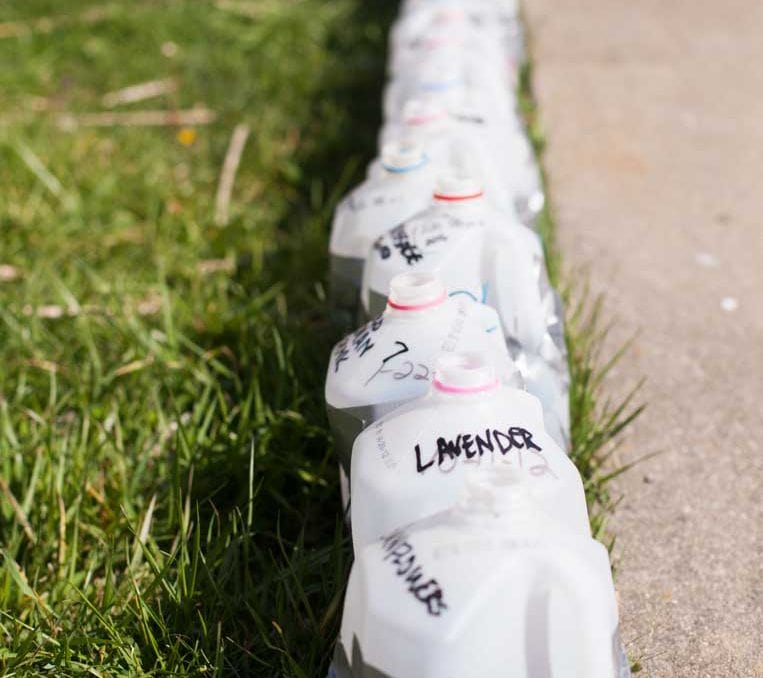
Step 6: Set them outside in a full sun location. We’ll talk more about how to care for your jugs in a minute, but for now, carry them all out into the sun and admire your work. It’s a beautiful thing. If you have a lot of wind where you live, prop your jugs on both sides with something supportive like bricks or stones so they don’t blow over. **If your jugs blow over before they sprout, they probably won’t come up at all and you’ll need to start over.

How to care for milk jug greenhouses
Once your greenhouses are sitting pretty, they won’t need much. If your jugs are tightly sealed they will make a greenhouse effect and you’ll see moisture collect on the inside of the jugs. This will drip back down on to your soil inside the container…BUT….if your soil begins to look dry, water.
If your seeds haven’t sprouted yet, you don’t want to just dump water down the hole of your jugs. You can dislodge them or force them deeper into the soil so they don’t emerge. Instead, I like using a spray bottle and just misting water inside. Just four or five squirts through the top is plenty. Some people like to set their jugs in a shallow tub of water as well so the moisture is absorbed from the bottom up. Either way is fine.
Just keep them moist (check them daily) and you’ll soon see sprouts of plants emerging. How long that will take depends on what you’re growing.
What to do if it gets cold
If you’ve sown your seeds and the temperature drops below freezing and they HAVE NOT sprouted, you’re fine! Don’t do anything to the jugs. In fact, there’s a whole method called winter sowing where you do just this. Put the seeds out in winter, leave them under snow and they will sprout naturally when spring arrives.
If your plants have sprouted, you’ll want to either move your jugs indoors or in to a garage for the night then take them back out the next day, or just cover them with a heavy blanket until morning.
What to do if it gets too hot for your milk jug greenhouses
I never have this problem, but if temperatures spike and your sprouted plants seem to be struggling, you can move your jugs into the shade. Some people even have to undo some of the tape and let some air through.
When to sow your milk jug greenhouses
If you don’t want to do the winter sowing technique, it’s really important to know when to sow seeds for your growing area or zone. Here in Kentucky, temperatures can spike to 70 for two weeks in February then tank to below zero again in March–I don’t dare try the full winter sowing approach. Everything would sprout then die.
I start my plants 8 weeks before I want to plant them. That’s usually mid-May here so mid March is when I start my seeds. About a week before you’re ready to transplant, take the tape off your jugs and leave them gapped so the plants can further adjust to the outside temperatures. You can even hinge open the jugs after two or three days. Just remember to check their moisture level and water as necessary.
How to transplant your seedlings from the jugs
When I’m ready to transplant I have two methods:
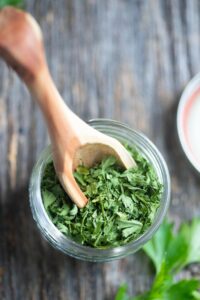
- Plant the whole contents of the jug in a clump. I use this for tender herbs or small flowers that won’t tolerate being separated. To do this, I open my fingers and then gently place my hand over the plants. Using the other hand, I turn the jug over and gently release the clump of soil and plants into my hand. I turn it back over and put the whole thing down in the hole.
- Turn out and separate. This method works best for vegetables like tomatoes. I use the same method to gently turn over the jug as mentioned above then I gently separate the plants being careful to make the breaks between the plants and keep as much soil and root intact as possible.


We are in Zone 9, and temperatures are currently running in the upper 90’s. Should we put our jug greenhouses in the shade, or in the sun?
Yes I’d put those in the shade.
if you do have heavy rain instead of moving all the jugs can’t you simply put the covers back on then remove after the rain us over? I have an old “red flyer” wagon the I’m going to use if I do have to move the plants to the shade. in Michigan the weather varies so much. I’m very excited about trying this method next year. sounds so much easier than the current way we do it. thank you so much.
Hi Marlene, the rain isn’t a problem. Just if the jugs get knocked over in the wind. Lids can stay off even in a downpour as long as the wind isn’t blowing them over. –Rachel
Since we used distilled water in our coffee makers, we have chosen to use those since there is no reason to rinse them. We are just now going to start seeds (a little late for zone 7a in Oklahoma), so I hope this works well for us. We found another organic soil mixture for container gardening I think we like better than the one you mentioned before at Ace Hardware called Whitney Farms Organic Fruit and Vegetable Raised Bed Mix. I won’t know how well this works in the gallon containers until we try this. We no longer have a traditional garden but plant in a nice raised garden, watering troughs, and food grade buckets we get free or cheap from Sam’s Club that have had frosting in them. (We are “Seniors” now and there are only the two of us living here.)
Thank you for the information! I have spent way too much money on other methods and hope this one works well!
Tina
Hey Tina! Don’t worry–this method works anywhere! If it gets up to 75/80 degree days, move your jugs into the shade so they don’t overheat but other than that, just let them grow. You’ll do a great job! –Rachel
Thank you for the information. I live in Big Clifty, Kentucky.
I grew up right up the road in White Mills Janice! 🙂
What are you using to put holes in the bottom of the milk jugs?
I use a sharp pointed serrated knife. I poke in and then twist a little.
I had trouble cutting the holes on the bottom but I found a light duty knife made by Revell that used a single edge blade and it made the job quick and easy!
Yes that’s great! I use a pointed serrated knife but some people also use a wood burning tool and burn the holes in. –Rachel
my tomatoes are 2″ high..it’s mid Feb. should I transplant?
Hi Dorothy, No. We don’t transplant anything from our jugs unless they are going straight into the garden. They will be ready to harden off and move when they are growing out the top of the jug three or four inches. Here in zone 6, my time to plant is May 10th give or take a bit. You should start plants about six weeks before your last frost date, otherwise they will either be ready much sooner than the weather will allow for planting, or they will die in cold weather. I start my seeds mid March to plant the second week of May. I hope that helps. –Rachel
Do you have trouble separating the roots when you transplant them? If so, is there a trick to it?
No not usually Jessica. If it’s something delicate, I usually just plant the whole clump. I turn it out gently into my hand then flip it over and put it in the hole. If it’s larger items like tomatoes, they can be gently separated without issue. Some plants will have a day or two of expected transplant shock but I’ve not had too many plants die at all with this method. –Rachel
If I can not find that exact potting soil – what would be the next best thing –
Sara I’d recommend ordering it. It’s never in any of my stores either and there’s just nothing that compares to it that you can buy in the big box stores. Here’s their main site you can use to do a search for local stores or you can have it shipped in. One bag usually lasts me three seasons. https://foxfarm.com/
Hi, how do you handle rainy days in the winterweeks with the milk jug greenhouse, with temps not lower than 30-35?
Hi Stephanie, Rain isn’t an issue since you have drainage holes in the bottom and the lids off the tops. Any rain water that gets in just flows out the bottom. And as long as the seeds haven’t sprouted there’s no concern even if the jugs were to freeze. Once sprouts are up, I might cover with a blanket or beach towels until the temp was above freezing for that day. I find that the sprouts do fine if they have been used to those colder temps already, but if your weather is like ours is here in Kentucky, it can be in the 60’s in January for three weeks then 16 for three weeks. If it’s something like that where the plants have sprouted in a warm burst of air, I move all my sprouted jugs into my garage for two or three days or until that weather passes then I bring them back out. It’s not ideal, but the plants handle it okay. Let me know if that answers your question clearly. –Rachel