
How to make baby back ribs on the grill
Baby back ribs on the grill are a specialty of summer–and something every rib lover wants to have on their table when they get a chance. My version takes a nod from the way my mom used to tenderize them and makes grilling a snap–get all the finger licking secrets here.
There’s nothing like the smell of baby back ribs on the grill. Well really, I like just about anything on the grill or over a campfire. It just tastes better than if you did it inside.
But grilling can feel intimidating if you aren’t sure how to tackle these classics–if you’ve been more of a burger and hot dogs sort of person but want to move up to baby back ribs on the grill, I think you’ll be amazed how easy it really is.
Tips for tender, juicy baby back ribs on the grill
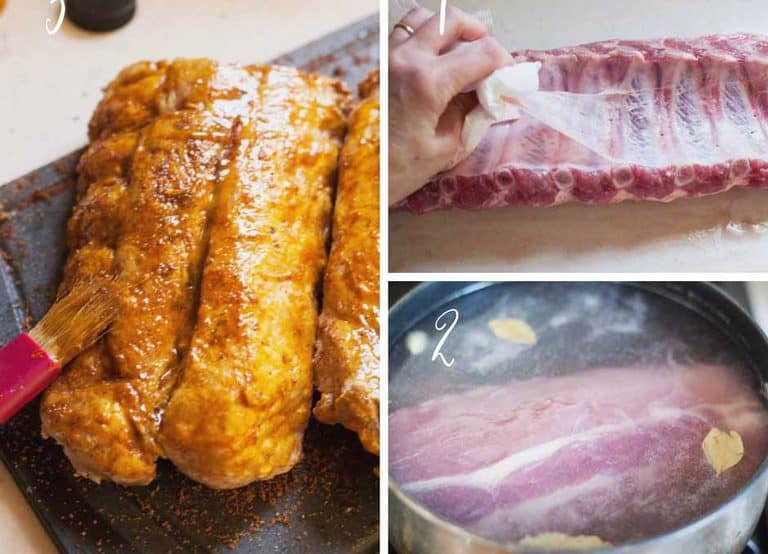
1. First, remember that you need to get the connective tissue off the back of the ribs. I know, I know. Gross.
But very necessary to make sure the ribs are tender and easy to eat. To remove the tissue, start on one end and wiggle a knife up under it–you’ll see it because it’s sort of cloudy white and tough.
Get part of it lifted and loose then use a paper towel to grab it and pull to the other side. Most of it should come off in one tug. If it breaks, just pick up where you left off and get what you can.
2. Next, we are going to boil these babies. Don’t die. I get it–the fact that someone out there is screaming at me right now because I haven’t done a 12 hour dry rub and 16 hours over a smoker.
Get real people. This is life.
We want these to be tender, right? Well this is how we did it growing up and it works. We add the ribs to pot of flavorful simmering water with bay leaves, garlic, salt and onion powder where they will bubble away for an hour (or more if you have time) until they are tender and ready for the grill.
Note: You can boil your meat, let them cool down then wrap them and put them in the fridge until you’re ready to put your baby back ribs on the grill.
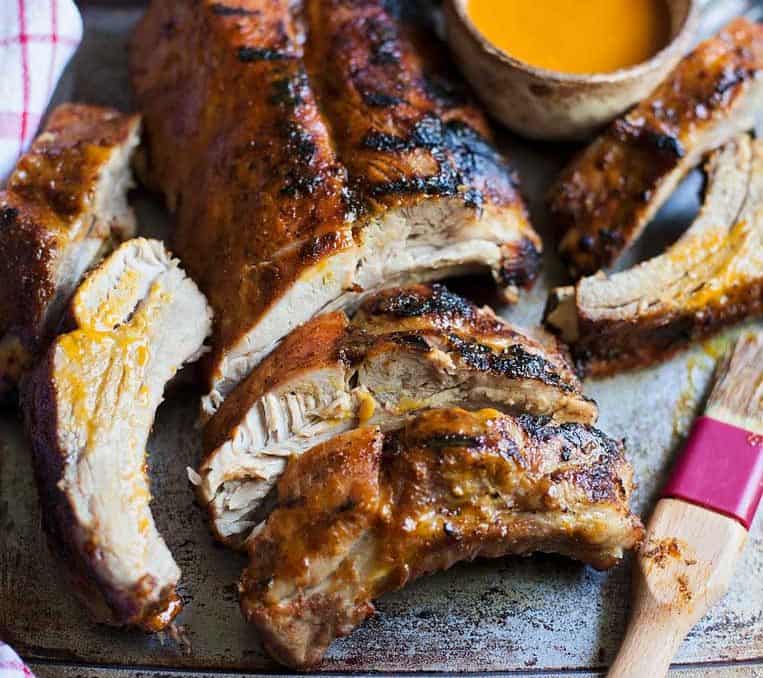
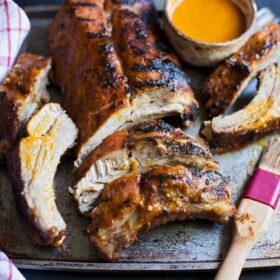
3. Finally, we brush the warm meat with any bbq sauce you like (I used Carolina Gold) and grill them just until crusty on the outside and hot all the way through.That’s one of the glories of this version in that you don’t have to worry about if they are cooked through on the grill. It has already been done in the pot.
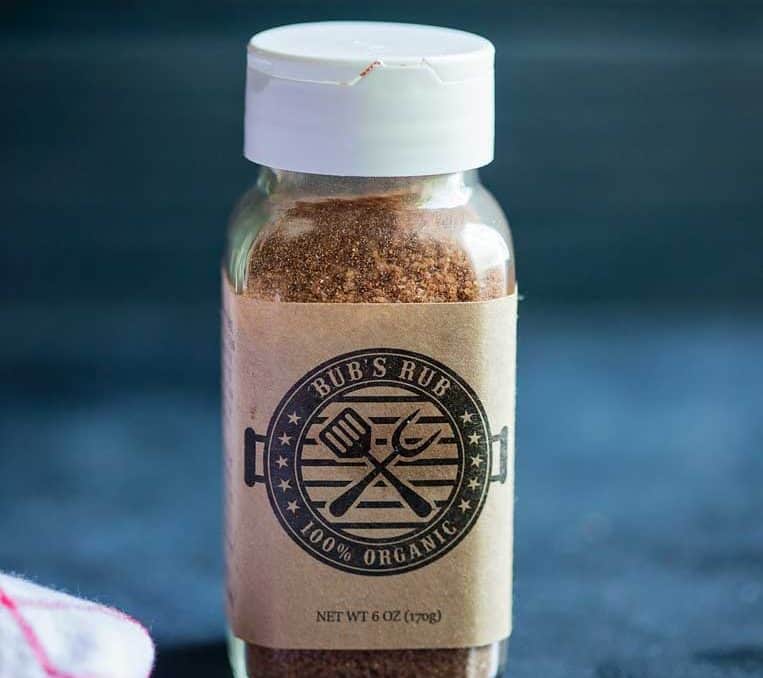
I did use a dry rub on my ribs after they simmered and then put on my sauce. My favorite is Bub’s Rub and you can learn about that here.
I like to brush my baby back ribs with some extra sauce when they come off the grill just for kicks and serve them warm with baked macaroni and cheese, some corn on the cob or my favorite corn recipe EVER, and plenty of napkins.
How to make baby back ribs on the grill
Ingredients
- 3 quarts water
- 3 garlic cloves
- 2 bay leaves
- 1 teaspoon onion powder
- 2 teaspoons salt
- 1 full rack of baby back ribs
- 2 tablespoons dry barbecue rub I used Bub's Rub, but it's optional
- 3/4 cup barbecue sauce of your choice
Instructions
- Bring 2 1/2 to 3 quarts of water to a simmer in a large pot. Remove skins from garlic and smash once but don't chop up. Add to the water along with the bay leaves, onion powder and salt. Allow to simmer while you prep the ribs.
- Turn the rack over, bone side up and starting at one end, loosen the layer of connective tissue that lays against the bones. Using a dry paper towel, grasp it and pull in the opposite direction, removing it from the length of the ribs. Cut away any excess fat, and cut the ribs in half so they will fit in the pot.
- Add the ribs to the simmering water and cover. Cook on low for an hour to an hour and a half if your ribs are really thick or meaty, or until your ribs are slightly tender when a fork is inserted. Transfer the ribs to a plate to cool for a couple of minutes. You may refrigerate them now, or start your grill.
- If grilling them right away, brush with your favorite sauce and cook over medium high flame or coals until just starting to char on one side--about 6 minutes--then turn and cook another 6 or until the ribs are hot throughout.
- Allow the ribs to rest 5 minutes before cutting and serving.


I have been doing ribs pork and beef for years and boy is this easy and quick.
Thank you for this quick and practical guide to cooking ribs. I like to cook ribs and obviously want them to taste good. But honestly, I just want to know how long I have to cook them until they are safe to eat, but before they are burnt.
Hey Braden, you could try to stick a thermometer in them if you want to just have them “cooked” and that’s to 145 degrees. If you take it up to closer to 200 degrees you should be able to get some of the collagens and fats to melt and hopefully get a more juicy final result. The goal with pre-cooking mine like I do is to help tenderize the ribs. If you just slap them on the grill you’d need to cook them low and slow so they aren’t really tough. –Rachel
You can skip the boiling part, but you will want your grill at a low heat, between 275°-300°. If cooking directly over the heat, flip the ribs every 15-20 minutes and watch how the meat recedes at the base of the bones, about a good 1/4″. As you flip the ribs you will notice that the end farthest from where you’re holding them will hang lower and lower, the lower the hang the more tender they are becoming. Hope this helps
There are certainly lots of ways to do your ribs and I realize the boiling is a bit odd…but for those of us who want them tender without spending hours watching grill temperatures and flipping every few minutes, it’s a great method. That’s why it works for me. –Rachel