
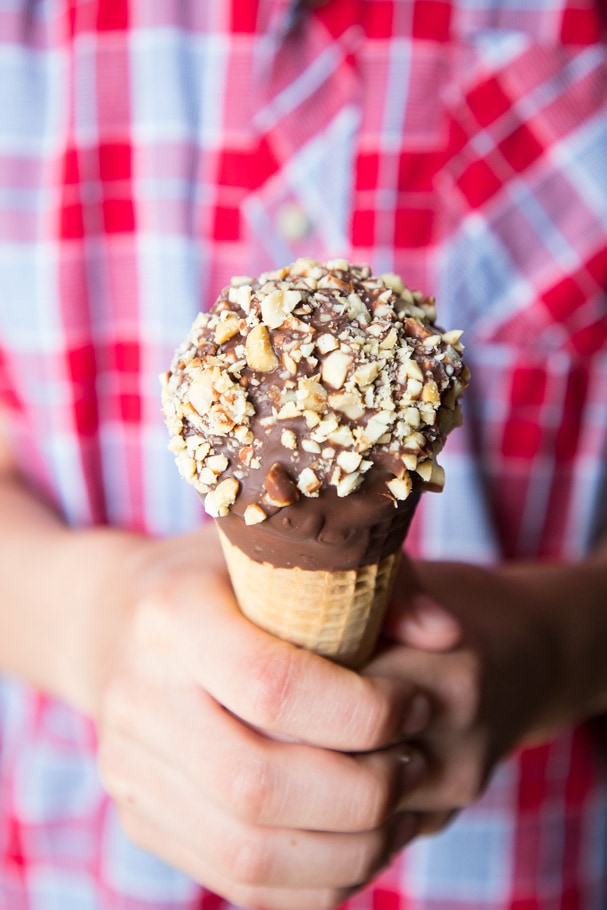
Chocolate Peanut Drumstick Ice Cream Cones
Drumstick ice cream cones are an American classic. Vanilla ice cream, chocolate shell and peanuts all piled into a waffle cone–they are delicious from top to bottom–but my version cuts many of the stabilizers, additives and preservatives from the store version and is still big on flavor.
This post is part of my Junk Food Remakes series on YouTube. You can see the full episode, along with others, and get all of the step-by-step instructions here.
Ask most people and they’ll tell you that drumstick ice cream cones come in a box, not from your kitchen. Why in the world would you even bother to make such a thing from scratch?
For me it’s because the store bought ones don’t even contain any real ice cream–I mean–unless you count dairy product solids and skim milk as the real deal. And if you’re trying to eat better I’ve always said that your body will respond a lot more logically to ingredients like cream, sugar and vanilla than to propylene glycol monostearate.
Customize yours any way you need to!
Maybe the most glorious reason to make your own drumstick ice cream cones is that you aren’t limited by dietary concerns. If you’re dairy free, use a coconut milk ice cream. If you need a nut-free version, leave them off or put sunflower seeds on the top. That would be amazing.
Making adjustments like this mean that the people you love (or you yourself) can enjoy treats you couldn’t have before and those small things feel really special sometimes.
If you’re using ice cream in yours, heads up for these tips
Ice cream can be really sneaky for hidden ingredients. I recommend finding a brand that’s free from colors, gums and carrageenan. I know Aldi carries a supreme brand that’s just cream, vanilla, and sugar and Haagen Dazs is also great. Just read the labels and choose one that’s as junk-free as you can afford.
Tips for making the best homemade chocolate peanut drumstick ice cream cones
- Make your own cones if you want to, use a gluten free version, or buy them at the store. I bought mine for this version because I honestly didn’t feel like doing that extra work.
- Stand your cones up in something tall enough to hold them mostly upright. I used coffee mugs because plastic cups just fell over.
- Melt enough chocolate to drop a bit in the bottom of each cone then allow that to set in the freezer for a few minutes.
- Pile in your ice cream and make a mound on top either with an ice cream scoop or a spoon.
- Freeze until very firm. If you try to work with your ice cream too soft you’ll be ticked off by the end. Ask me how I know.
- Once the ice cream is very hard, melt chocolate chips with coconut oil for the shell. Make sure your peanuts are chopped really finely and are ready to go as well.
- Dip the cone into the chocolate to cover the ice cream and where it meets the cone. Dip into peanuts and chill until solid–an hour or more.
How to make drumstick ice cream cones in advance
Once you’ve made as many cones as you wish and they are frozen solid, wrap each one loosely in parchment paper and place them in a gallon zipper bag or air tight container. Store in the freezer for up to two weeks. They may store longer than that, but I find that the cones start to get a little soft if you go longer than that.
Enjoy even more junk food remakes
If you’ve missed the series, you can check out my homemade pop tarts, hot pockets and microwavable easy mac and cheese. You’ll love them!
Watch me make these drumstick ice cream cones on YouTube!

Chocolate Peanut Drumstick Ice Cream Cones
Ingredients
- 12 sugar cones gluten free, homemade or your choice
- 1/2 gallon vanilla ice cream get a good quality one!
- 1 3/4 cups chocolate chips divided
- 1/4 cup coconut oil
- 3/4 cup roasted salted peanuts optional
Instructions
- Set the waffle cones upright in coffee cups or some other sturdy container. Place the coffee cups on a large cookie sheet and make sure you have room in your freezer for them all to chill standing up. If not, do them in smaller batches.
- Melt 3/4 cup chocolate chips in the microwave in 30 second bursts, stirring in between until the chocolate melts.
- Add 1/2 teaspoon dollops into the bottom of each cone and allow the chocolate to set in the freezer–about 5 minutes should do it.
- Set out your ice cream if it’s very hard and allow to soften just so you can work with it. Using a small spoon, gently fill the cone with ice cream until you are flush with the top. Use an ice cream scoop or your spoon to mound ice cream on top.
- Use your hands to gently “seal” the ice cream to the cone. Return the cones to their coffee cups and chill until very hard–at least one hour.
- When you’re ready to dip, melt the remaining chocolate chips with the coconut oil in 30 second bursts until melted and smooth.
- Finely chop the peanuts and have them nearby.
- Working quickly, dip the ice cream into the chocolate making sure to cover the place where the ice cream meets the cone.
- Dip in the peanuts and freeze again until sold. One hour more.
- To store wrap in parchment paper and store in a zip top bag or air tight container for up to two weeks.
Nutrition


About the Author
Rachel Ballard, RN, BSN brings more than 20 years of professional nursing expertise to Feast and Farm. With a love for nutrient dense foods that support wellness, she works to distill complex health information and current trends into recipes that fuel the best version of yourself. Read more about Rachel here.