
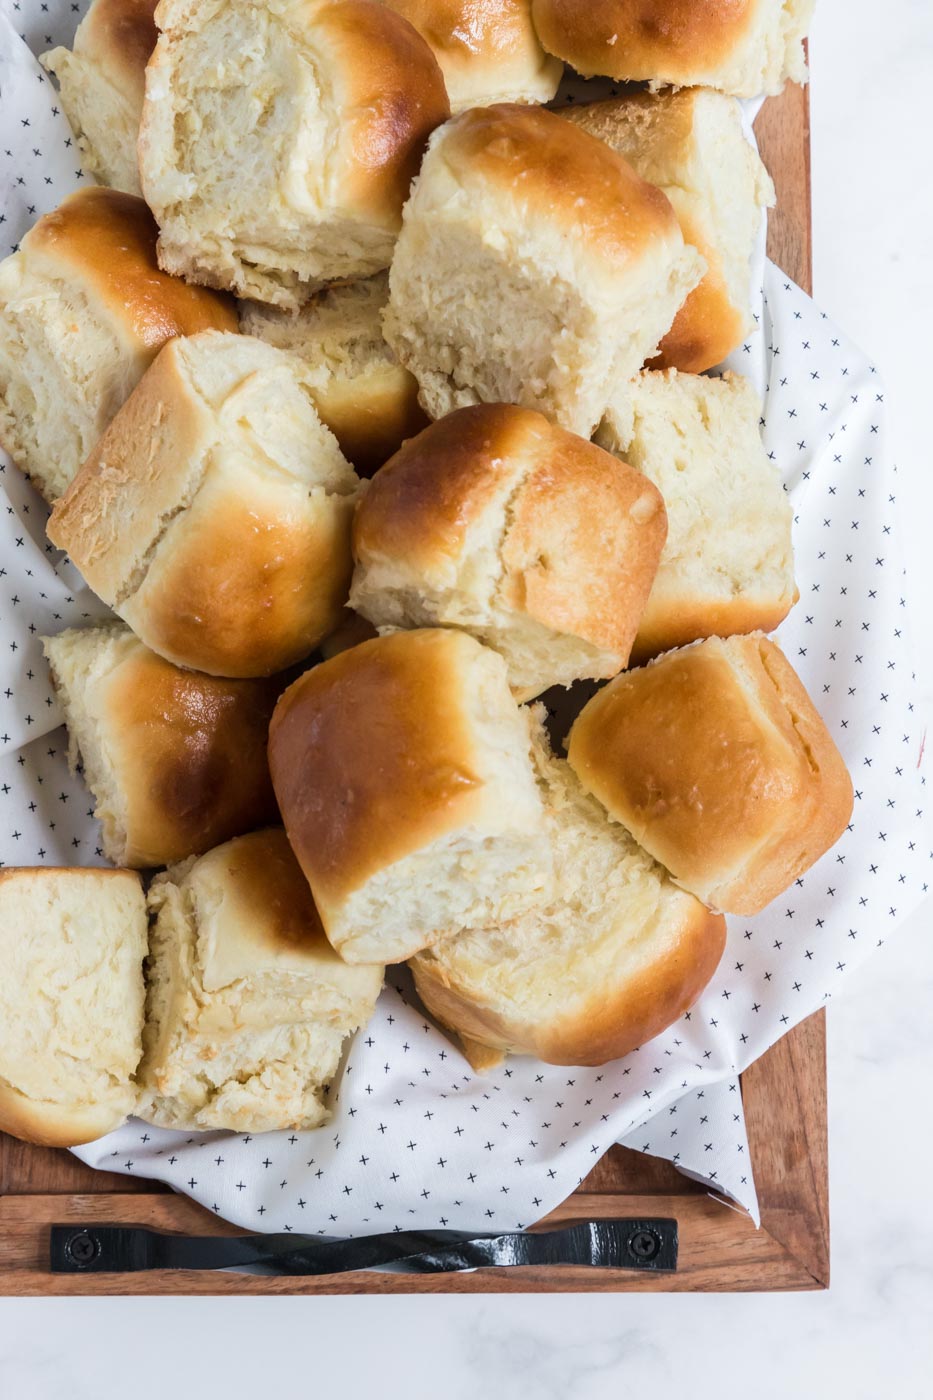
Old Fashioned Yeast Rolls (a 100 year old recipe!)
Old fashioned yeast rolls bring to mind a soft pillowy dough, buttered golden tops and not a single plastic bag of anything ending in Shubert or Rhodes. Make a recipe passed down for more than 100 years and keep the tradition going.
Jump to Recipe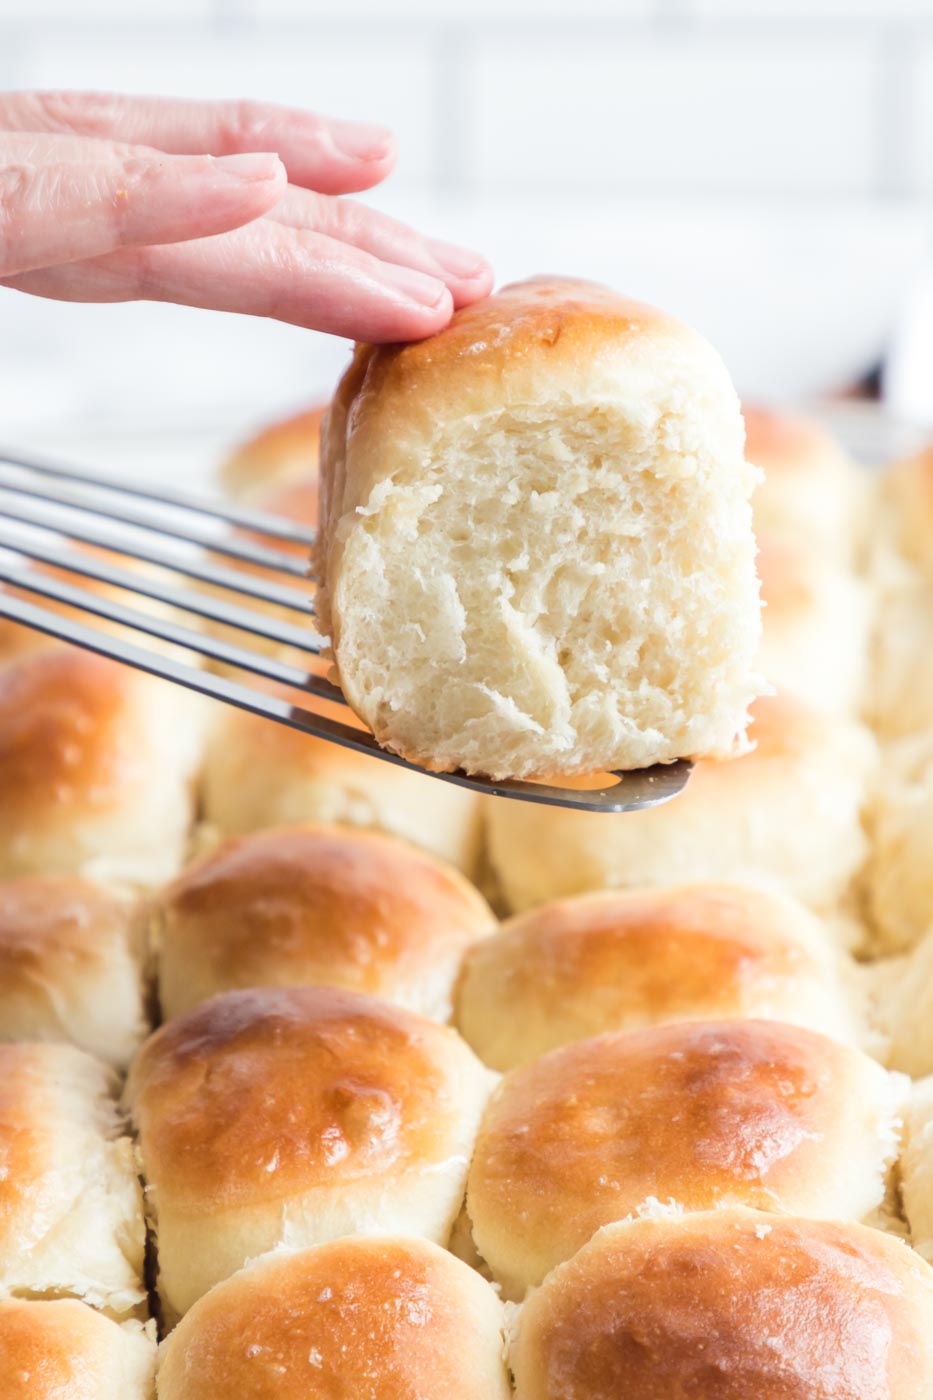
I hear you hate hearing stories about recipes. So the only validation I’ll give you for this recipe is that it was my husband’s great grandmother’s. She was born in 1918, ran a restaurant and baked the lightest, best rolls ever.
I took over baking them after her heart attack more than 20 years ago, and each year she would taste one before Thanksgiving slathered in butter and tell me how good they were. No pressure. This is that recipe.
The key to activating yeast
When baking any sort of yeasted old fashioned yeast rolls, it is crucial to activate your yeast properly. Here come some tips to set you off on the right foot:
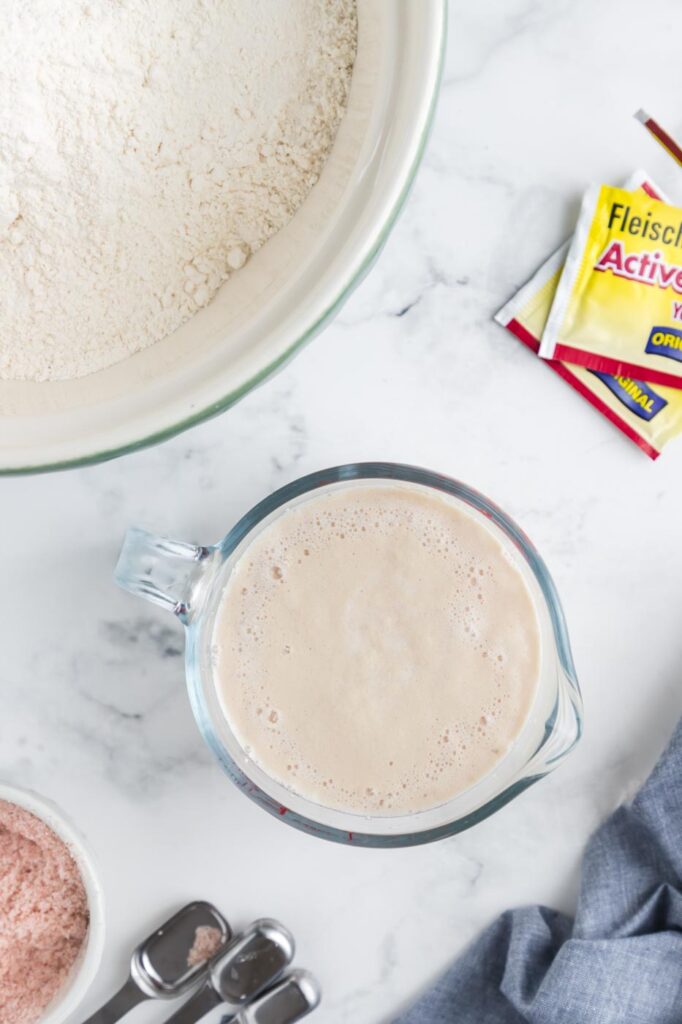
- Make sure that the water you are dissolving your yeast in is only just over lukewarm (somewhere between 110 and 115 degrees F). Too hot will kill the yeast and too cold will not have enough oomph to activate it.
- You will know your yeast is activated when it is foaming. Not dramatically, but just a bit. Check out this video to get a general idea of what to look for.
- I suggest using active dry yeast as opposed to instant yeast. If you are in a pinch and only have instant yeast, make sure to activate it in lukewarm water just the same as you would with active dry yeast.
Make the dough
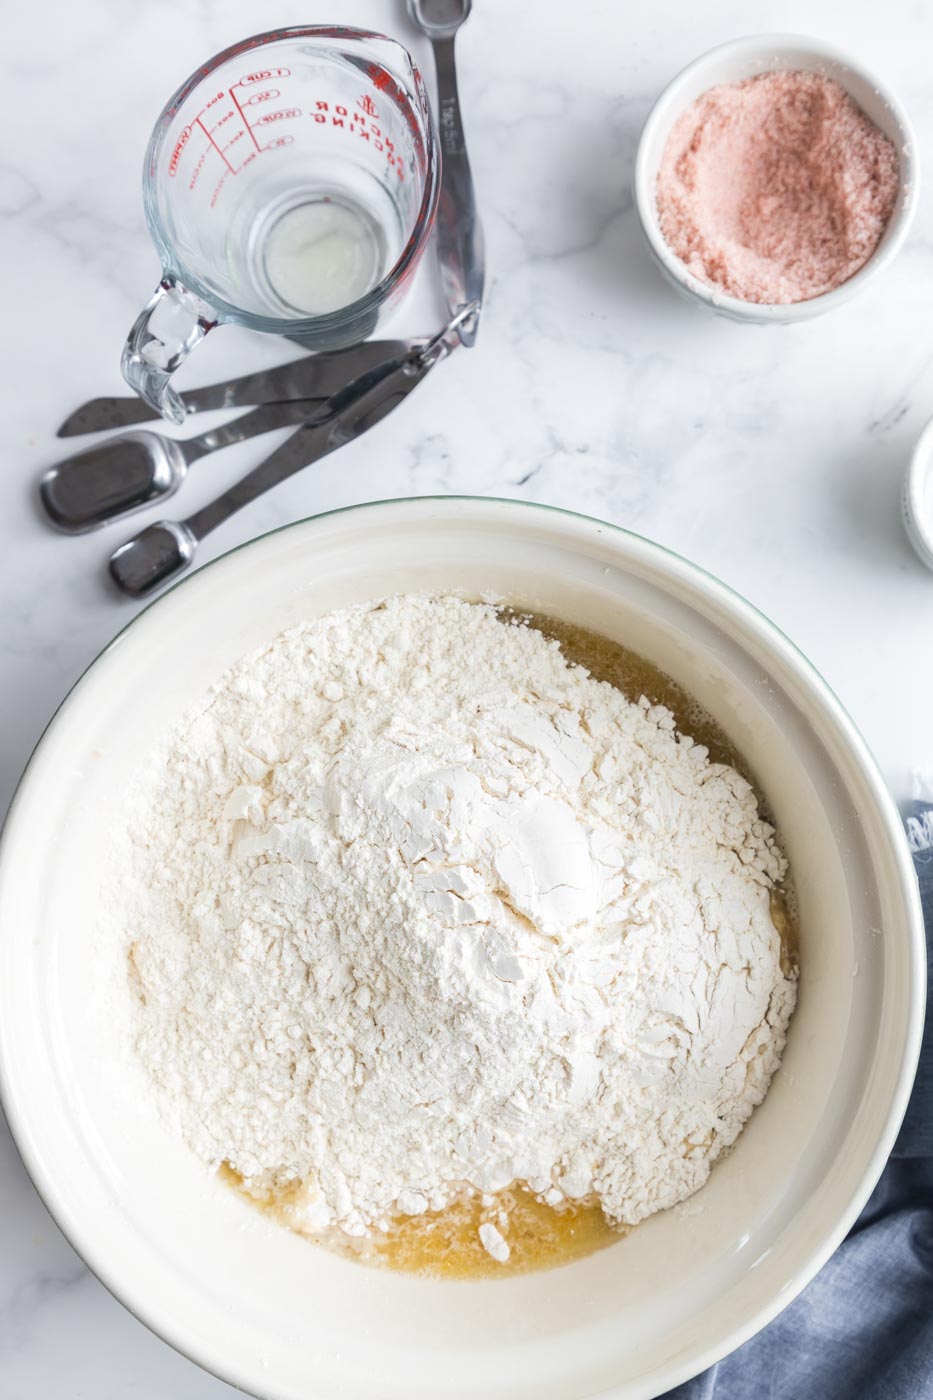
- Activate yeast in warm water
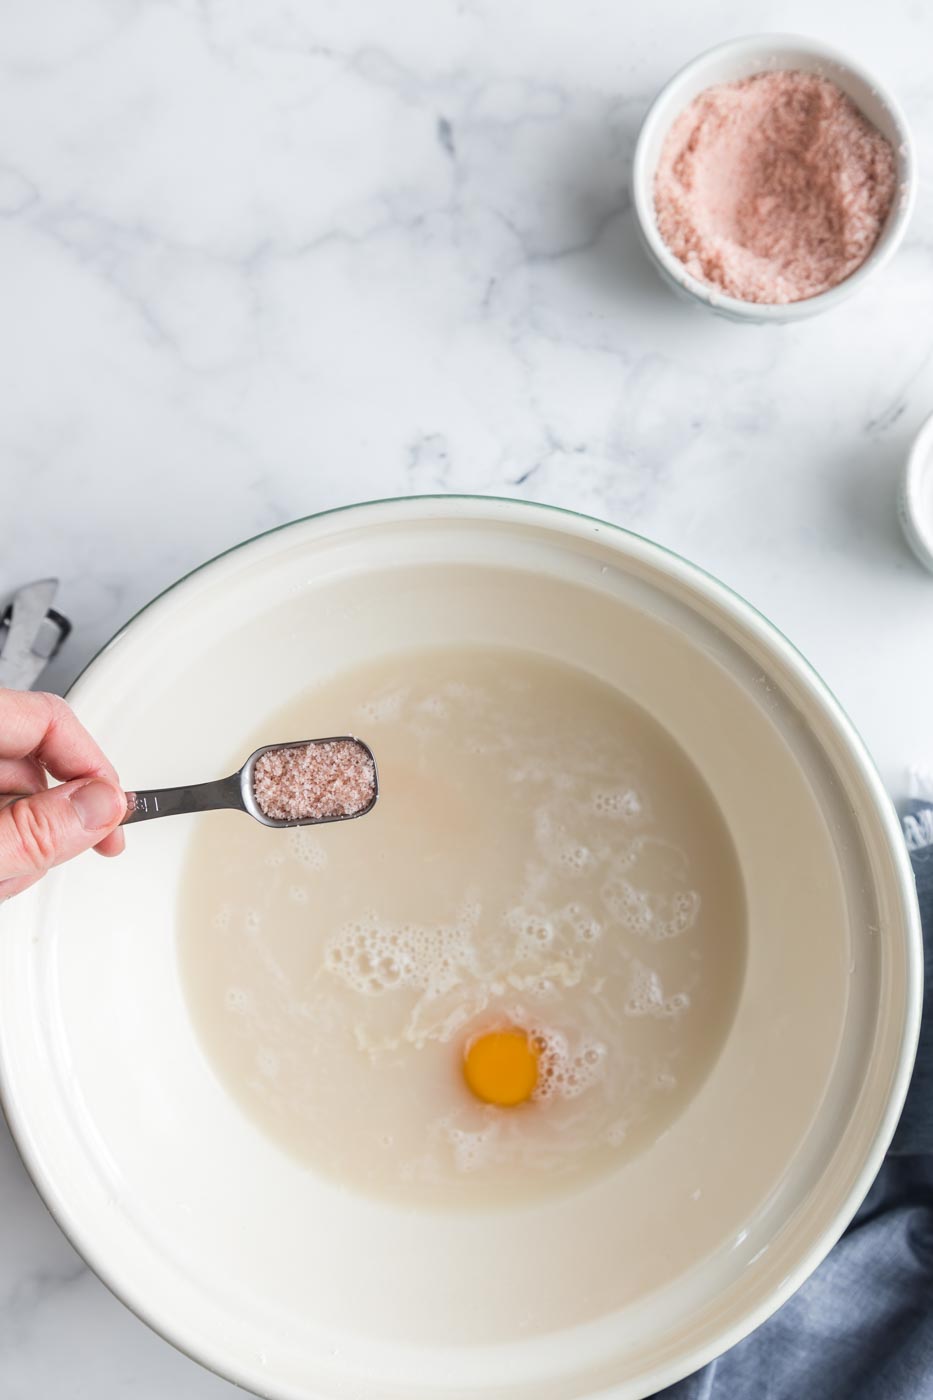
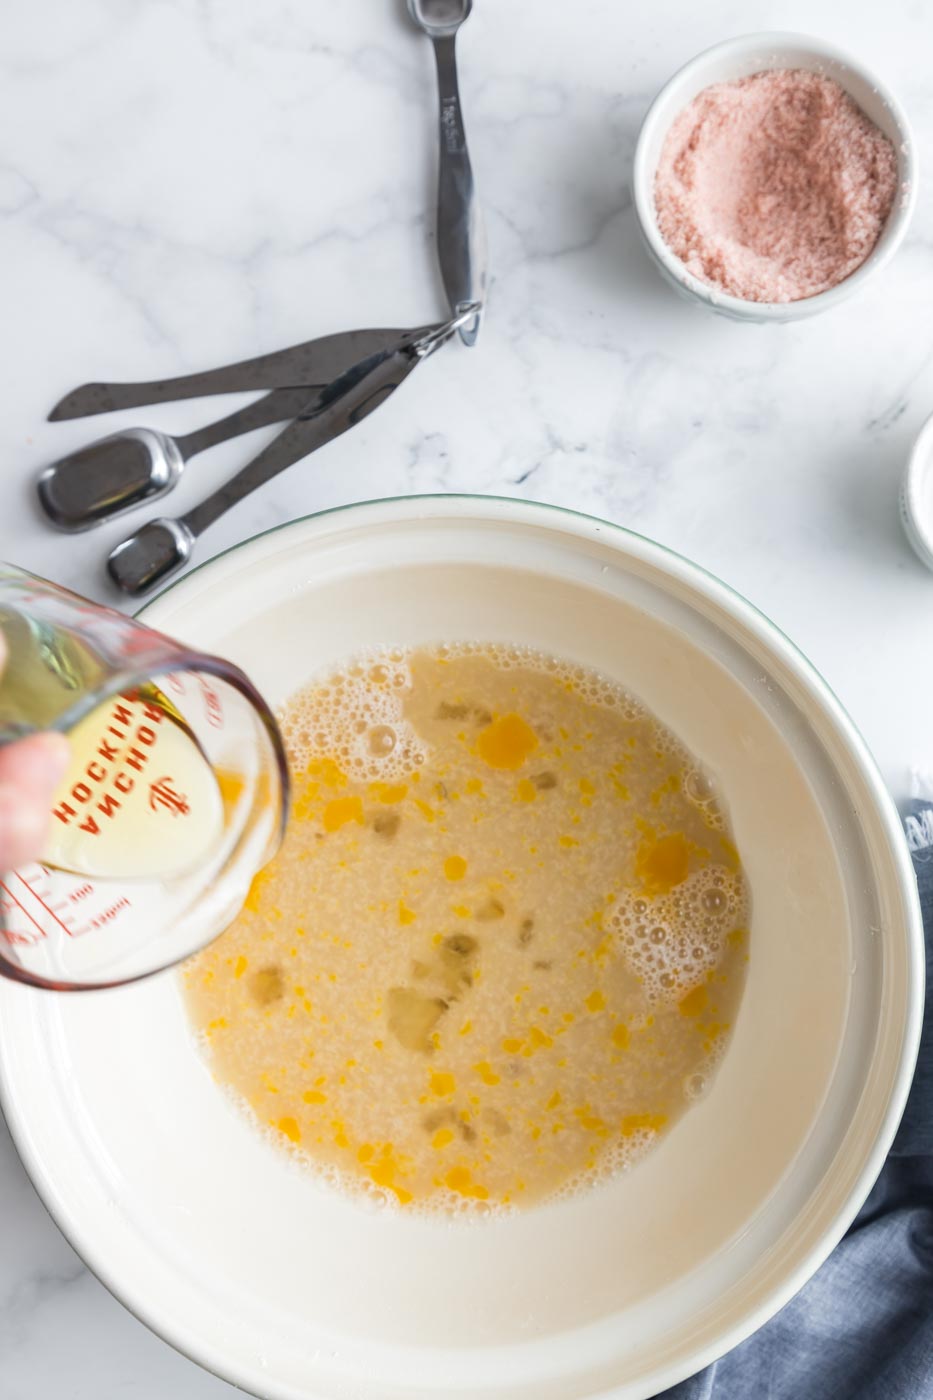
- Add salt, one room temperature egg and flavorless oil. I use avocado.
- Add 6 cups of flour, holding back the last 3/4 cup until you see if you need it.
Finish mixing, rise and knead
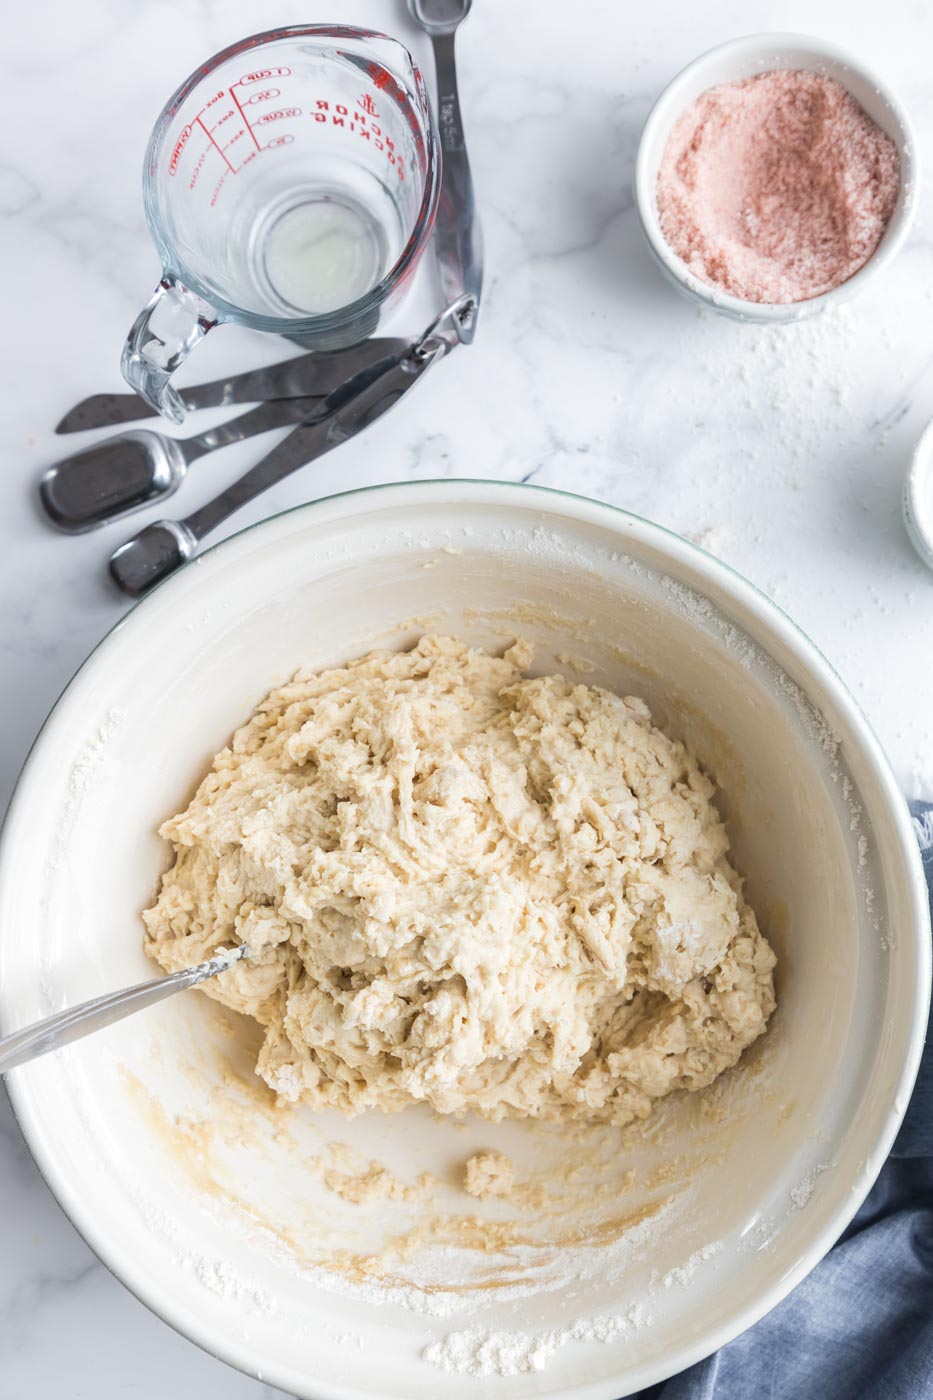
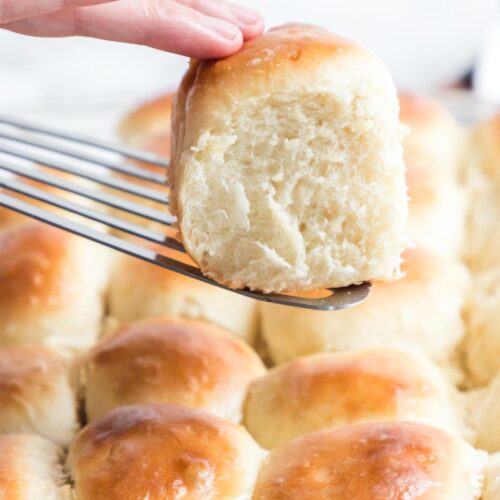
- The dough will be soft, this is fine.
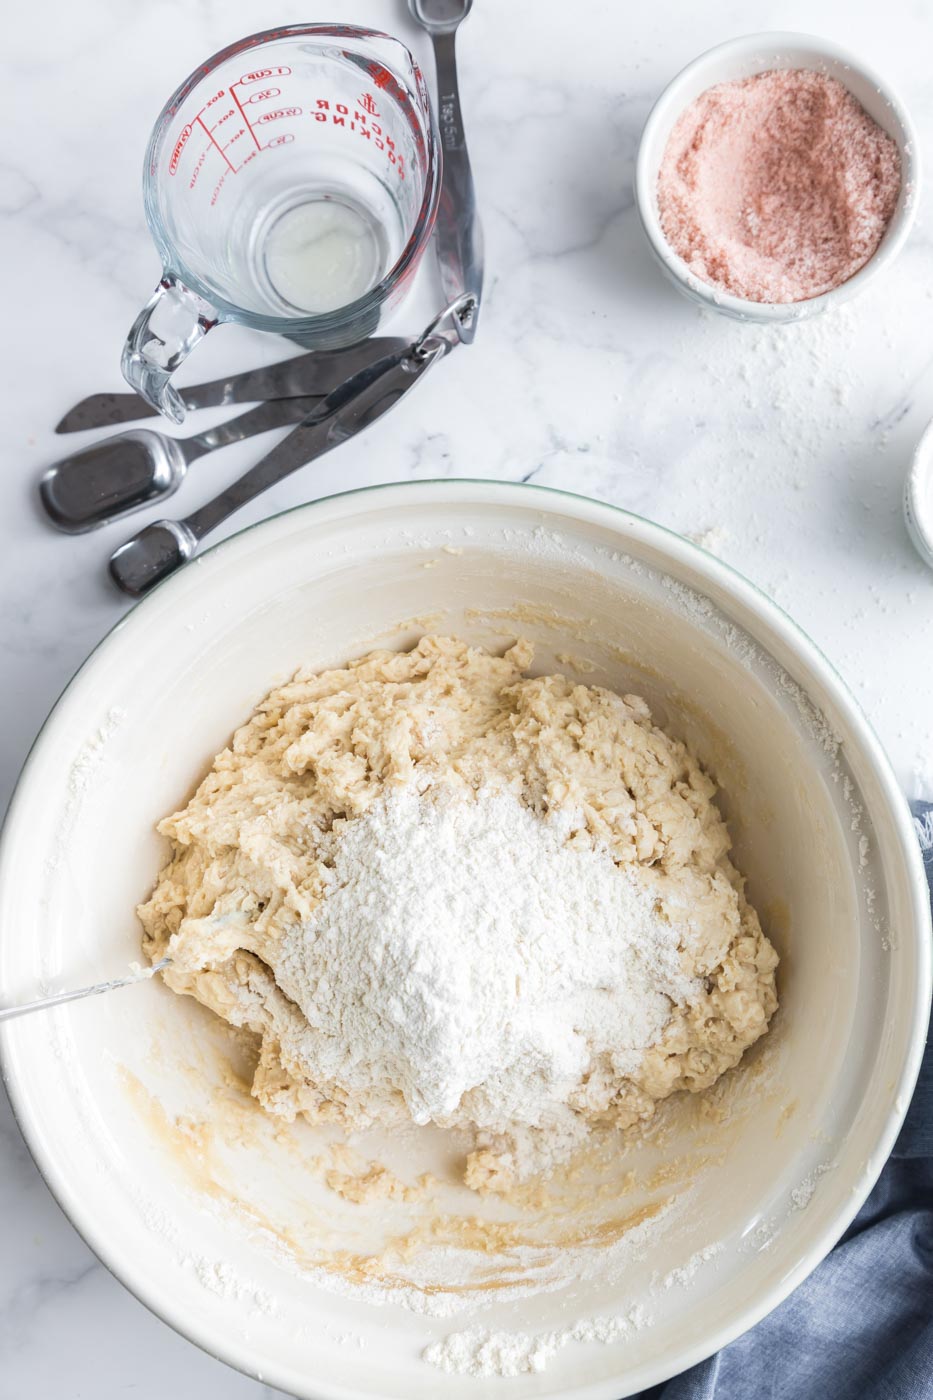
- Add the last 3/4 cup flour if the dough and mix in.
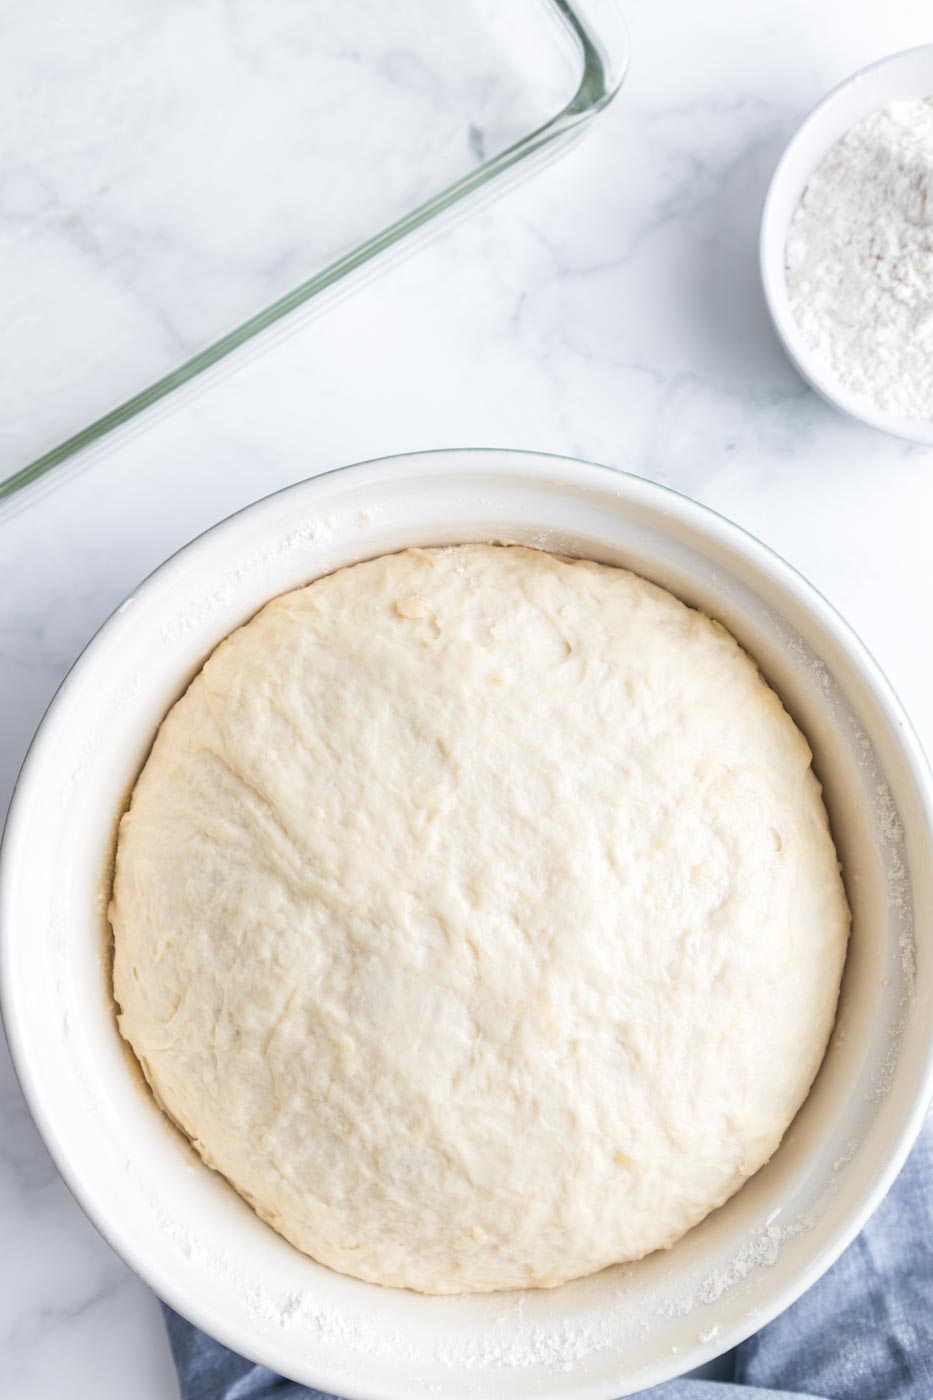
- Cover and let rise 1 to 1 1/2 hours until doubled.
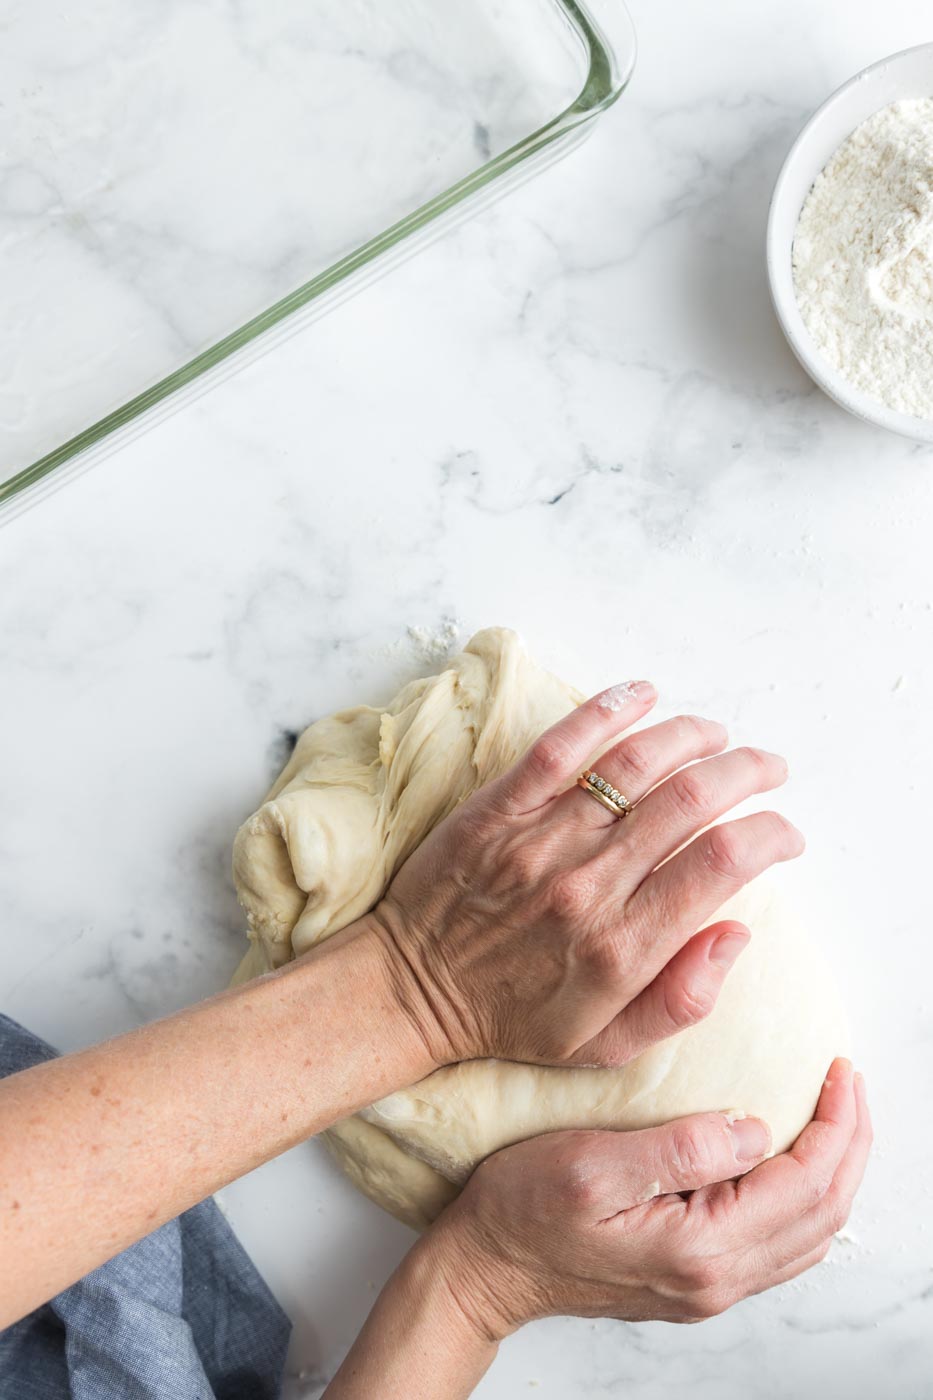
- Knead 5 minutes. Get help with kneading.
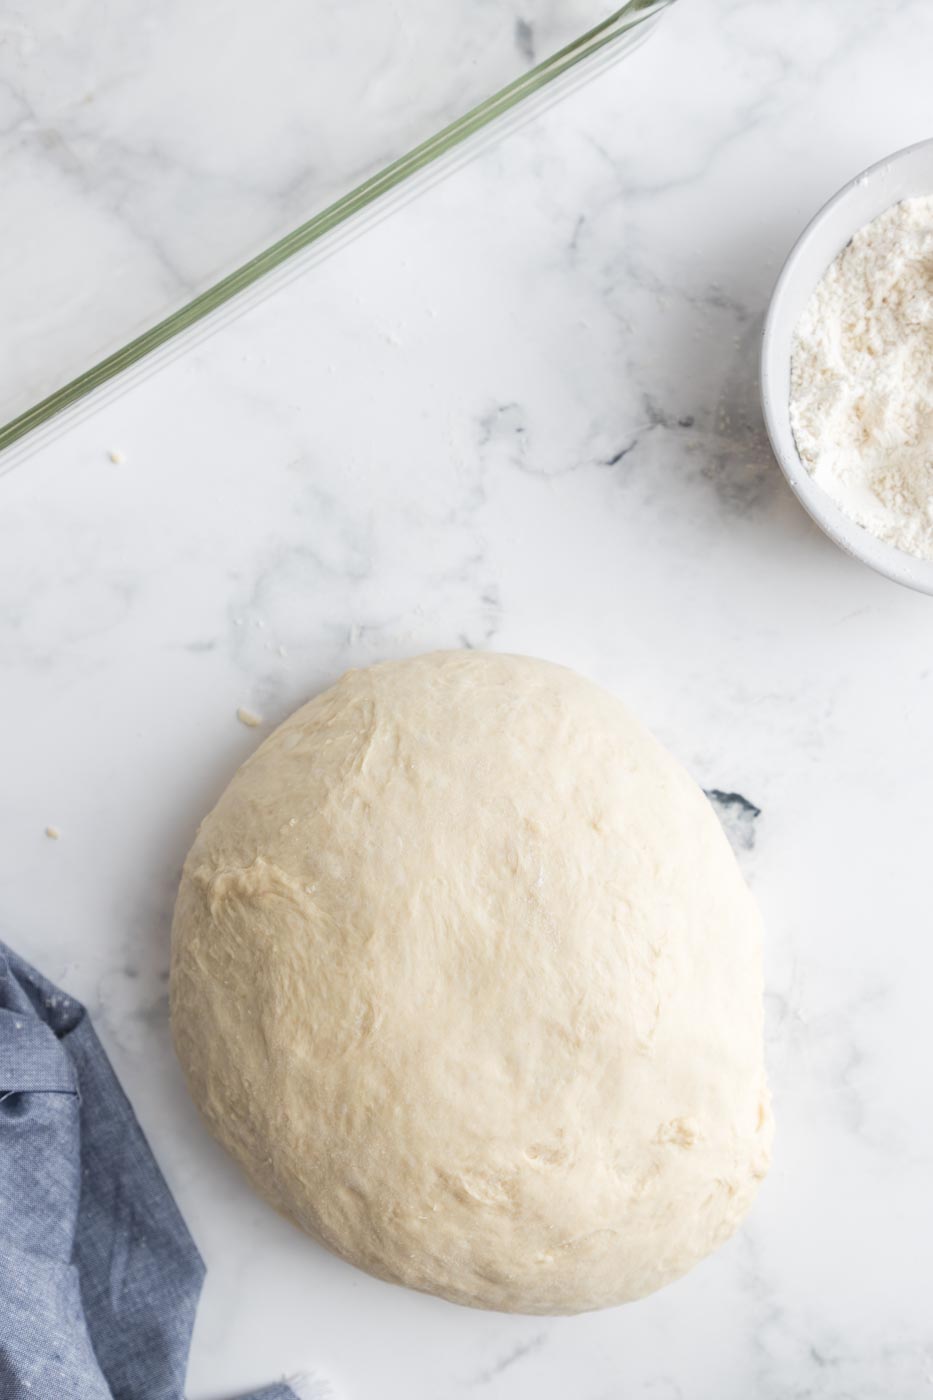
- The dough will be smooth and elastic. Let the dough rest 5 minutes before shaping .
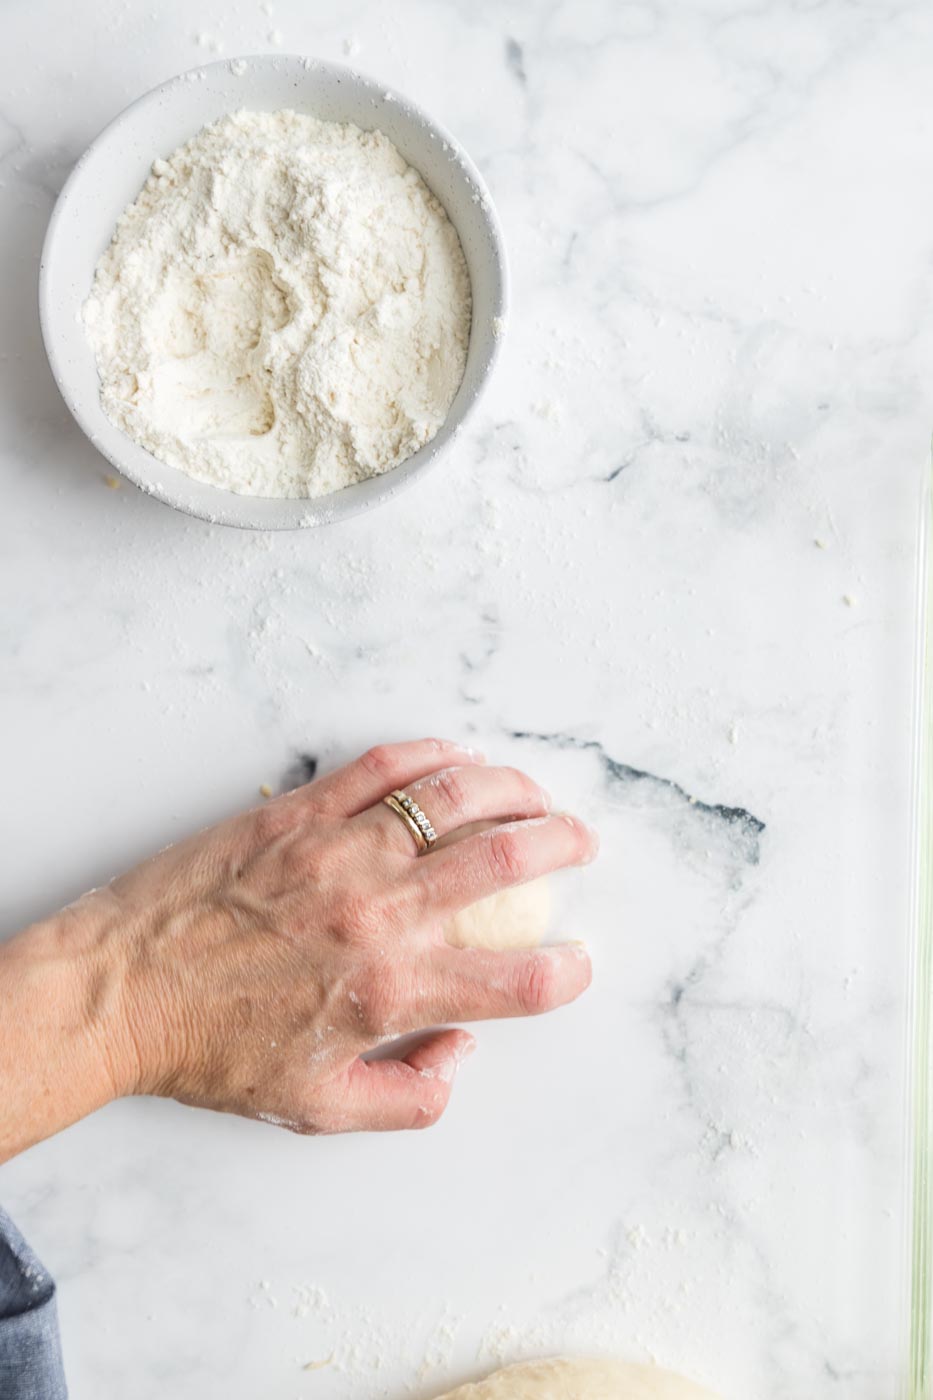
How do you shape dinner rolls?
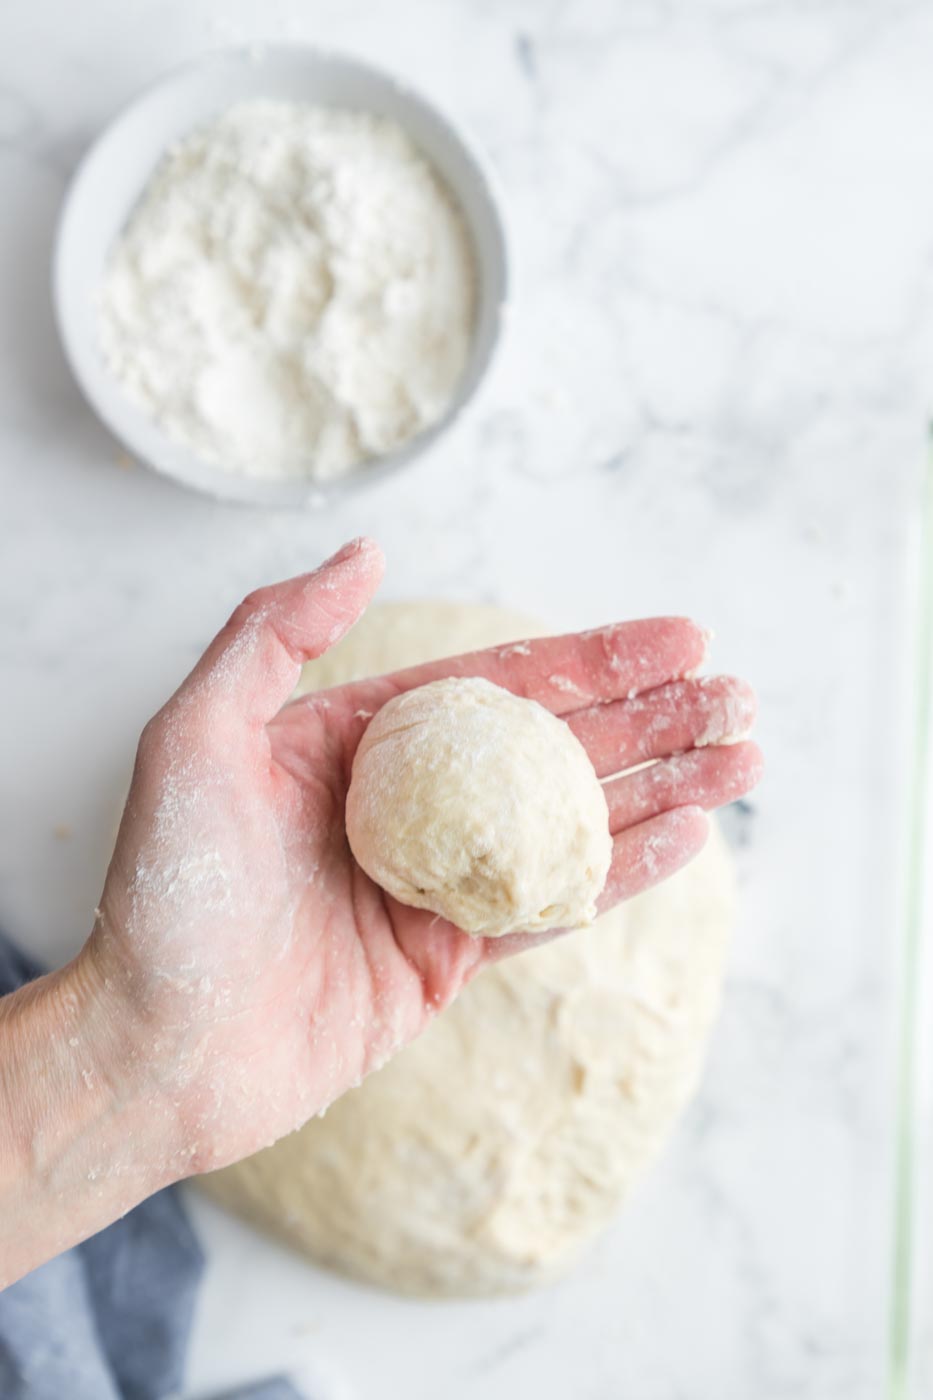
When shaping your dinner rolls, start by pinching off 2-inch balls of dough. I made these a bit bigger than 2 inches, but something like this:
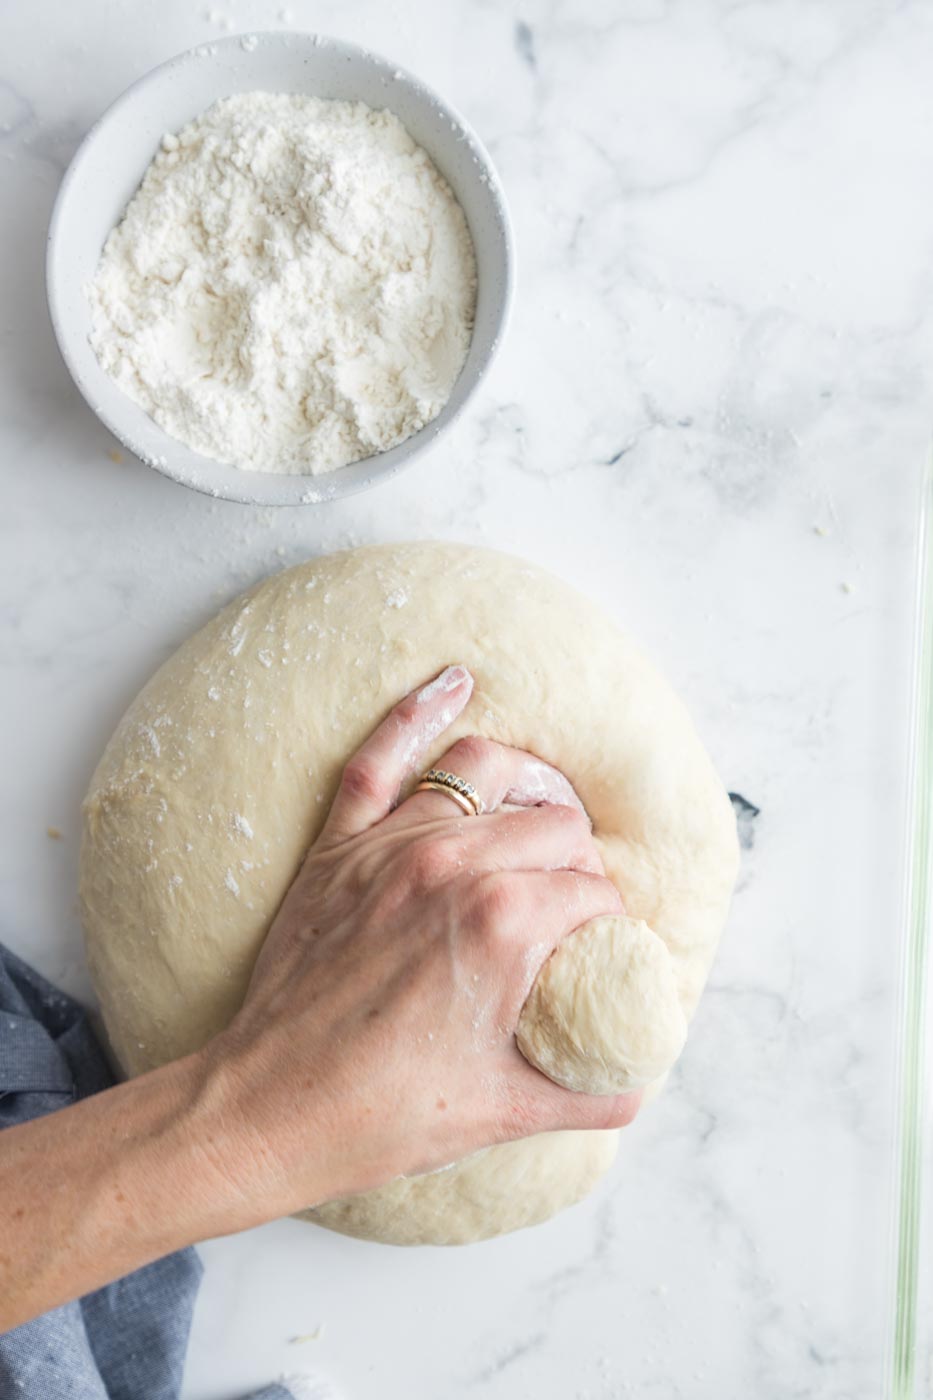
Gather the dough at the bottom of the portion and pinch it together from all 4 directions, leaving a rounding top and a pinched bottom.
Place the dough ball pinched-side-down on an unfloured counter.
Next, cupping your hand over the top of the dough, swirl your hand in a small, fast circle, tightening the ball and giving it a nice, round shape.
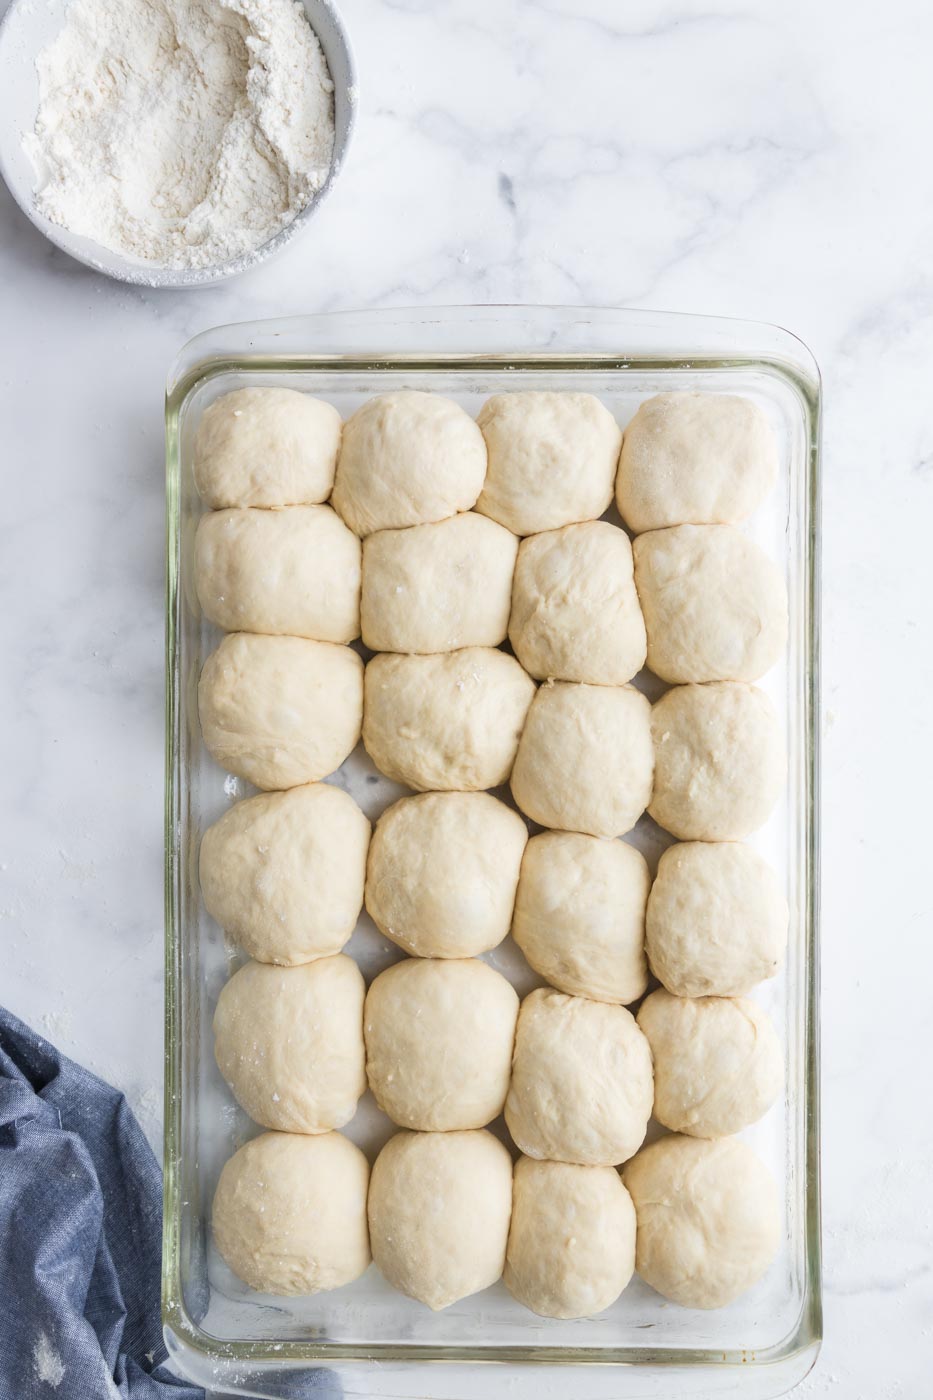
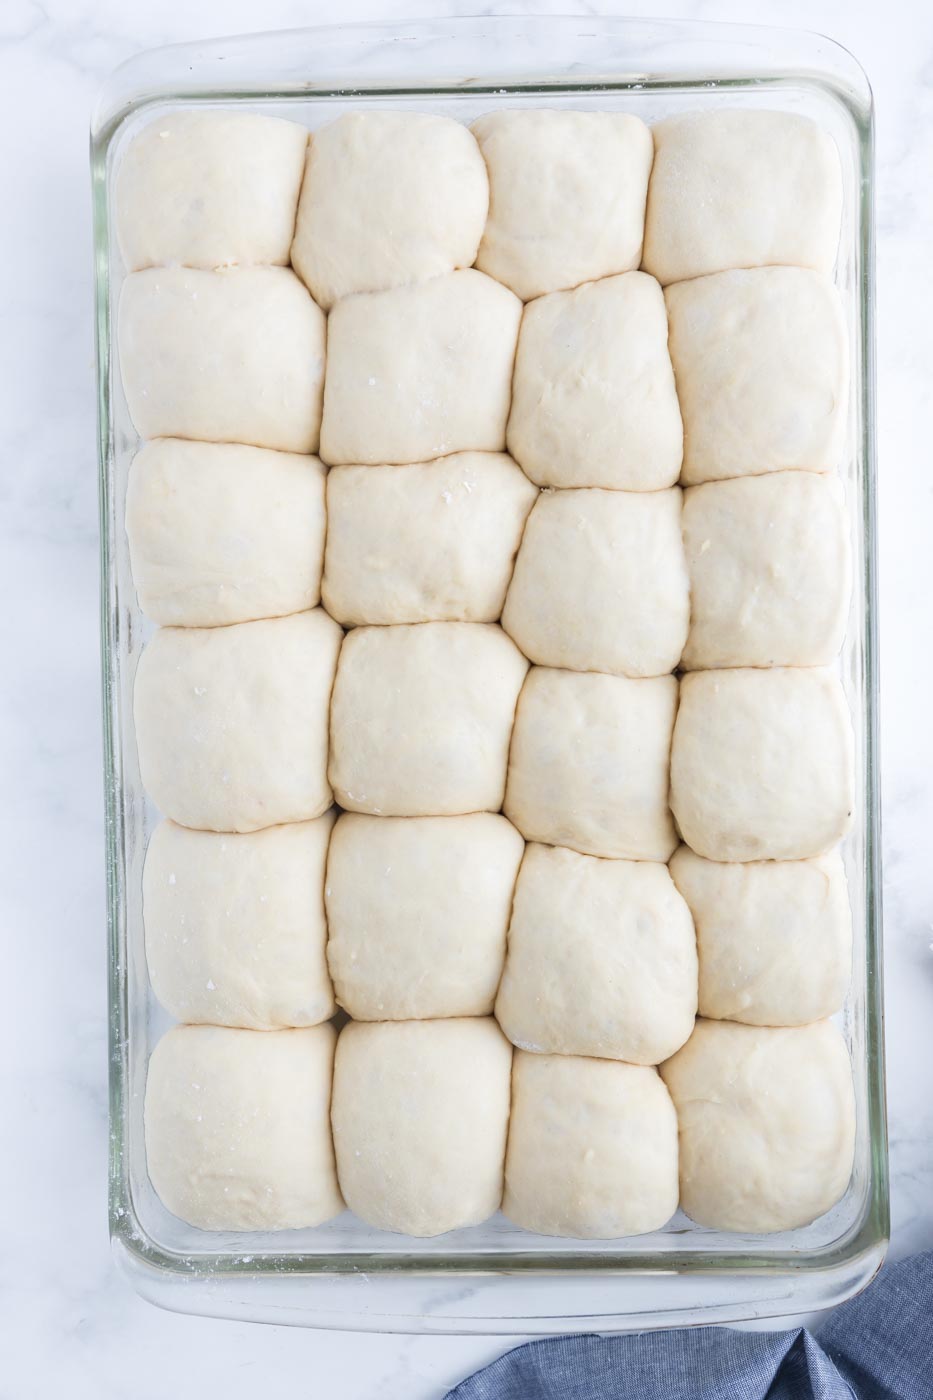
Place the dough balls in a 9×13 greased baking dish just touching but not smashed together. Cover with greased plastic wrap and let rise 1 hour or until doubled.
Is bread flour or all purpose flour better for dinner rolls?
As I am sure you have noticed, most grocery stores offer “flour” and “bread flour”. We can get into the differences between the two another time.
In this recipe, I have found success using either on its own or a blend of the two.
If I were to choose, however, I would say my favorite here is bread flour. It seems to yield a better rise and, thus, a lighter, fluffier roll. My favorite is King Arthur Bread Flour.
Why are my dinner rolls hard?
There are a couple of reasons dinner rolls come out of the oven hard. Often, it is due to overhandling of the dough and/or adding too much flour during the kneading process.
Knead your dough, but not to the point of it feeling dense and hard to handle. Five minutes or so of kneading is fine.
On flour, add enough to ensure that your dough isn’t wet and tacky, but not so much that your dough becomes firm.
Another reason for hard dinner rolls is flour quality. Certain brands (Pillsbury and Gold Medal in particular) will often produce a hard, heavy bread. So reach for a different product. I’m a fan of King Arthur bread flour.

Why are my rolls not light and fluffy?
So maybe your roles didn’t achieve that light and fluffy texture you were looking for. Bummer! This common mishap is usually due to the fact that your yeast did not activate properly.
It can also be due to the fact that you added too much flour during the kneading process. So follow my tips above for activating yeast and don’t use more than 1/4 to 1/3 cup of extra flour when kneading.
Why is there a hard top on my rolls that comes off?
Ahhhh another common mishap. This hard portion on the top of your dinner roll that comes off is also often the result of over handling and/or adding too much flour to your dough during the kneading process.
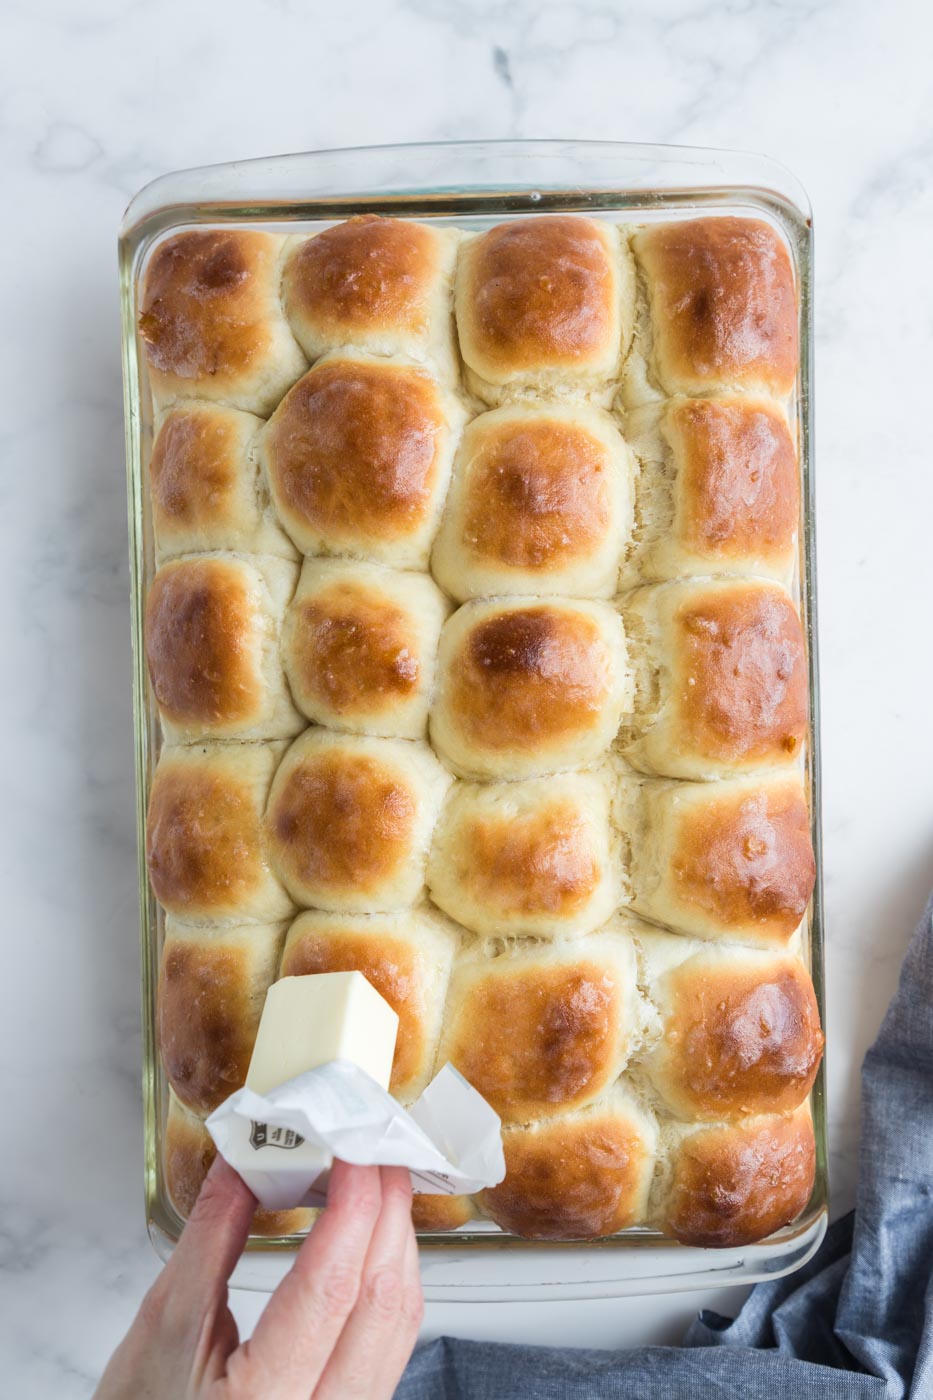
How do you make rolls shiny?
You know those slightly shiny dinner rolls you see in restaurants? You can achieve that too! Simply rub a stick of cold butter over the top of your rolls just as they come out of the oven.
Another option is to brush the top of the roll with an egg wash (part beaten egg, part water) before baking.
I find that this sometimes yields a slightly eggy taste, however. So I lean toward the butter method.
What to serve with old fashioned yeast rolls
These yeast rolls are wonderful on their own and serve as a great compliment to almost any meal, but you can certainly spread a little butter (or even flavored butter!) on the rolls to take them up a notch.
Sweet tooth? Or maybe breakfast time? These dinner rolls go very well with your favorite jam or apple butter.
How to freeze homemade rolls
Dinner rolls are a great thing to make ahead and freeze for later enjoyment. There are 2 ways in which to freeze these rolls.
(1) Freeze them just after shaping and before allowing for the final rise. When it comes time to enjoy them, remove them from the freezer and allow them to rise for 8 hours under well greased plastic wrap before baking.
(2) You can also freeze them after baking. Seal your rolls in an airtight container, such as a Ziploc, and place them in the freezer.
When it comes time to reheat, wrap your rolls in parchment paper and then foil and bake at 350 degrees F or until the center is hot. You can reheat them from frozen but it’s better if they are partially thawed.
What to serve with old fashioned rolls
They are the BEST for slathering in butter. Want to make your own? Go all out with my homemade butter recipe. You can also make a batch of slow cooker apple butter (let’s all just sigh) or slather your rolls in jam or jelly.
If savory is your thing, I would suggest a slice of country ham or even a classic pork chop.
If you want a smaller batch of rolls
Try my classic easy yeast roll recipe to make just a dozen.
Old Fashioned Yeast Rolls
Ingredients
- 2 cups warm water about 120 degrees
- 2 packages dry active yeast
- 1/2 cup sugar
- 2 teaspoons salt
- 1 egg at room temperature
- 1/4 cup avocado oil vegetable oil also works
- 6-7 cups all purpose or bread flour
Instructions
- In a large bowl, add the water and yeast. Allow it to sit until the yeast starts to foam--about 5 minutes.
- Add the sugar, salt, egg, and oil and stir to combine.
- Add6 cups of flour and stir well. You may have to use your hands to finish mixing it.
- Add the last 1/2-1 cup of flour if the dough is still very wet. It will be a sticky dough and that's okay.
- Spray the top with cooking spray or tap with oil and cover the dough with plastic wrap.
- Let rise in a warm place until doubled in size 1 to 2 hours.
- After the dough doubles, punch it down with your fist and turn it out onto a floured surface.
- Knead the dough until smooth--about 5 minutes or so.
- Grease a 9x13 pan with oil or cooking spray.
- Break off walnut-sized balls of dough (about 2 inches in diameter) and place them in the pan just touching but not smashed together.
- Cover lightly with greased plastic wrap and allow to double again. About another 45 minutes to an hour.
- Bake in a 375 degree oven until golden, 20 to 25 minutes. Brush with butter before serving.

I have tried many bread and roll recipes. These are by far the best. They are delicious. I’ve made them twice and they are just as good cold as they are hot out of the oven. So yummy!
So glad to hear that Jann!
Easy to follow directions, and they turned out great, delicious.
I am making these and want to put in the freezer for Christmas Eve. Should I butter the tops before freezing, or wait to do that when I pull them out to warm them up?
I do it after I bake them. If you are going to bake then freeze, just put it on while they are hot from the oven. They shouldn’t need any more when you reheat them. –Rachel
I would encourage everyone to watch her YouTube video so you can see the consistency of the dough and add flour a little at a time. I added the 6 cups right away and it was way too much. I waited until after they rose to see how they’d do but I had to throw them away because I knew they were going to be way too dense.
Yes Erica, the rule with bread making is to never add all the flour at once. You’ve learned though and your next batch will be better. –Rachel
I love your recipe and am forced to use Pillsbury flour as that is all my store carries. Made them the other day to rave reviews from my grandkids. I’m making them again for Thanksgiving. There is only one kneading, is that correct? I don’t knead until after the first rise? Thanks again for sharing.
You’re welcome Ron. Yes just one kneading and not until after the first rise which is backwards of many recipes that knead before the first rise. I hope you all love them and that you can get your hands on better flour soon. Pillsbury just makes bad bread. 😉
can another oil be used successfully?
Yes you can use what you have on hand just not olive oil. The flavor is too strong. –Rachel
could I put into refrigerator then cook the next morning
The rolls would probably over proof and sink when baked Linda. You can bake them a day or two ahead, freeze them very tightly wrapped, then thaw and warm them in the oven the day of. That’s the way I usually do it and it works great. –Rachel
Hello. I’m planning on making these for our Thanksgiving Dinner this year. How will I know if I need the reserved 3/4 c flour? I can’t wait to make these. I made yeast rolls last year and my future in laws were blown away. I’m excited to have extra fluffy rolls this year.
Hey Erica, I reserve that last 1/2-1 cup and use it only if my dough is very wet. Here’s the recipe in a half batch on my YouTube channel. Maybe take a look at that and you’ll see the texture. I usually add about 1/2 cup of the remaining flour and use the rest during kneading so the rolls don’t end up heavy. The smaller the amount of added flour during kneading, the better your rolls will be. –Rachel
Thank you for the great recipe. As a 1st time roll maker, mine looked like the picture but felt a bit heavy. They were fluffy and had some air pockets. The yeast taste just wasn’t there. I did cut the recipe in half. Is it possible that I added too much White Lily bread flower?
Well you just gave me a clue with the flour: White Lily makes awful bread. I hate to say it because everyone loves it and it makes fine biscuits but…not bread. Pillsbury is also awful. King Arthur flour is always my recommendation. They could also be heavy if you added too much flour during kneading or fiddled with/overworked the dough balls during shaping so maybe try less flour when kneading and a very gentle touch. And…a different flour.